Activity Statement User Guide
- Organisation details
- GST
- PAYGW
- PAYGI
- Other fields such as FBT or FTC
- Summary
The Activity Statement (AS) feature in GovReports enables users to lodge business and instalment activity statements directly with the Australian Taxation Office (ATO) using Standard Business Reporting (SBR).
Activity statements can be prepared by manual data entry, imported file upload,or directly synced from SBR-compatible accounting software.
GovReports supports AS lodgment for all reporting periods, including monthly, quarterly, and annual, in compliance with regulatory requirements for businesses and government entities.
This user guide outlines all features available for tax agents, BAS agents and business owners using the AS function. The User Guide assumes that registered agents have previously set up a client list.
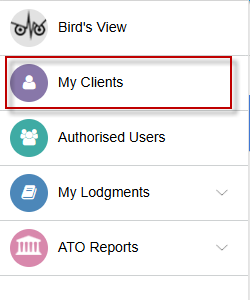
Activity Statements are accessible from My Clients or My Lodgments or ATO Reports.
Activity Statements can also be created as a job and added to client schedules or practice calendars for efficient management of jobs and tasks.
All the activity statement fields are now visible on the same screen, allowing you to see the complete statement.
For businesses, go to My Business and select the business.
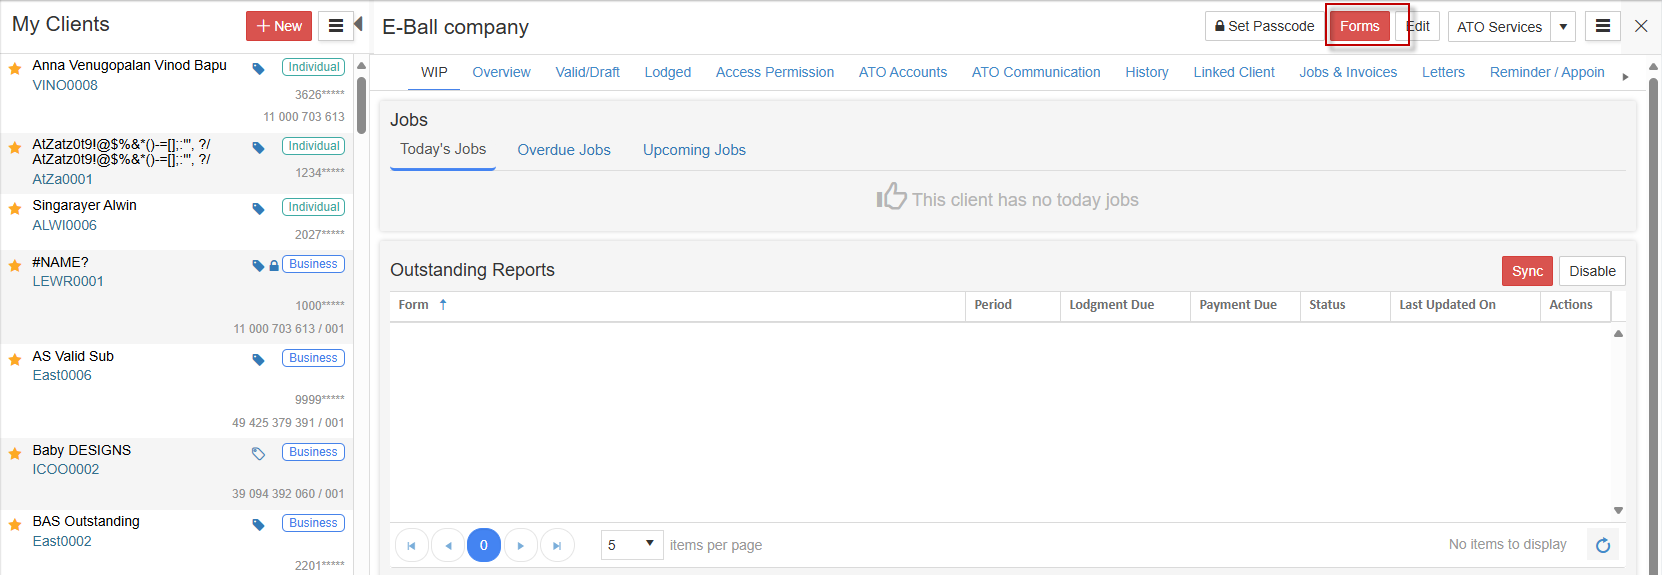
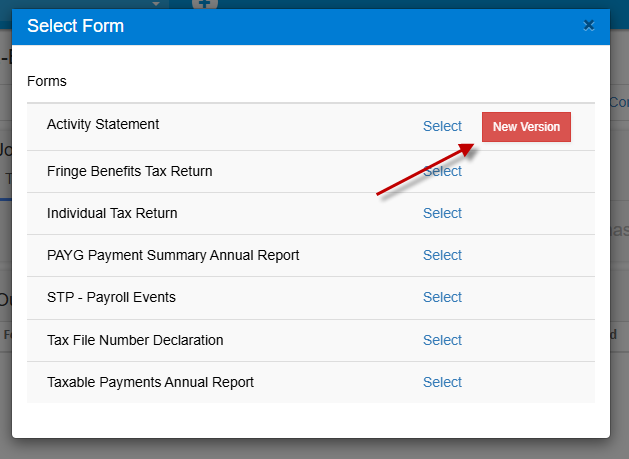
Select Forms then select New Version.
Select Activity Statement report New Version.
The Activity Statement overview page will load.
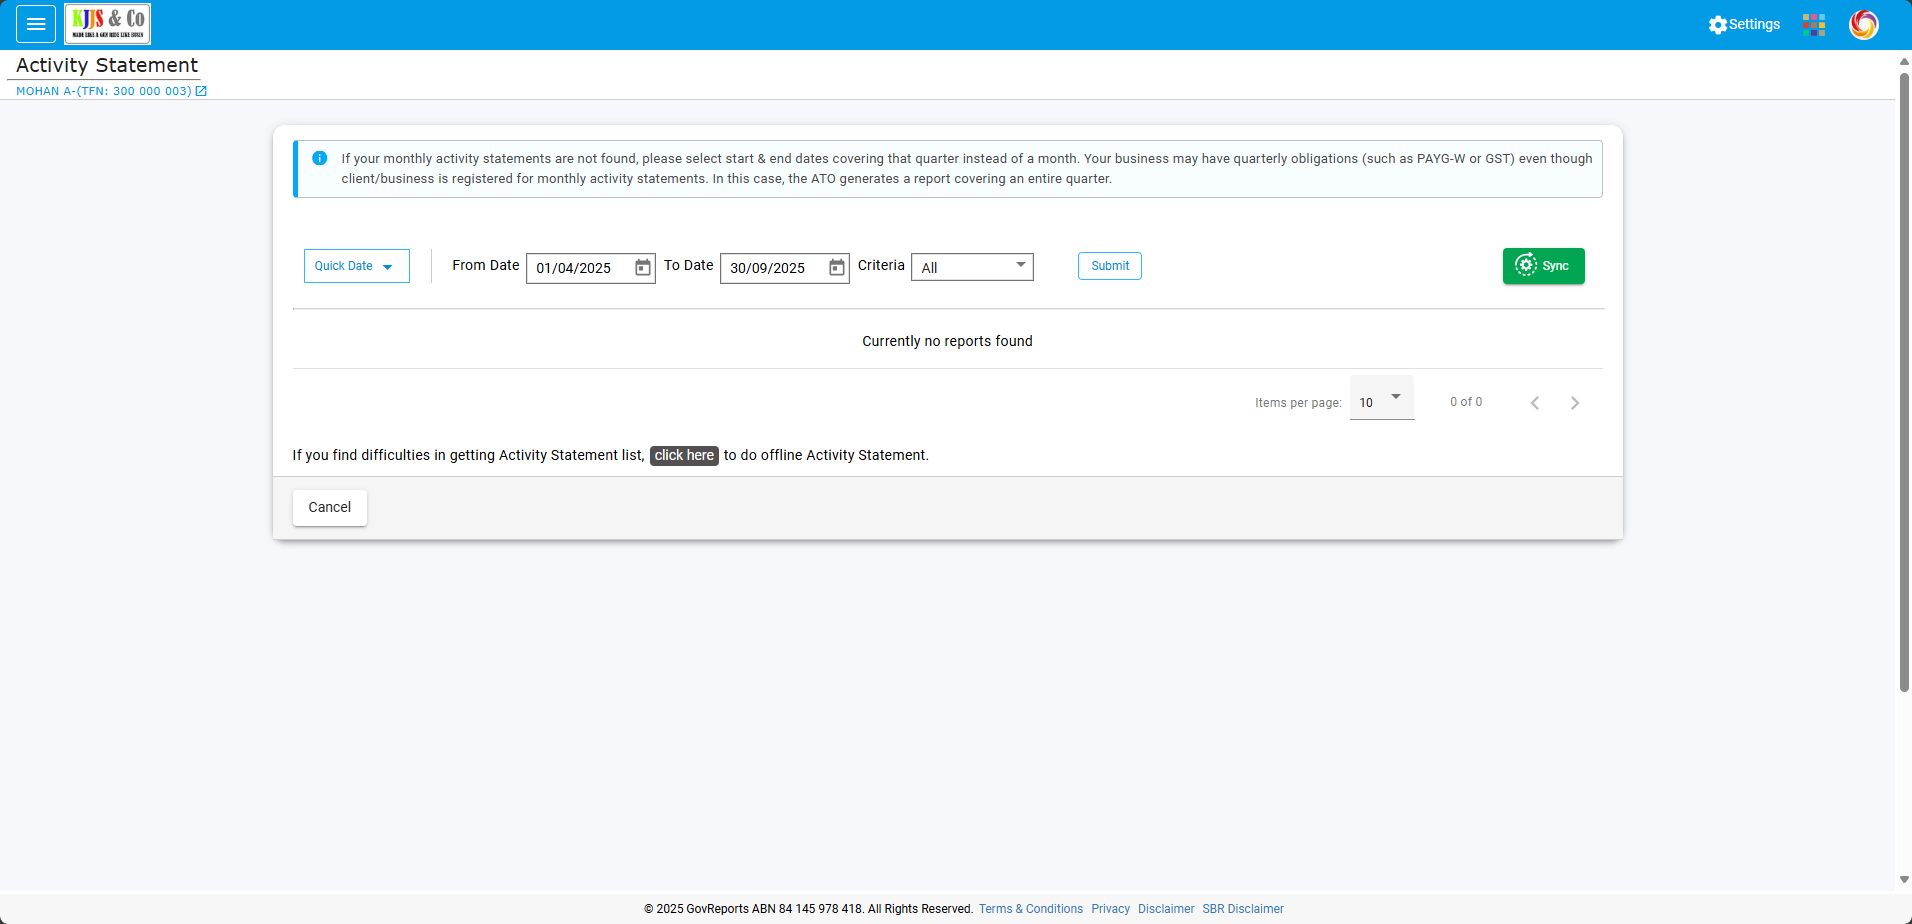
Choose Quick Date to prefill the period From and To dates.
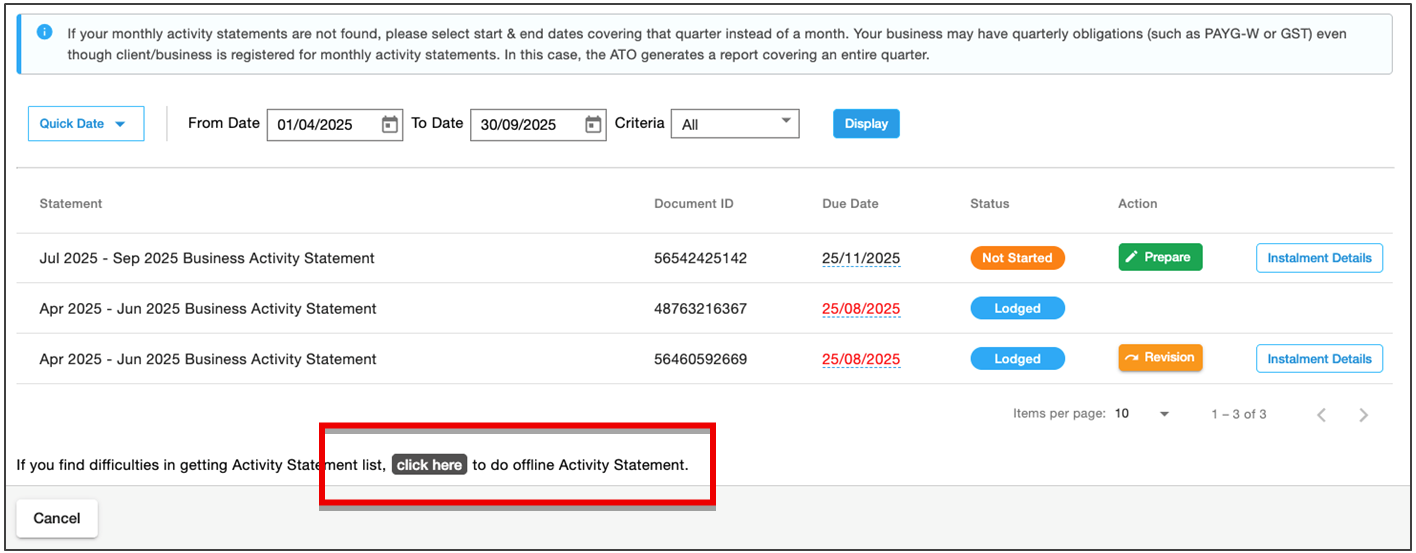
Select Criteria: All, Historical or Not Lodged to refine the list results.
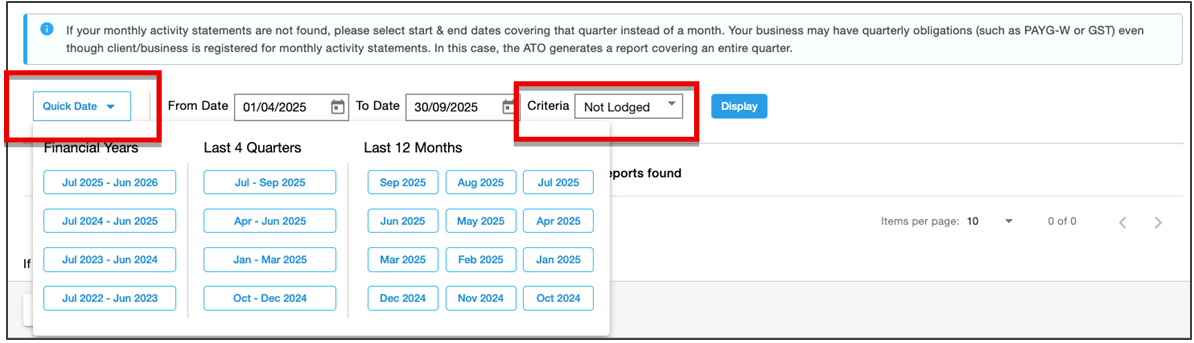
Click the Display button to retrieve the ATO Activity Statement report list.
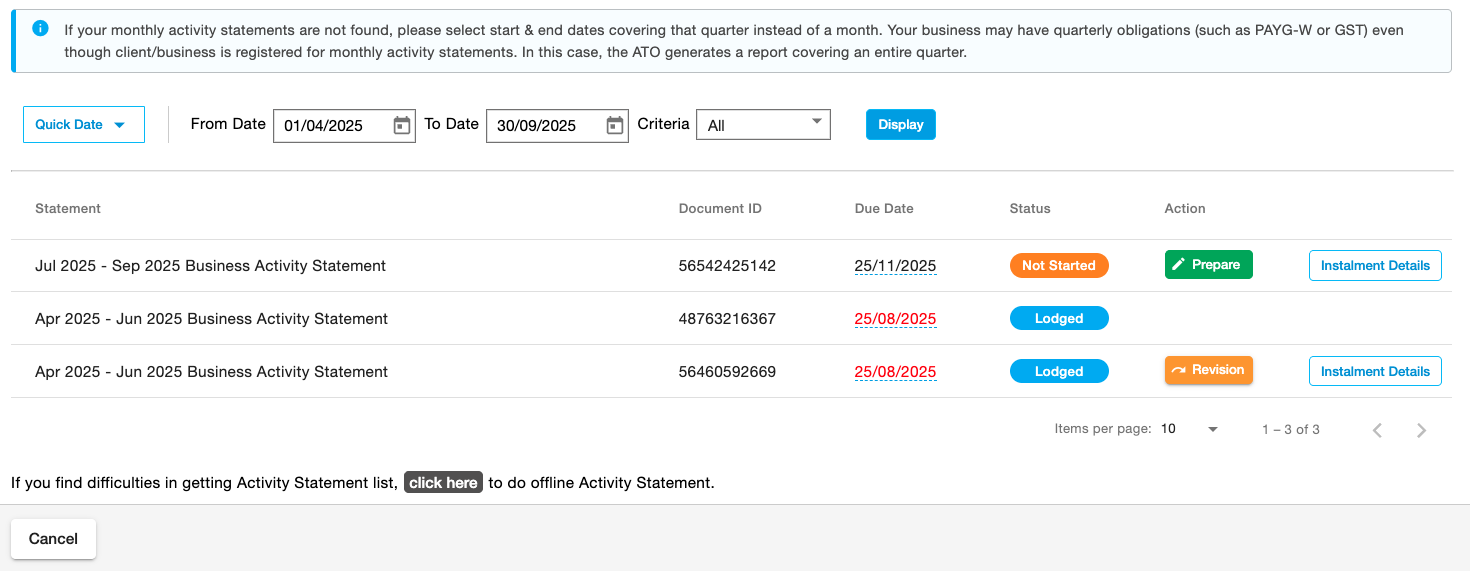
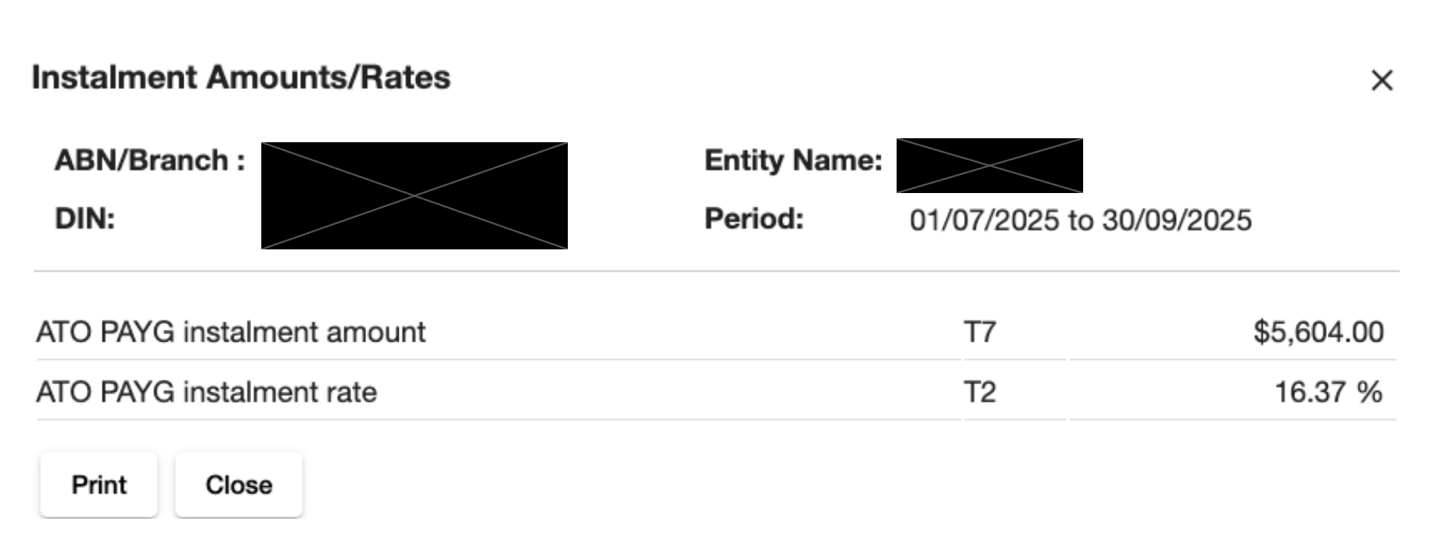
Select Instalment Details to view the instalment amount rate or amount in the pop-up window. Print or close the window to return to the activity statement being prepared.
Select Prepare to create the report.

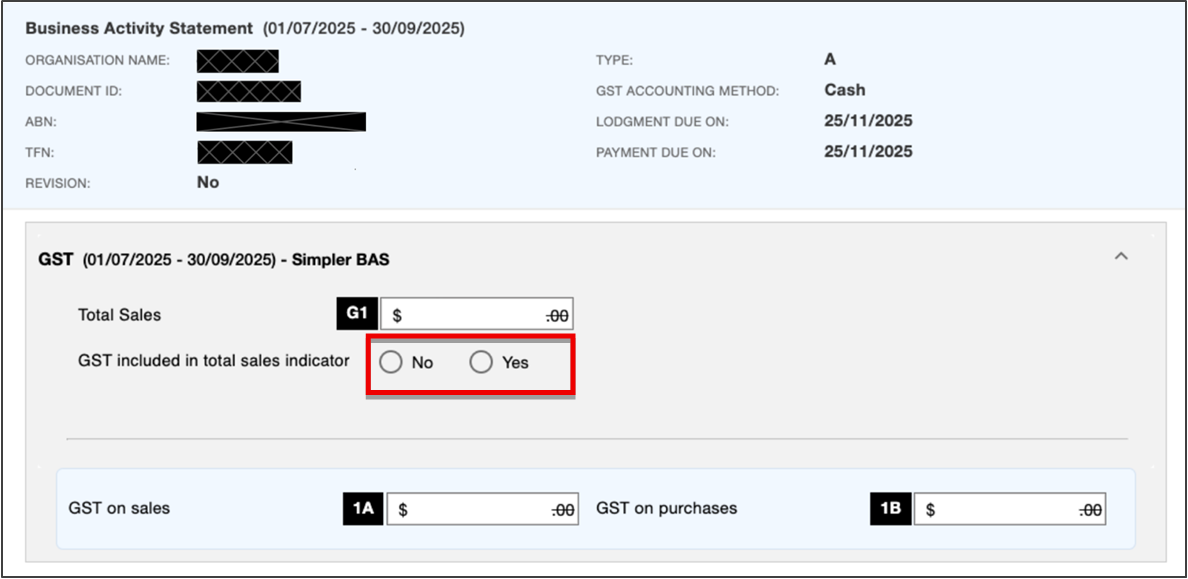
Review the prefilled details and check the settings, including the date, GST accounting method and GST sales indicator.
Make sure the GST sales indicator is the same as your accounting software report.
GST – Import from Connected File
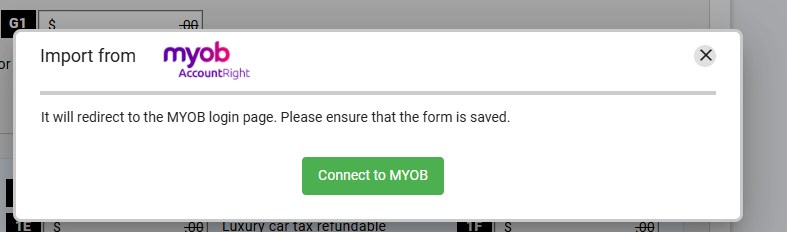
If you have published an activity statement in any of the accounting software apps (MYOB, ReckonOne, Sage One or Xero), you can sync GovReports and the software to import data from the corresponding activity statement directly.

Select your software app. The import pop-up window will appear. Authorise the connection to your software.
For MYOB AccountRight, select the Connect to MYOB button to connect the MYOB account and import data.
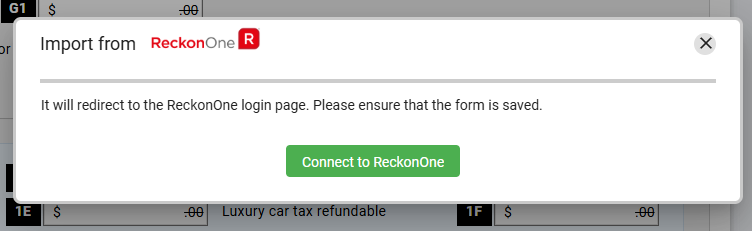
For ReckonOne, select the Connect to ReckonOne button to connect the ReckonOneaccount and import data.
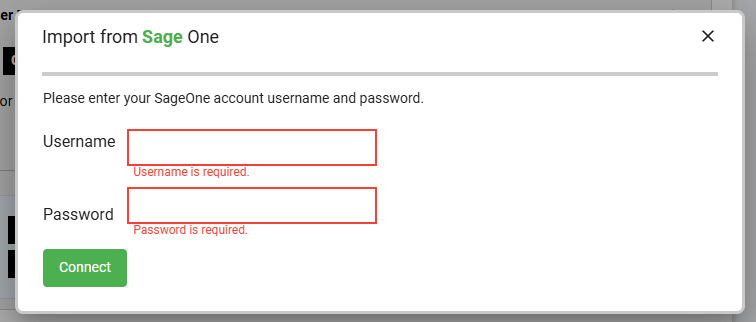
For SageOne, enter your Username and Password, then select the Connect button to import data.
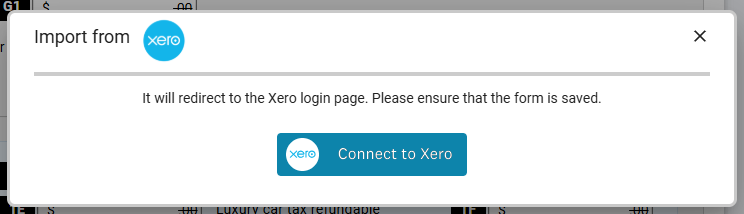
For Xero, select the Connect to Xero button to connect the Xero organisation and import data.
GST – Import from File Upload
Alternatively, you can upload a compatible format activity statement file from the software apps .
Prepare the activity statement in the software and export it to the relevant file format for the software.
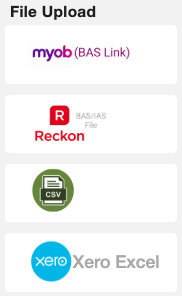
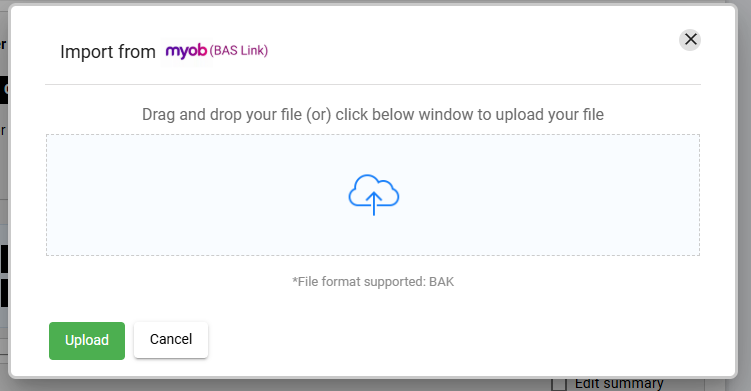
For MYOB (BASLink), upload the BASLink file, review the data, and import it.
For Reckon BAS/IAS, upload the XML file, review and import the data.

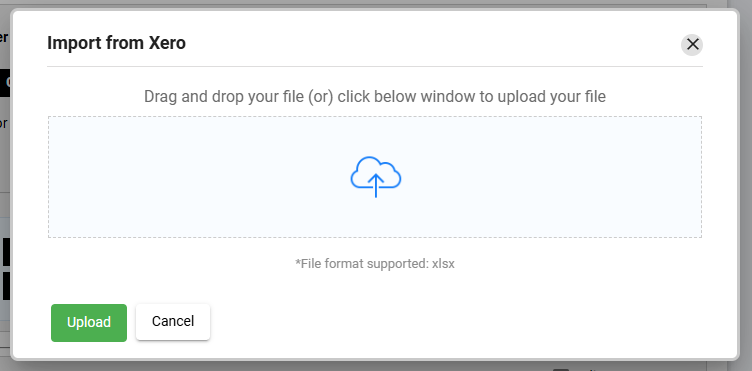
For Xero, upload the XLSX file, review and import the data.
For CSV, upload a CSV file, review and import the data. To avoid errors with the CSV import, download the sample template file first, add your data in the relevant fields, then import and review.

Review the imported details and select Import to overwrite the BAS form.

GST – Enter Figures Manually
Finally, you can enter activity statement amounts manually. If you are preparing an activity statement manually, you must save a record of your calculations to validate your figuresin case of an ATO audit.
Enter relevant amounts for GST on sales, GST on purchases, PAYGW and payroll figures, PAYGI, and any other relevant fields such as FBT instalment.
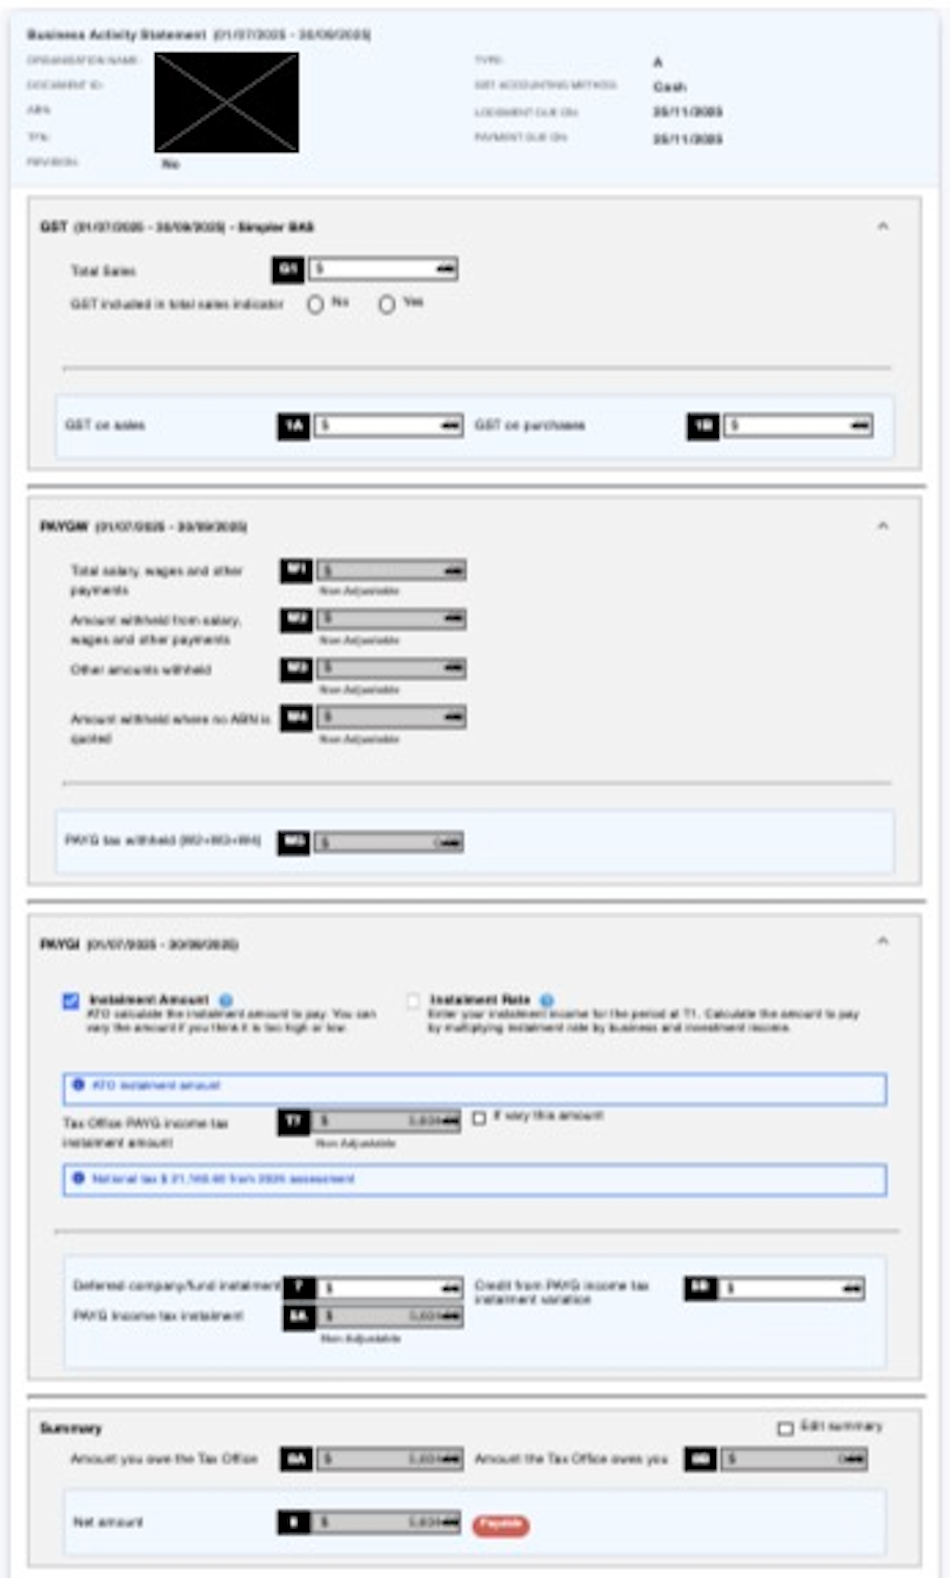
Completing the BAS Fields
Whether you have selected to import data, upload a file or enter data manually, the same fields are available in the Activity Statement form.
All BAS fields are displayed on the same screen.
Review any prefilled details and check the settings, including the date, GST accounting method and GST sales indicator.
Ensure the GST sales indicator matches your accounting software report settings.
Check the details in each section:
Check that the summary field is displaying the correct amounts payable and receivable and the net amount of the BAS before proceeding.
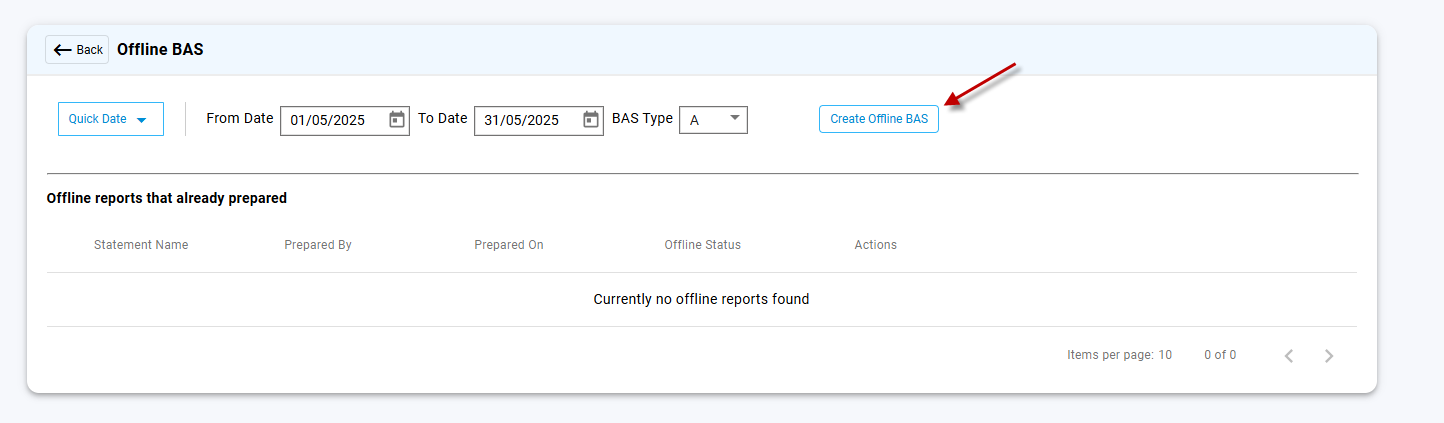
Select the Quick Date option or enter the BAS period dates. Select BAS Type from the dropdown list, then select the Create Offline BAS button .
Note that the BAS type identifier must correspond with the form you need to create.
The activity statement form will open.
The form will be saved as an Offline Draft until a valid document ID number is imported. Some AS fields are unavailable to edit until a DIN has been entered. A DIN is required before lodgment.
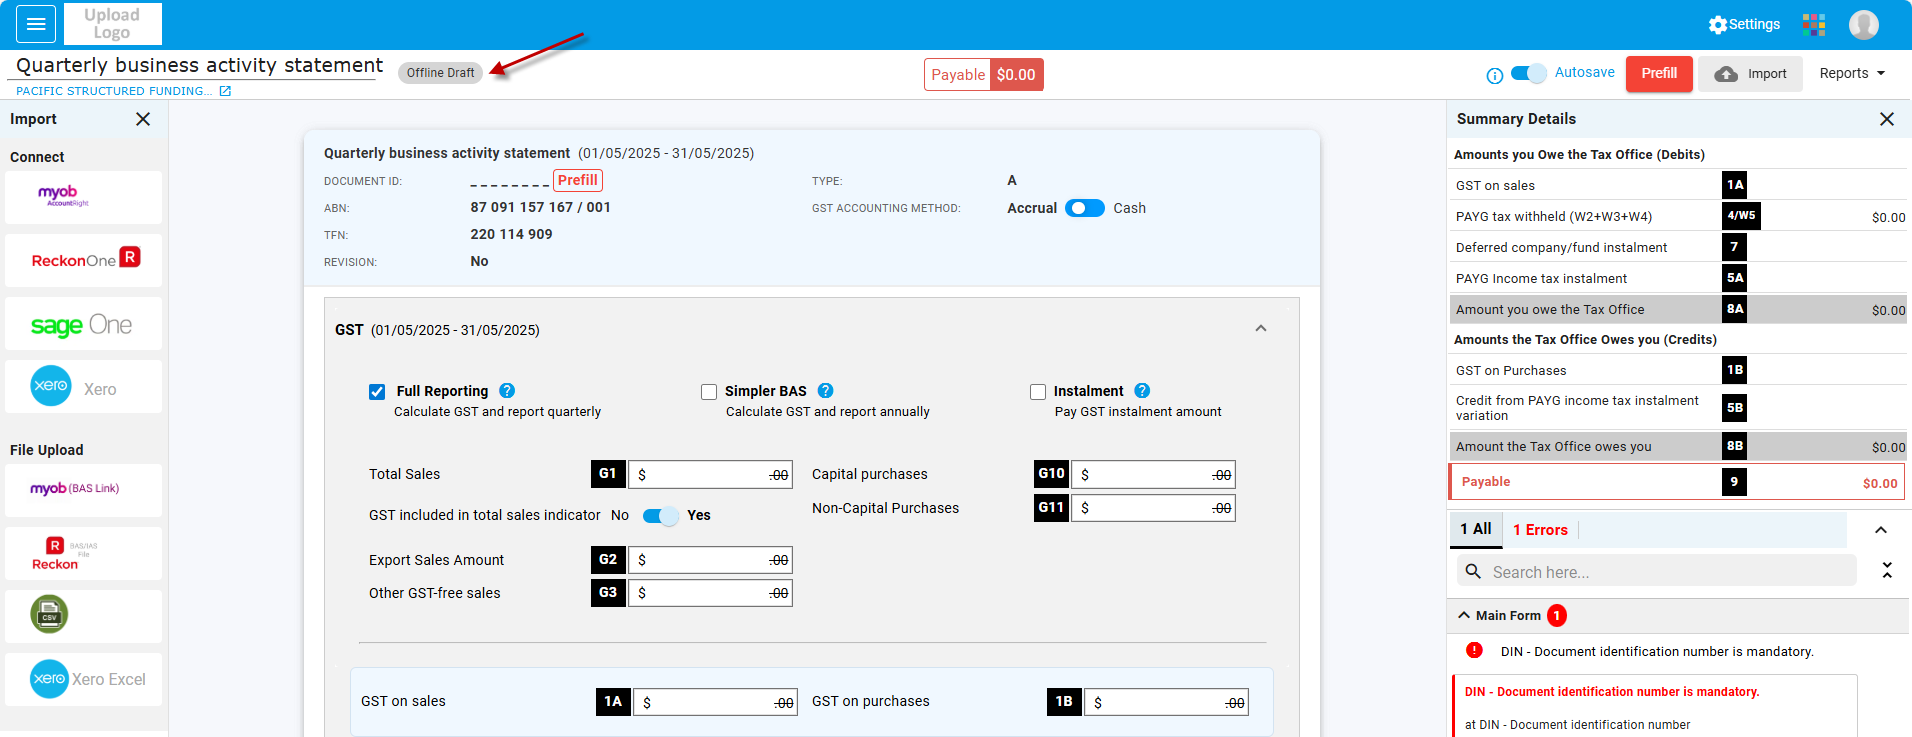
Click the Prefill button to import the document identification number(DIN) from the ATO.

Once the DIN has been imported, all BAS fields are available for editing.Checkall details such as cash or accrual, full or Simpler BAS, and instalment amounts and edit if required.
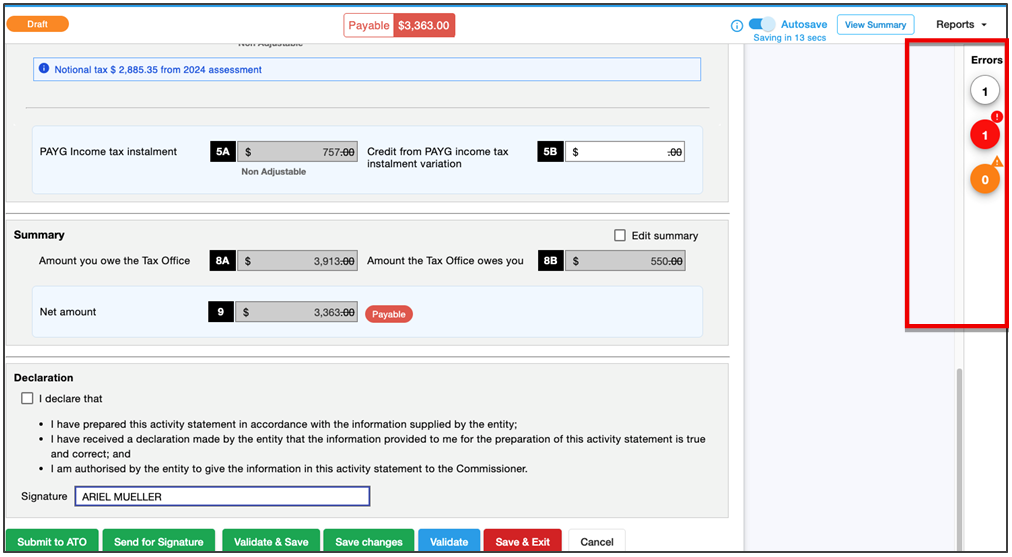
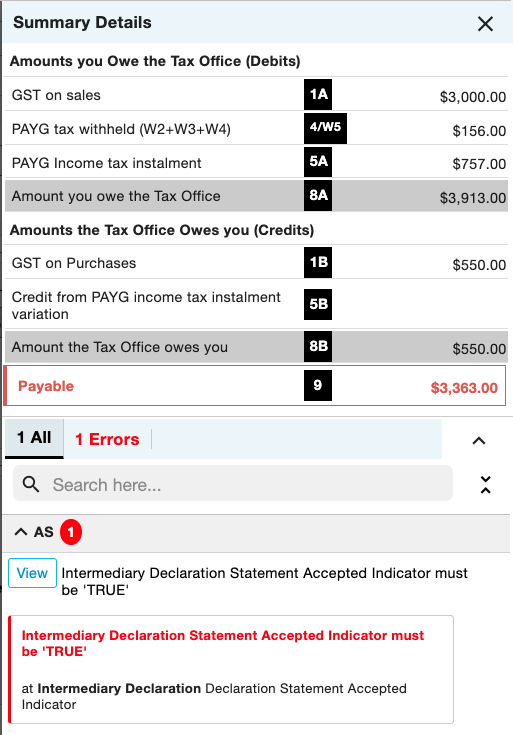
You can also select View Summary to show the details of the amounts payable and any errors.
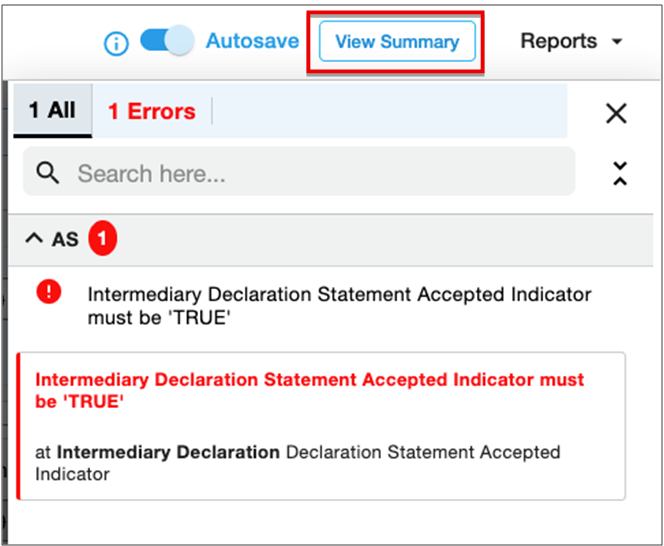
At any time while preparing the AS form, you can select Validate to check the data with the ATO.
Correct any errors that show in the report before signing the declaration. A form with errors in any of the AS fields cannot be lodged.
Until the declaration is signed, an error will automatically show as a reminder to authorise the form.
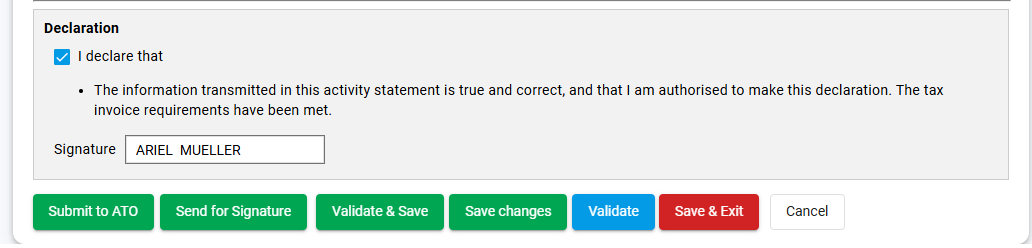
Submit to ATO:Once the form has Valid status, select Submit to ATO to lodge the form with the ATO.
Send for Signature:Registered agents can send the report to their client for digital signature authentication by selecting Send for Signature.
The form will redirect to the digital authentication process. Refer to the Help Center for additional information on using digital authentication.
Validate & Save:This option validates the data with the ATO, allowing you to check the details before lodging.
Save Changes: Select Save Changes to save the current form without finalising or exiting.
Validate: This option validates the data with the ATO, allowing you to check the details while working on the current form.
Save & Exit: This option saves and exits the form,then directs you back to the Saved Reports summary.
Note: These options are only available for Online BAS.
For Offline BAS, there are only two options.
Save Changes willsave the activity statement form. The report will then be available in My Lodgments > Saved Reports, allowing you to continue preparing it later.


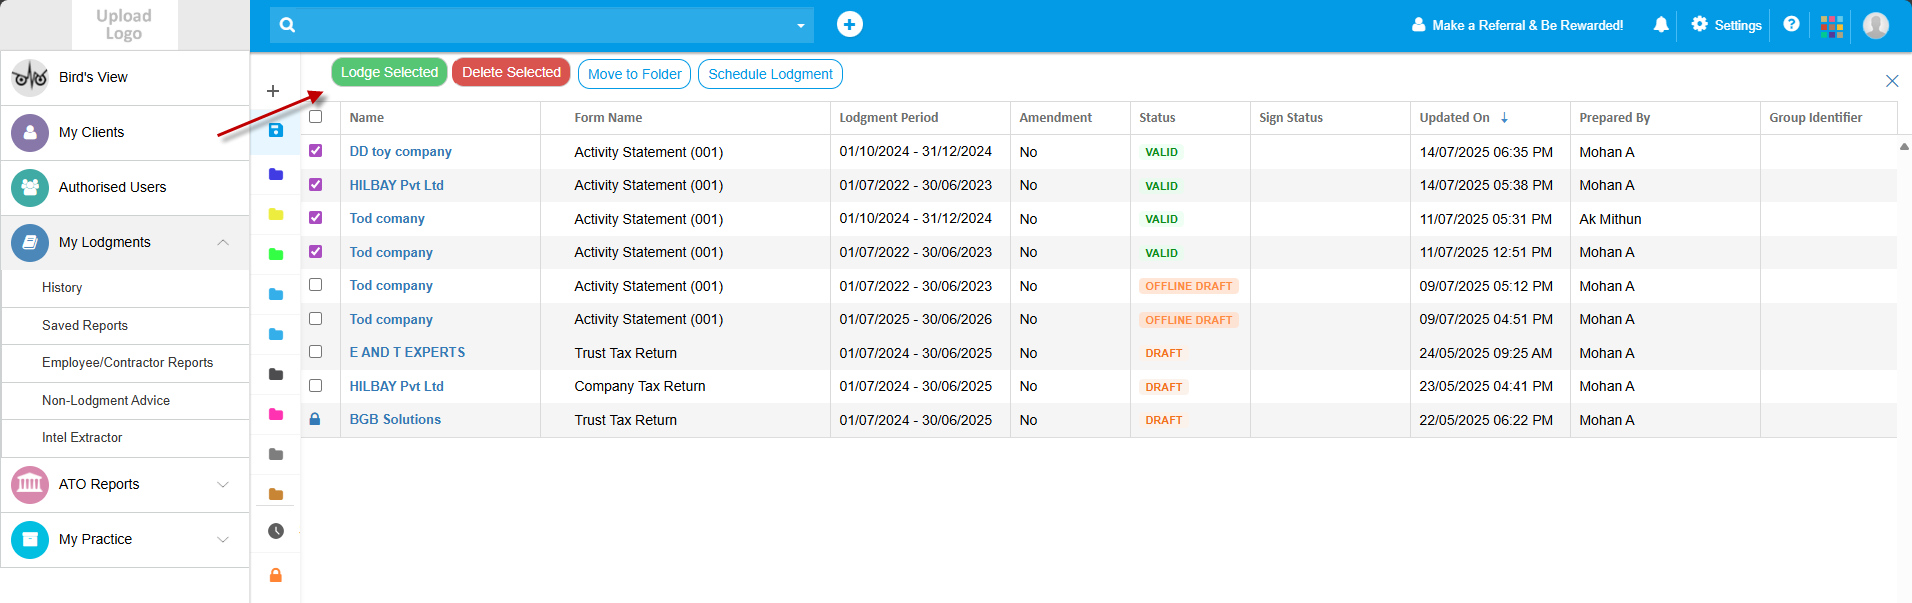
Select the required form from the Saved Reports list. The report can be lodged, deleted, moved or scheduled .

Make your selection and follow the prompts to lodge, delete, move or schedule for a future date and time. Note that you can only lodge reports with a valid status.
Lodging from Saved Drafts
Forms that have been finalised and validated can be lodged in bulk. Selectsingle or multiple reports, then choose an action to apply to selected reports.
Editing from Saved Drafts
Select Edit to open the form.
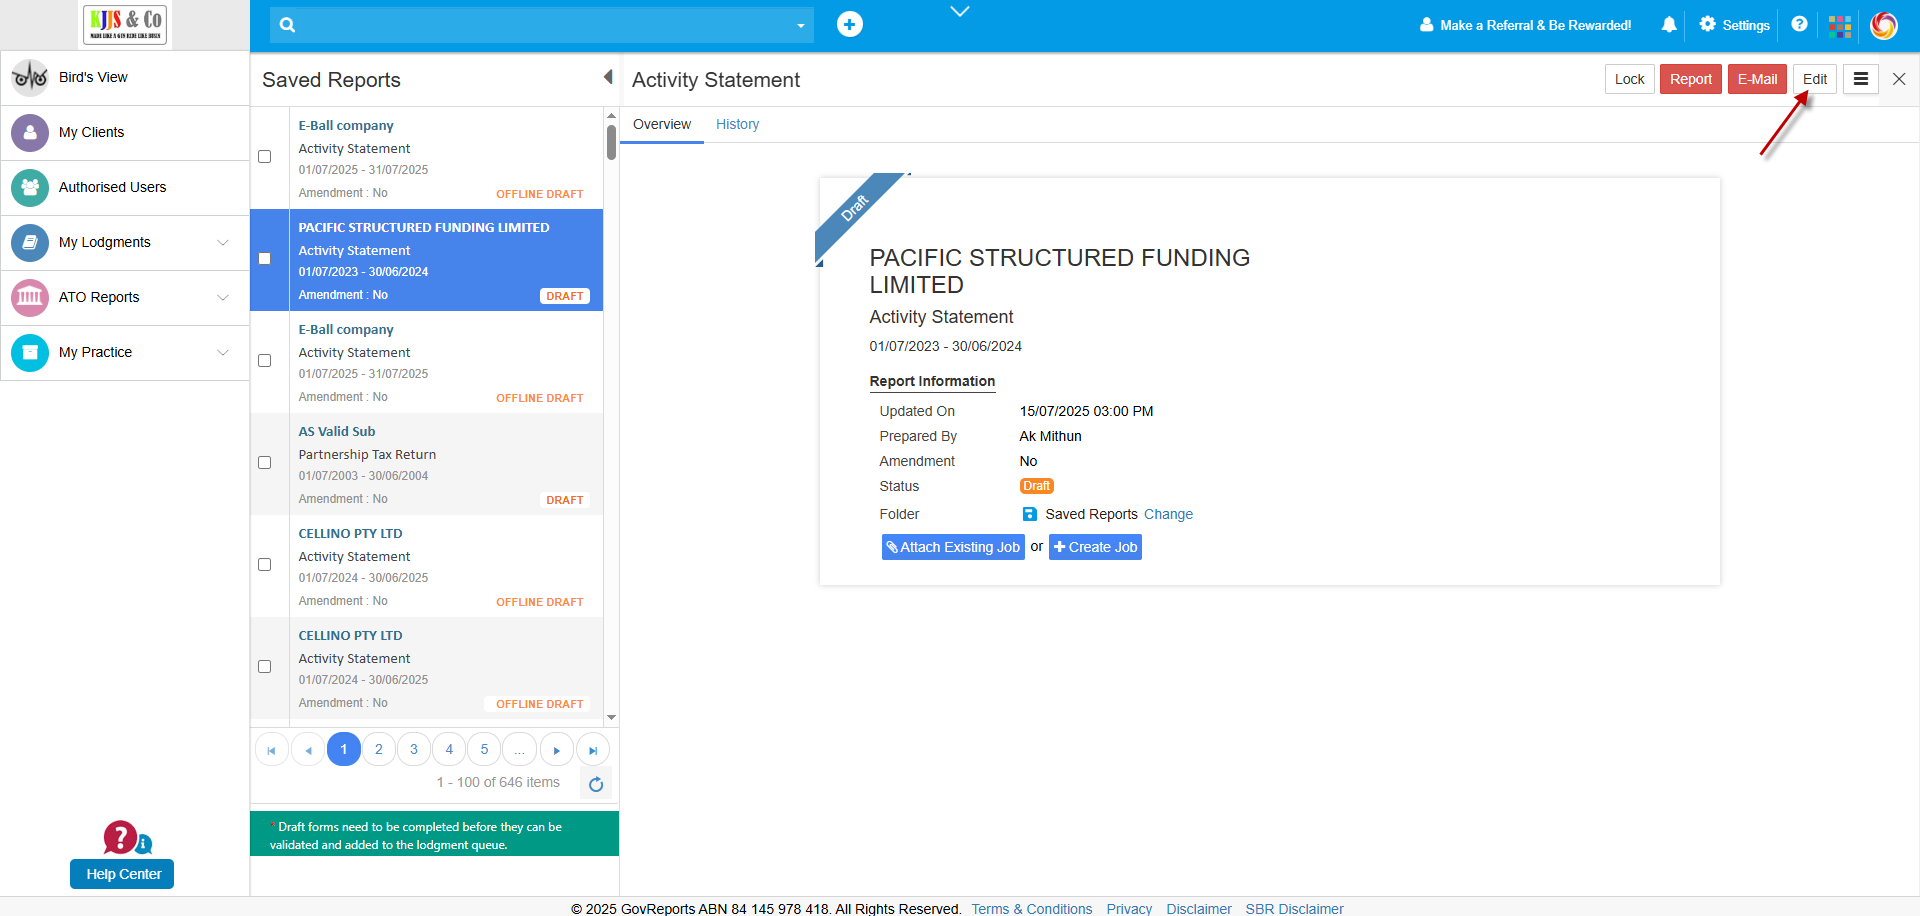
Edit any fields required and sign the declaration, then proceed to Submit to ATO to lodge the BAS report immediately.
Alternatively, for registered agents who need to send the form to a client for authorisation, select Send for Signature.The form will redirect to the digital authentication process.
Lodging Validated Reports
Forms that have been finalised and validated can be lodged separately or in bulk from the overview screen. Select multiple reports, then choose a bulk action.
From the lodgment history overview, select a form to view. This will open the audit trail for that lodgment.
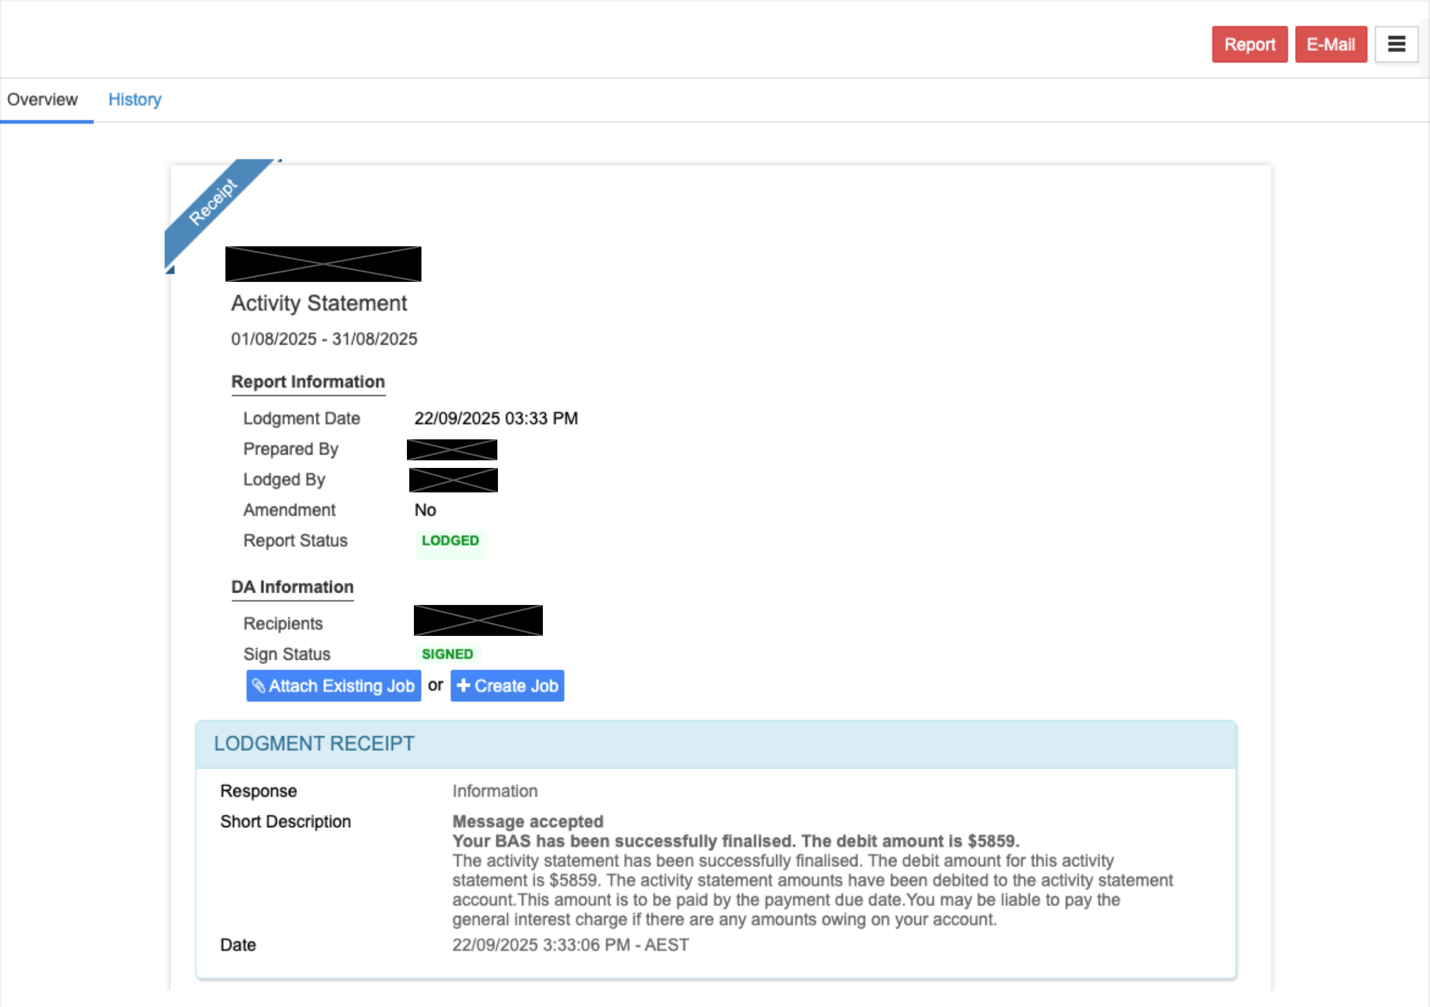
The History tab displaysthe dates and times of all actions related to the report, from its creation or import to signature and lodgment.
Alternatively, go to the selected client record and the Lodged tab.
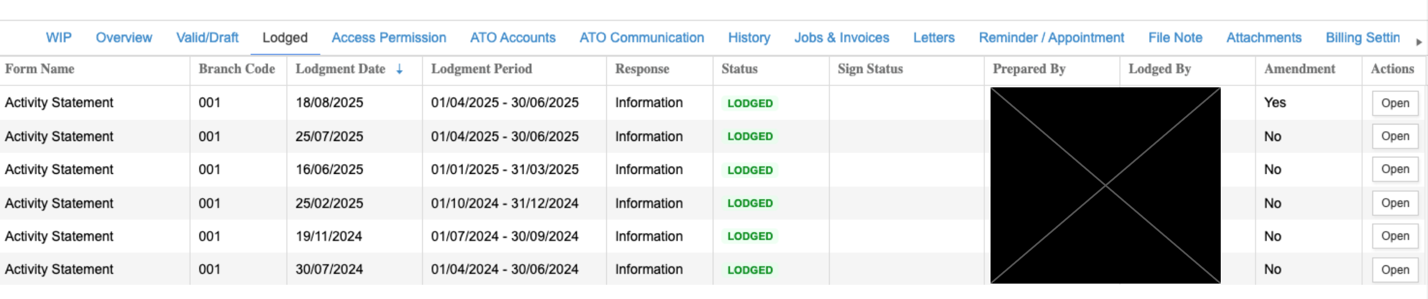
From the Actions menu, select Open to view the overview and history of actions related to the report.
Revising Activity Statements
Activity statements, once lodged, can be revised if needed.
Access the statement from either the Saved Reports list or the client record.
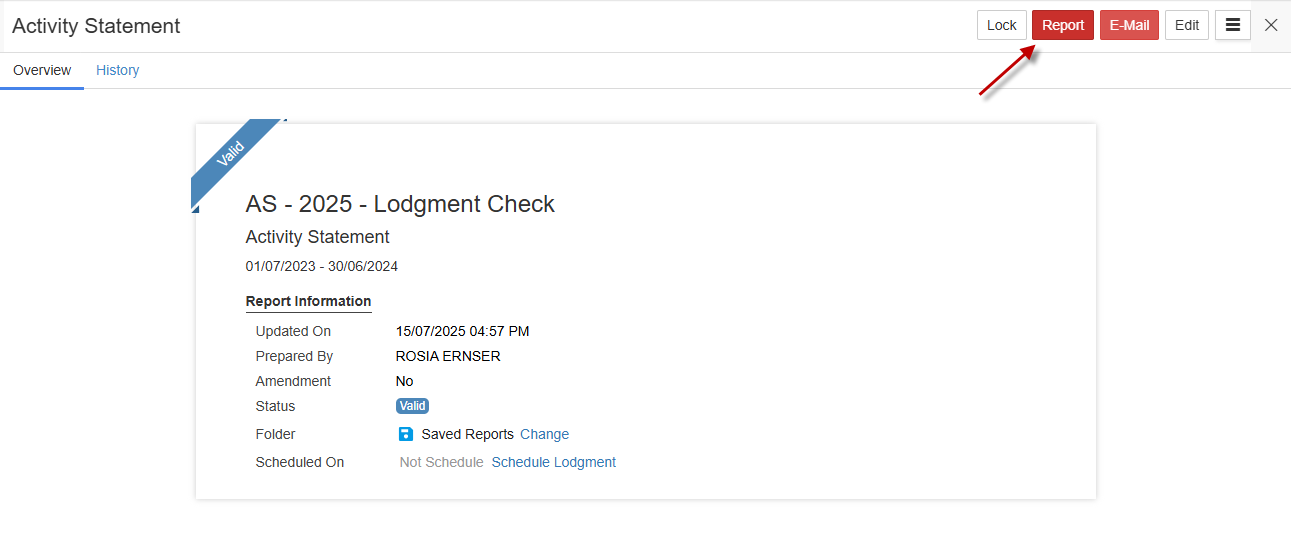
Open the statement, and from the overflow menu, select Revision.

This will save a draft report, which will be visible in the Saved Reports list with the amendment indicator.
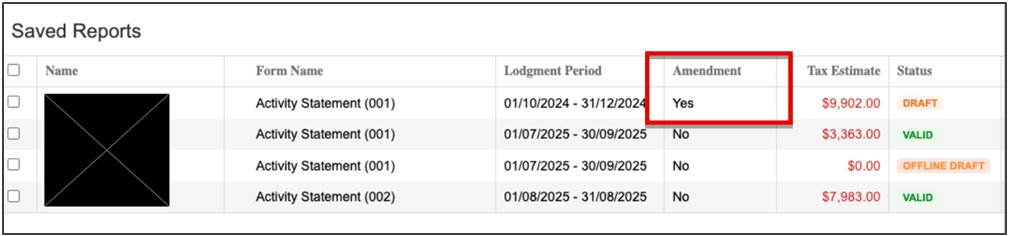
Open the report to edit, finalise and lodge.
This will open a separate browser tab to preview the PDF. The PDF can be downloaded or printed from the browser tab.
To email the report, select Email to open the pop-up box. This allows you to choose yourself as a business owner or another recipient. If you are a registered agent, the client details are available as well.
The activity statement form is sent as an attachment to the email.
Activity statements can be prepared by manual data entry, imported file upload,or directly synced from SBR-compatible accounting software.
GovReports supports AS lodgment for all reporting periods, including monthly, quarterly, and annual, in compliance with regulatory requirements for businesses and government entities.
This user guide outlines all features available for tax agents, BAS agents and business owners using the AS function. The User Guide assumes that registered agents have previously set up a client list.
1. Overview
Activity Statements are initiated from the My Clients list. Multiple reports can be saved in draft form and lodged in bulk later. Reports can be worked on while the ATO is unavailable, or when you are offline, and lodged when convenient.Activity Statements are accessible from My Clients or My Lodgments or ATO Reports.
Activity Statements can also be created as a job and added to client schedules or practice calendars for efficient management of jobs and tasks.
All the activity statement fields are now visible on the same screen, allowing you to see the complete statement.
2. Preparing BAS Reports
For registered agents, go to My Clients and select the client.For businesses, go to My Business and select the business.
Select Forms then select New Version.
Select Activity Statement report New Version.
The Activity Statement overview page will load.
Choose Quick Date to prefill the period From and To dates.
Select Criteria: All, Historical or Not Lodged to refine the list results.
Click the Display button to retrieve the ATO Activity Statement report list.
Select Instalment Details to view the instalment amount rate or amount in the pop-up window. Print or close the window to return to the activity statement being prepared.
Select Prepare to create the report.
Review the prefilled details and check the settings, including the date, GST accounting method and GST sales indicator.
Make sure the GST sales indicator is the same as your accounting software report.
GST – Import from Connected File
If you have published an activity statement in any of the accounting software apps (MYOB, ReckonOne, Sage One or Xero), you can sync GovReports and the software to import data from the corresponding activity statement directly.
Select your software app. The import pop-up window will appear. Authorise the connection to your software.
For MYOB AccountRight, select the Connect to MYOB button to connect the MYOB account and import data.
For ReckonOne, select the Connect to ReckonOne button to connect the ReckonOneaccount and import data.
For SageOne, enter your Username and Password, then select the Connect button to import data.
For Xero, select the Connect to Xero button to connect the Xero organisation and import data.
GST – Import from File Upload
Alternatively, you can upload a compatible format activity statement file from the software apps .
Prepare the activity statement in the software and export it to the relevant file format for the software.
For MYOB (BASLink), upload the BASLink file, review the data, and import it.
For Reckon BAS/IAS, upload the XML file, review and import the data.
For Xero, upload the XLSX file, review and import the data.
For CSV, upload a CSV file, review and import the data. To avoid errors with the CSV import, download the sample template file first, add your data in the relevant fields, then import and review.
Review the imported details and select Import to overwrite the BAS form.
GST – Enter Figures Manually
Finally, you can enter activity statement amounts manually. If you are preparing an activity statement manually, you must save a record of your calculations to validate your figuresin case of an ATO audit.
Enter relevant amounts for GST on sales, GST on purchases, PAYGW and payroll figures, PAYGI, and any other relevant fields such as FBT instalment.
Completing the BAS Fields
Whether you have selected to import data, upload a file or enter data manually, the same fields are available in the Activity Statement form.
All BAS fields are displayed on the same screen.
Review any prefilled details and check the settings, including the date, GST accounting method and GST sales indicator.
Ensure the GST sales indicator matches your accounting software report settings.
Check the details in each section:
Check that the summary field is displaying the correct amounts payable and receivable and the net amount of the BAS before proceeding.
3. Creating Offline BAS Reports
From the activity statement list, select click here to open the offline BAS form.Select the Quick Date option or enter the BAS period dates. Select BAS Type from the dropdown list, then select the Create Offline BAS button .
Note that the BAS type identifier must correspond with the form you need to create.
The activity statement form will open.
The form will be saved as an Offline Draft until a valid document ID number is imported. Some AS fields are unavailable to edit until a DIN has been entered. A DIN is required before lodgment.
Click the Prefill button to import the document identification number(DIN) from the ATO.
Once the DIN has been imported, all BAS fields are available for editing.Checkall details such as cash or accrual, full or Simpler BAS, and instalment amounts and edit if required.
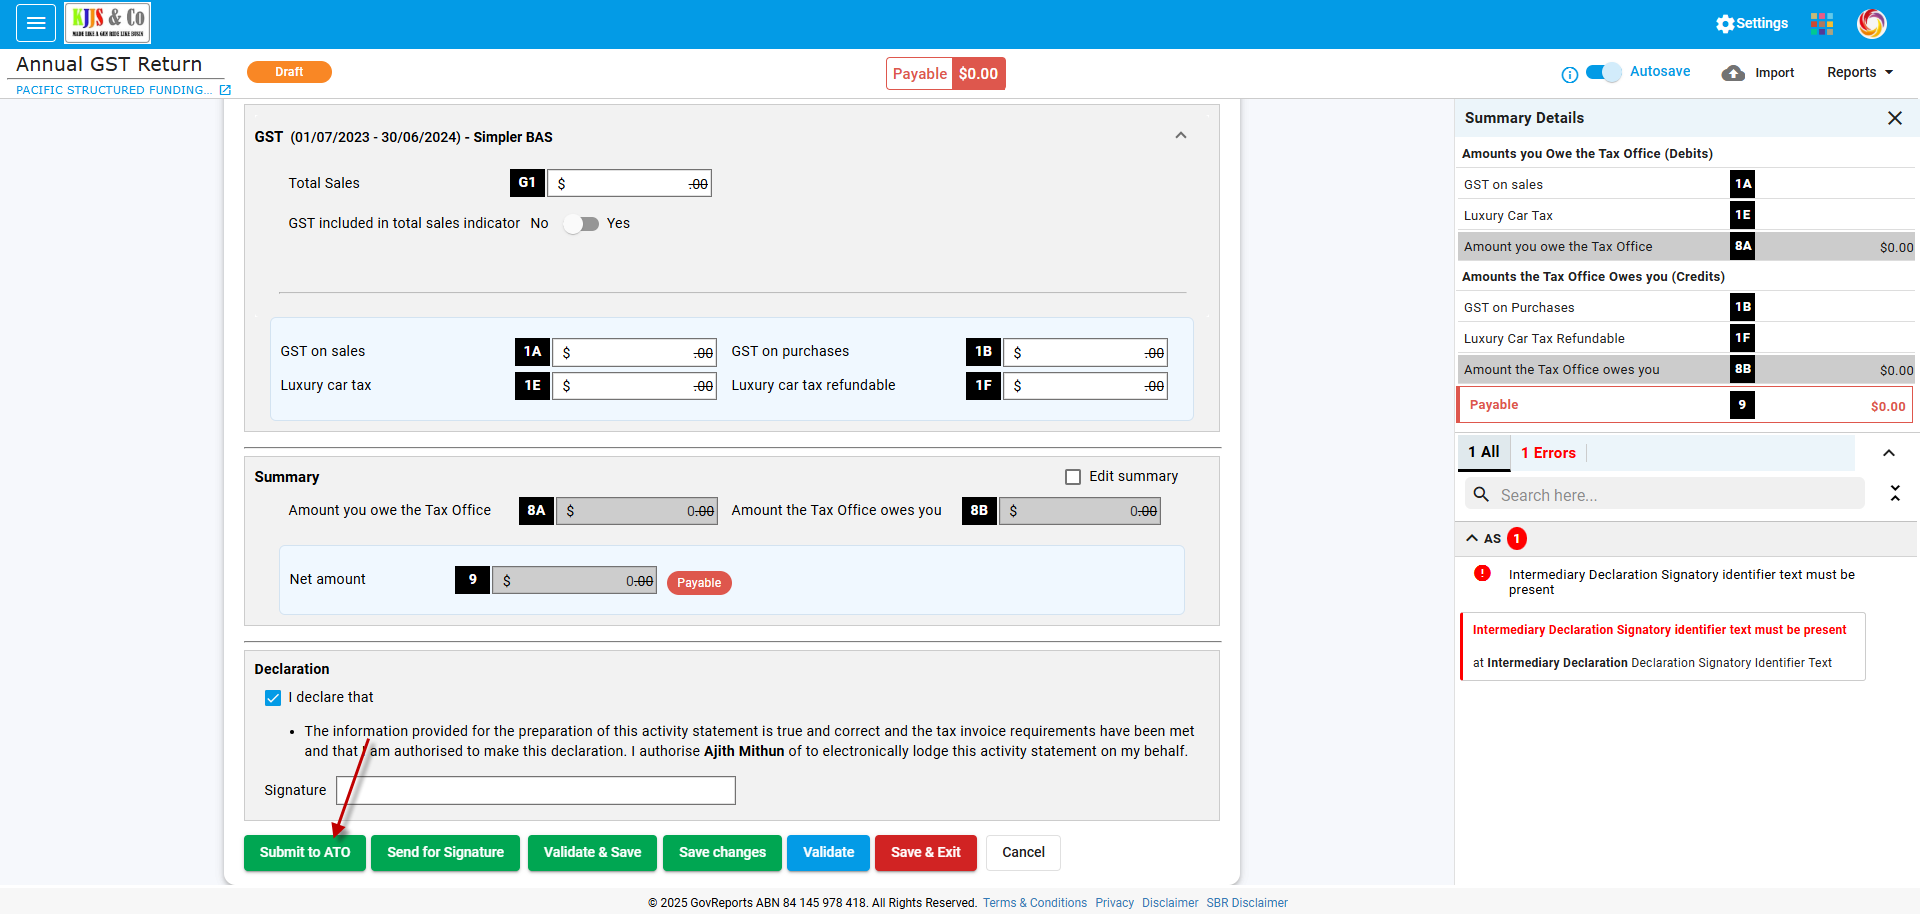
4. Correcting Errors
From any activity statement preparation screen, if errors are present in the form, they will be displayed to the right of the screen.You can also select View Summary to show the details of the amounts payable and any errors.
At any time while preparing the AS form, you can select Validate to check the data with the ATO.
Correct any errors that show in the report before signing the declaration. A form with errors in any of the AS fields cannot be lodged.
Until the declaration is signed, an error will automatically show as a reminder to authorise the form.
5. Finalising and Lodging BAS Reports
Whether you have prepared the activity statement from imported accounting software data, file upload, manual entry or offline form, the process of finalising, validating, authorising and lodging the AS is the same.Submit to ATO:Once the form has Valid status, select Submit to ATO to lodge the form with the ATO.
Send for Signature:Registered agents can send the report to their client for digital signature authentication by selecting Send for Signature.
The form will redirect to the digital authentication process. Refer to the Help Center for additional information on using digital authentication.
Validate & Save:This option validates the data with the ATO, allowing you to check the details before lodging.
Save Changes: Select Save Changes to save the current form without finalising or exiting.
Validate: This option validates the data with the ATO, allowing you to check the details while working on the current form.
Save & Exit: This option saves and exits the form,then directs you back to the Saved Reports summary.
Note: These options are only available for Online BAS.
For Offline BAS, there are only two options.
Save Changes willsave the activity statement form. The report will then be available in My Lodgments > Saved Reports, allowing you to continue preparing it later.
6. Retrieving Reports from Saved Reports List
Go to My Lodgments> Saved Reports. From this list, various functions are available, either for a single form or for multiple forms.Select the required form from the Saved Reports list. The report can be lodged, deleted, moved or scheduled .
Make your selection and follow the prompts to lodge, delete, move or schedule for a future date and time. Note that you can only lodge reports with a valid status.
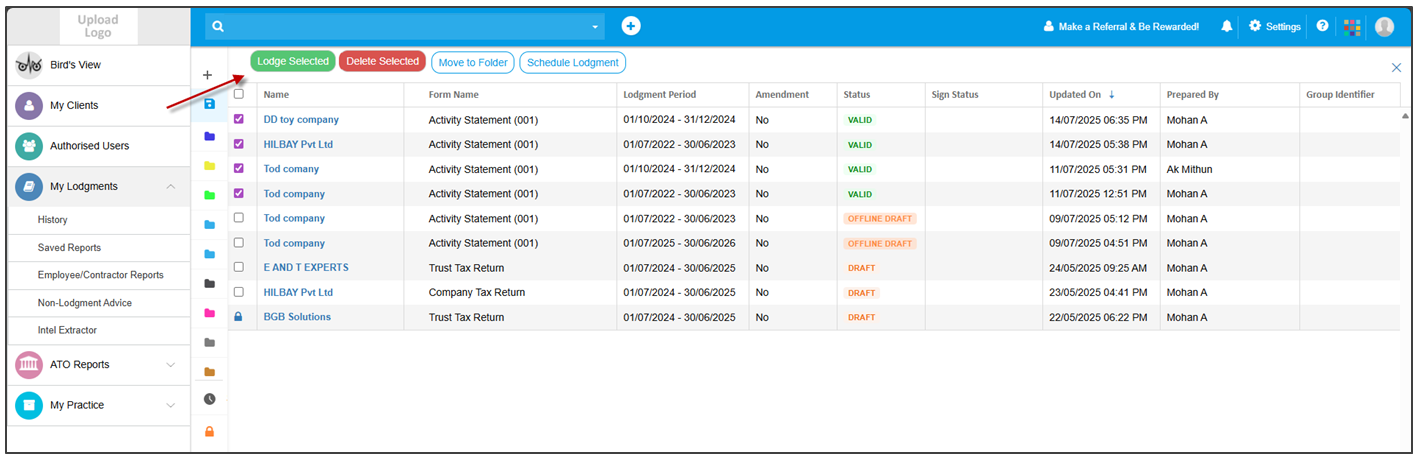
Lodging from Saved Drafts
Forms that have been finalised and validated can be lodged in bulk. Selectsingle or multiple reports, then choose an action to apply to selected reports.
Editing from Saved Drafts
Select Edit to open the form.
Edit any fields required and sign the declaration, then proceed to Submit to ATO to lodge the BAS report immediately.
Alternatively, for registered agents who need to send the form to a client for authorisation, select Send for Signature.The form will redirect to the digital authentication process.
Lodging Validated Reports
Forms that have been finalised and validated can be lodged separately or in bulk from the overview screen. Select multiple reports, then choose a bulk action.
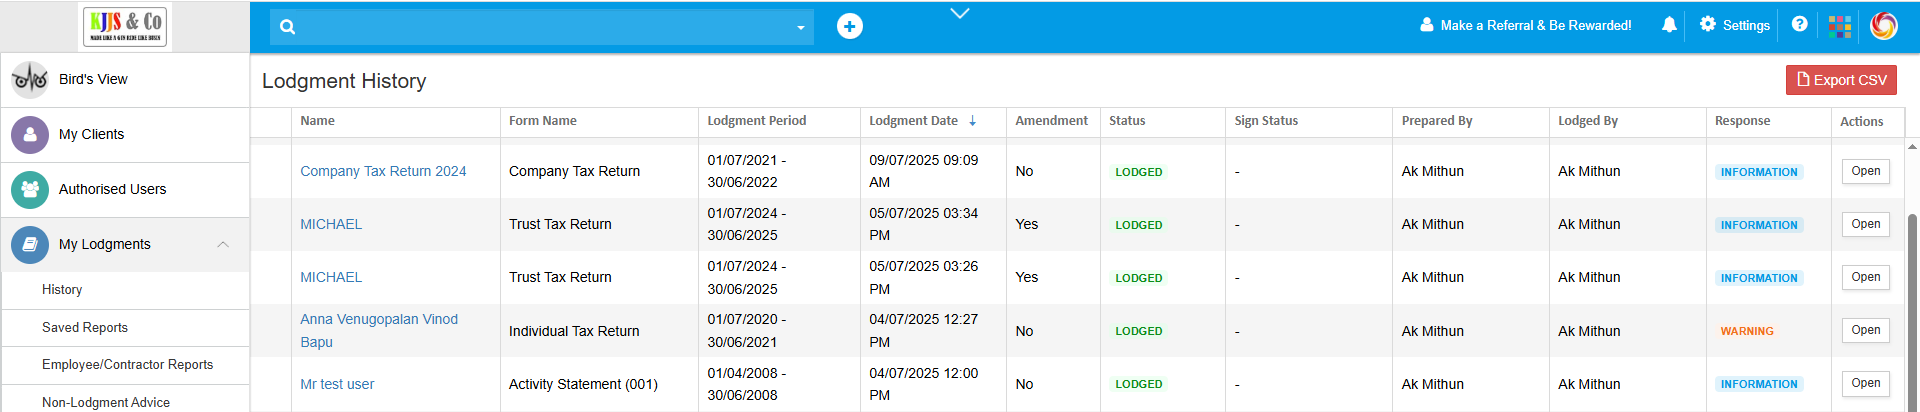
7. Saving and Managing Lodged Reports
You can view all lodged forms from My Lodgments > History, or from within each client record.From the lodgment history overview, select a form to view. This will open the audit trail for that lodgment.
The History tab displaysthe dates and times of all actions related to the report, from its creation or import to signature and lodgment.
Alternatively, go to the selected client record and the Lodged tab.
From the Actions menu, select Open to view the overview and history of actions related to the report.
Revising Activity Statements
Activity statements, once lodged, can be revised if needed.
Access the statement from either the Saved Reports list or the client record.
Open the statement, and from the overflow menu, select Revision.
This will save a draft report, which will be visible in the Saved Reports list with the amendment indicator.
Open the report to edit, finalise and lodge.
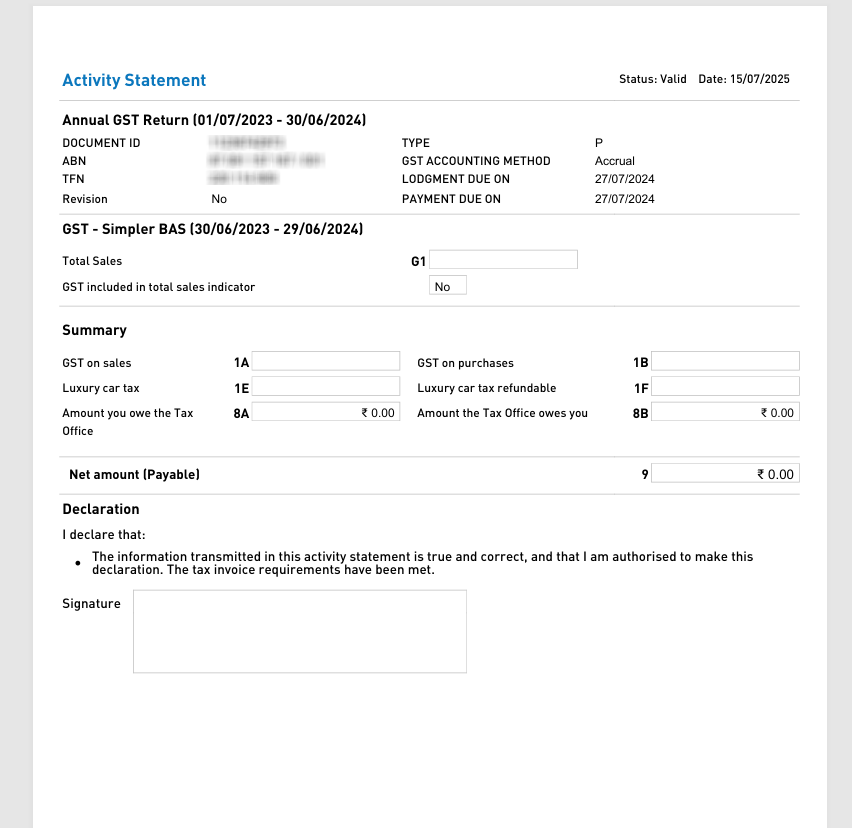
8. Printing and Emailing Report Details
From either the lodged report screen or the client record screen, select the Report button to view the report PDF .This will open a separate browser tab to preview the PDF. The PDF can be downloaded or printed from the browser tab.
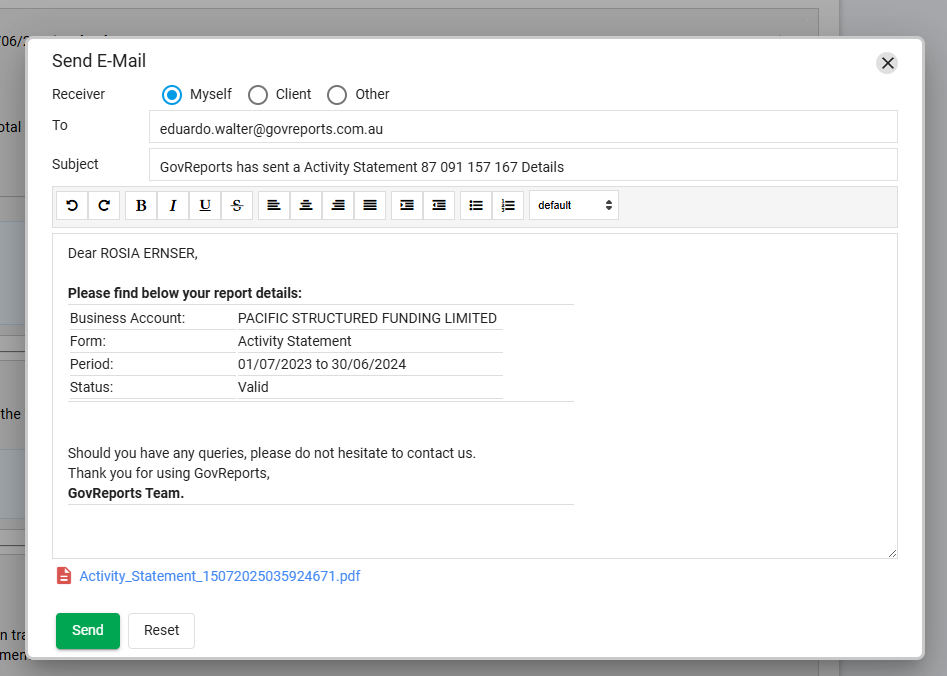
To email the report, select Email to open the pop-up box. This allows you to choose yourself as a business owner or another recipient. If you are a registered agent, the client details are available as well.
The activity statement form is sent as an attachment to the email.
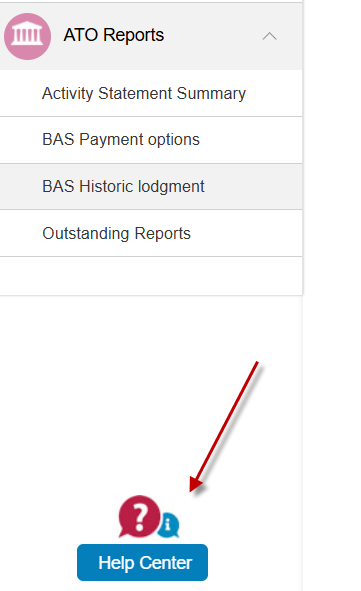
9. Help Centre
The Help Centre is available from the main menu and any screen.