What is new in ITR 2020?
Legislation changes
Schedules & Worksheet
Individual schedule
- Income statement (Multiple employer statements)
- Other Income details
- Business, Trust & Partner
|
Schedules |
Added (new) |
| PAYG Payment
|
Schedules |
Removed |
| Summary schedule,
|
Schedules |
Removed |
| Superannuation Lump sum schedule
|
Schedules |
Removed |
| Work related expense schedule
|
Schedules |
Removed |
| Standard worksheet
|
Worksheet |
Removed |
New Look
Rollover & prefill
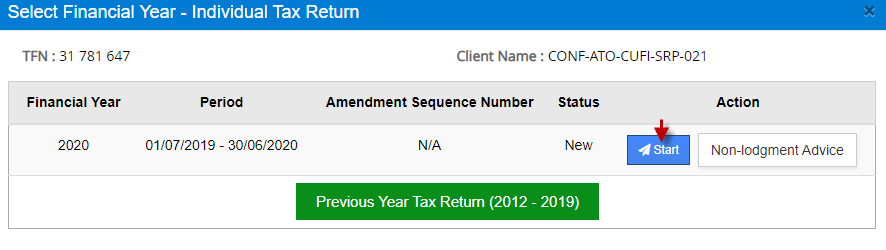
When you select Forms -> Individual Tax Return, you will have the option to either start the Tax Return for the Financial Year 2020 or prepare a Non-lodgment advice.
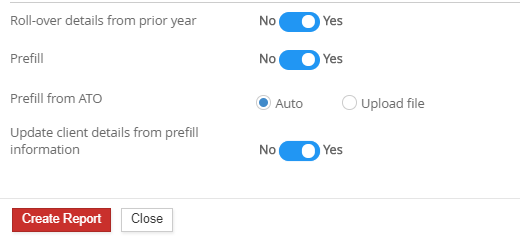
As soon as you start the Tax Return, you will be redirected to the screen below. The Rollover and Prefill options are now combined where you can select it at the start of the Tax Return.
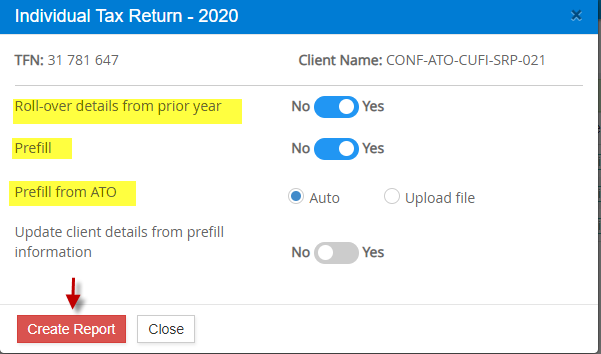
You can set the controls where you can Rollover the details (from the prior year) if you have lodged the prior year Tax Return from GovReports.
The Prefill option allows you to prefill the sections of main form, schedules and worksheets. There are 2 ways of pre-filling the form- Auto (Automatic ATO Prefill) or Upload file (connecting to the ATO site, logging in, downloading the Prefill report and manually uploading it in GovReports).
Tax Return Layout
The new Tax Return design and layout is designed to be robust ensuring high performance.
Quick links
The Tax Return form has different sections like main form, schedules and worksheets.
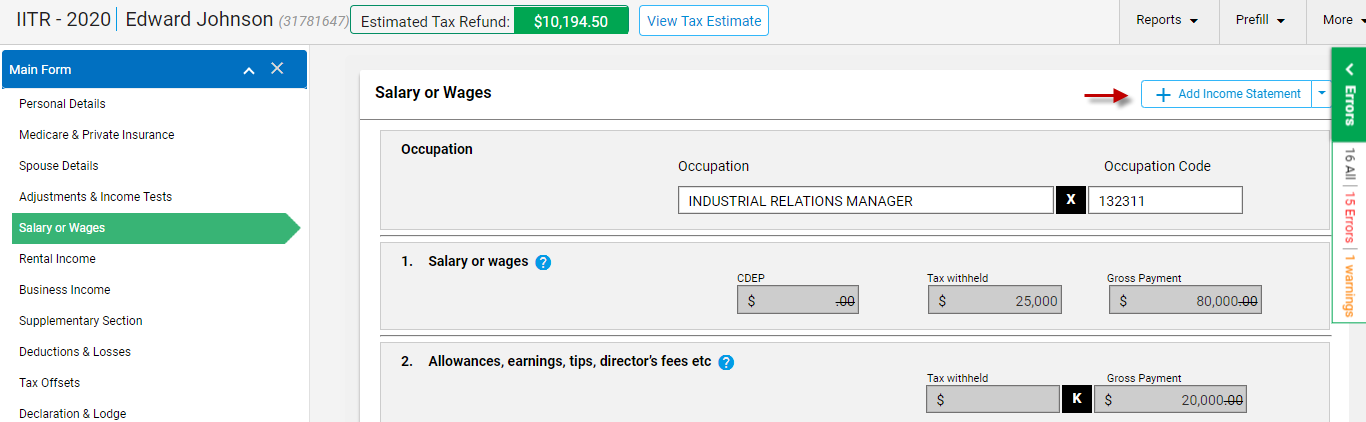
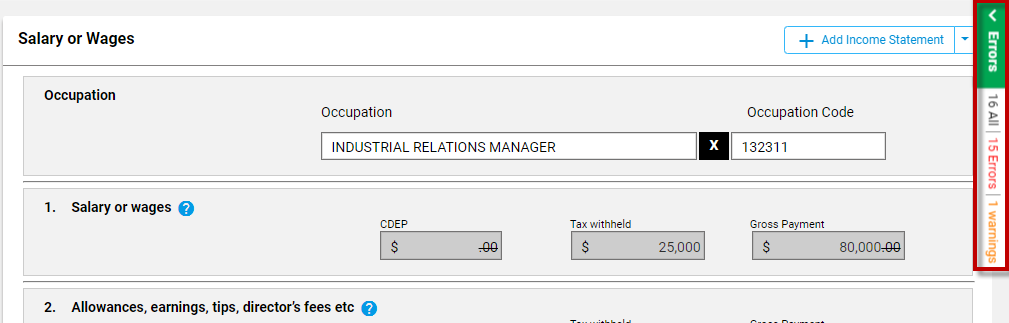
Each section has the relevant quick links on the right which when clicked gets redirected to the appropriate schedule or worksheet.
For example, in the Salary and Wages section, there is a quick link on the right to add “Income Statement”. Clicking on it, the page gets redirected to the Income Schedule.
How to prepare Individual Tax Return 2020?
Introduction
The Individual Tax Return for the year 2020 has the following changes.
- 1. The new schedules added are Income details schedule with sub-schedules like Other Income and Business, Partnerships and Trusts Income
- 2. The schedules which existed in ITR 2019 have been removed in ITR 2020 like Individual PAYG Payment Summary schedule, Superannuation Lump sum schedule, Work related expense schedule.
- 3. The Standard worksheets which existed in ITR 2019 have been removed. The new worksheets have been added, which includes Partnership and Trust worksheet and Individual offset worksheet.
- 4. The “Report” option is given at the top of each page which includes downloading a PDF report or emailing the report.
- 5. The “Prefill” option at the top of each page includes Auto prefill or Manual prefill.
- 6. Option to add Notes is provided under “More” which also includes CGT (Capital Gains Tax) Calculator.
- 7. The options included in points 4 to 6 were initially put together under “Actions” in the previous 2019 Individual Tax Return.
- 8. The “Tax Estimate” option is provided at the top of the page for quick access.
- 9. The “Declaration” and “Save and Lodge” sections which were separate in Individual Tax Return 2019 have been combined in a single page.
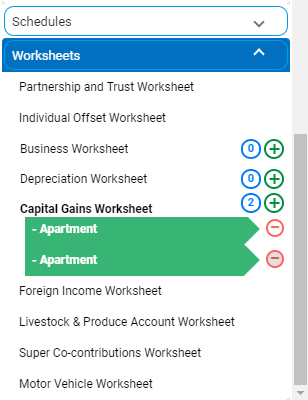
- 10. The user interface of the Individual Tax Return 2020 form has been changed with a new theme. It also combines all the schedules and worksheets under the common menu called “Schedules” and “Worksheets” respectively.
-
11. The “Save as draft” and “Save and Validate” option have been removed in “Save and Lodge” section as the individual “Save” button at the end of each page.
Individual Tax Return 2020
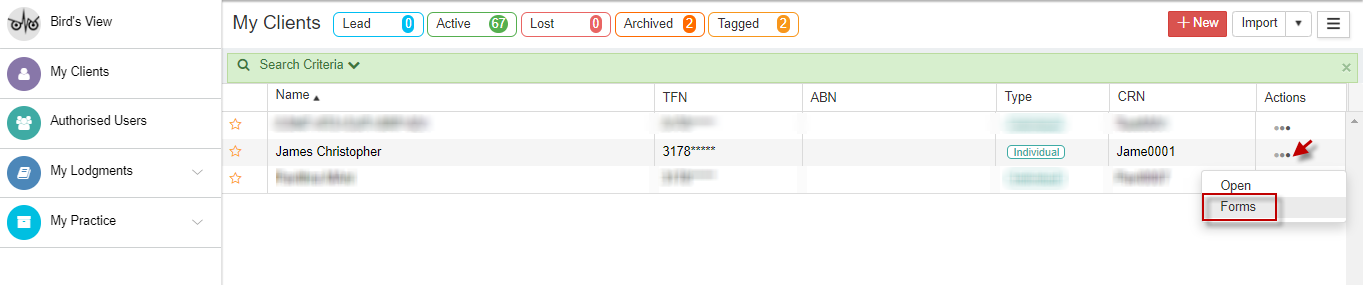
Go to My Clients -> Locate the client.

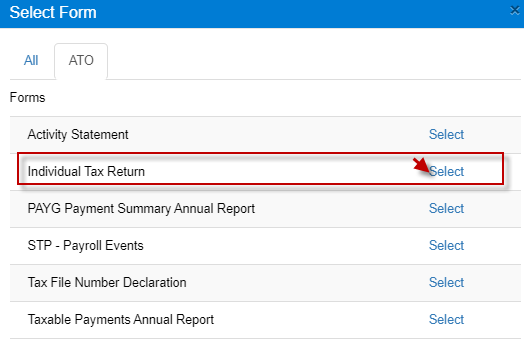
Select Actions -> Forms -> Individual Tax Return.
Click “Start” for the Financial year 2020.
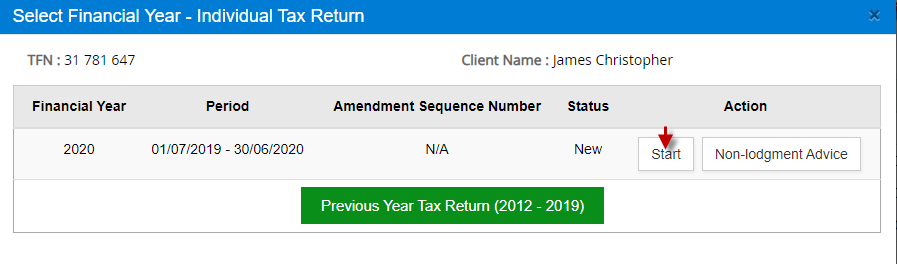
If you wish to lodge Tax Return for prior years starting from 2012, you can select “Previous Year Tax Return” and proceed to prepare the tax returns.
Rollover
When you click “Start” button next to Financial year 2020, you will get a window as shown below:
You can toggle on “Roll-over details from prior years”. This allows rollover of data from the prior tax return lodged from GovReports.
You can also select to prefill based on your choice.

The Individual tax return form opens up with the data from “Rollover”.
There is also another way to “Rollover” the Individual Tax Return.
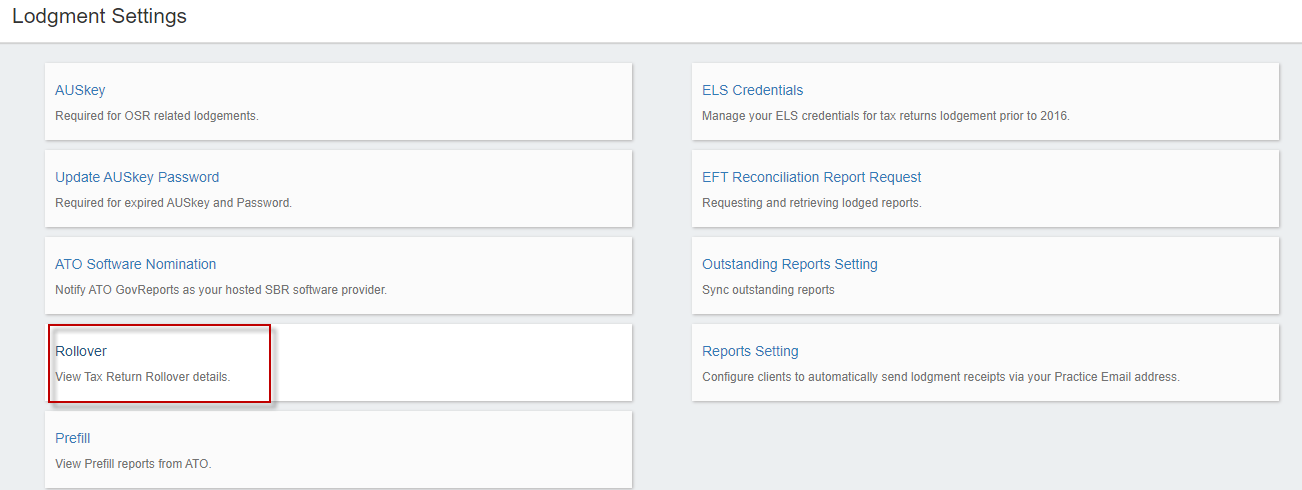
On the top right corner, go to Settings -> Lodgment Settings.
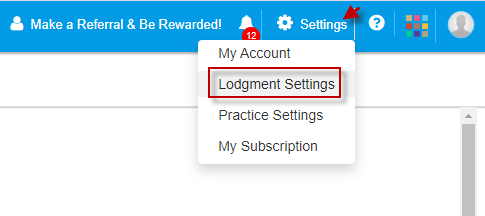
Select “Rollover”
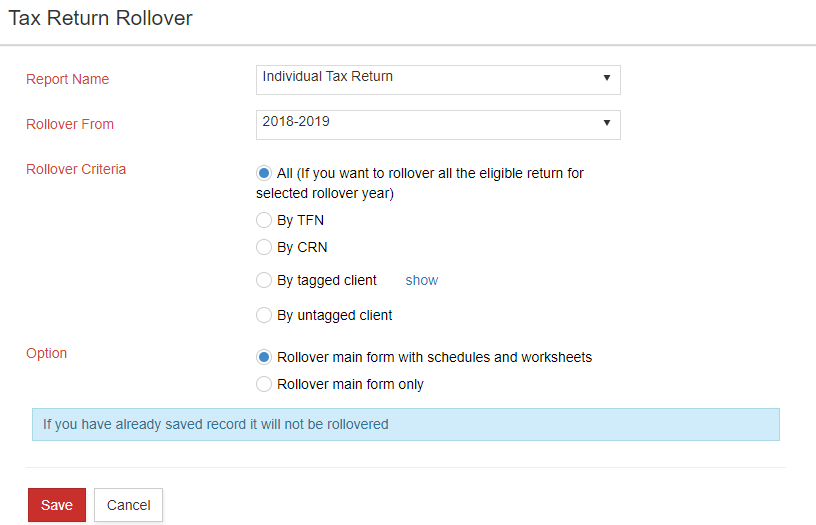
Select the Tax Return type from the drop-down and select the “Financial Year”.
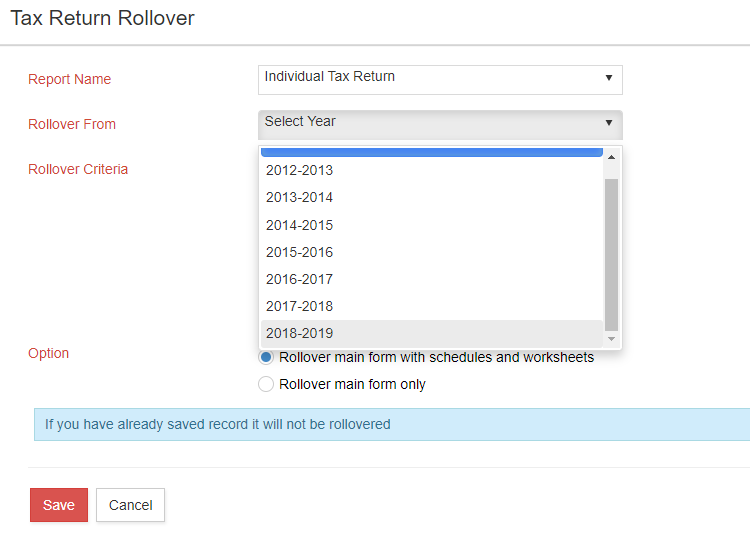
You can select the Rollover Criteria and Option. Select “Save”.
Prefill
Also, you can appropriately select the Prefill option when you click the “Start” button of the Tax Return. The prefill usually happens in the Main form, Income schedule, Deductions schedule,
and any other sections if values are present.
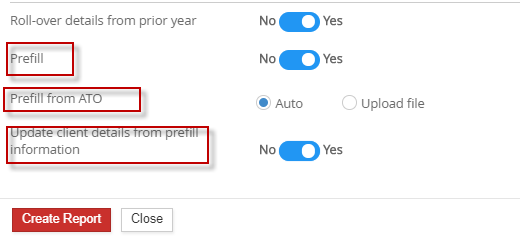
Setting “Prefill” toggle option “ON” allows either Manual or Prefill from ATO.
The next option, “Prefill from ATO” allows the prefill option to be selected as one among “Auto” and “Upload file”.
The last option “Update client details from Prefill information” prefills only the client details.
The Prefill can be done in 2 ways – Manual Prefill and ATO Prefill

Auto Prefill
This option directly takes all the Tax Return details from ATO and prefilled into the Tax Return form.
When you select “Auto Prefill”, the following screen appears.
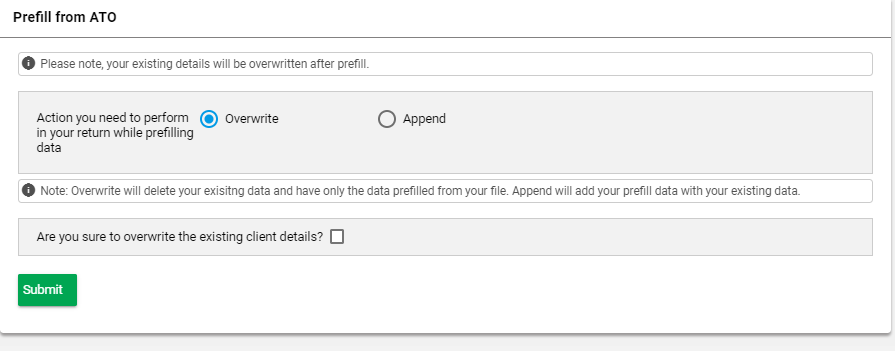
You can either select “Overwrite” or “Append” based on whether you wish to overwrite the details or just append to not affect the already entered details in the Tax Return form.
Overwrite will delete your existing data and includes only the prefilled data. Append will add your prefill data with your existing data.
If you wish to overwrite the existing client details, you can tick the checkbox.

After selecting the required options, please select “Submit”
The details based on the selection will be prefilled.
Manual Prefill
When this option is selected, the prefill file from your ATO login can be uploaded in GovReports manually.
On the top right corner, select Prefill -> Manual Prefill

You can upload the prefill file, click on the “Choose File” button.
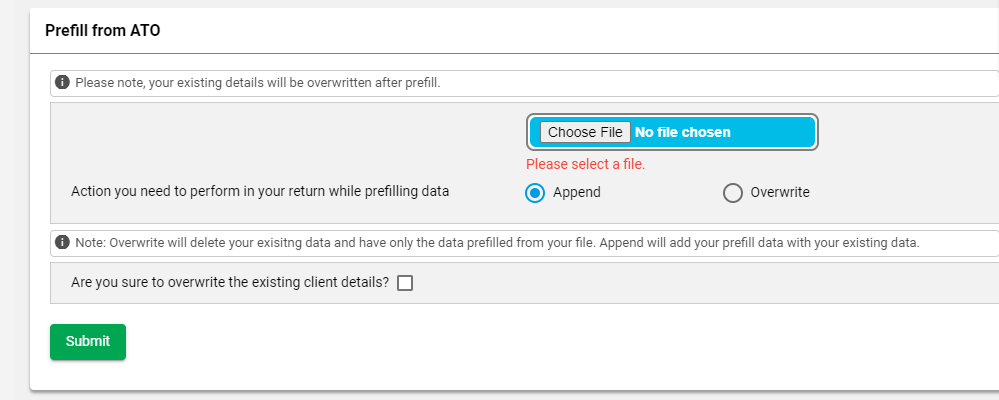
While prefilling you can either Append the data which means the data already entered will be unaffected. Overwrite option will replace any or all of the data
with the pre-fill information from the file uploaded.
You can also overwrite the existing client details by ticking the checkbox.
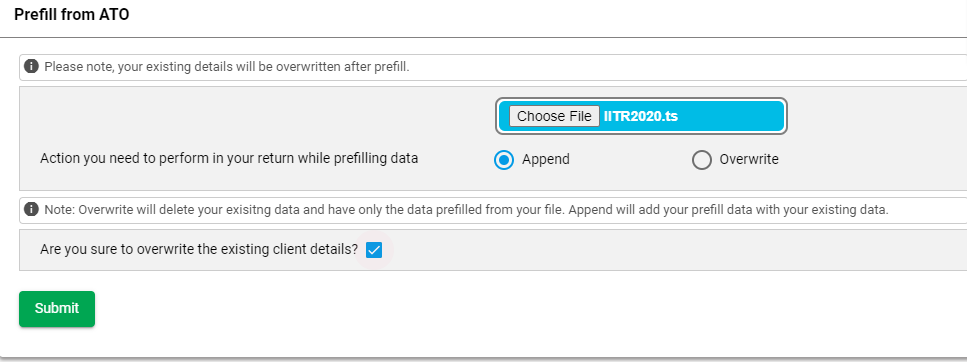
After you click “Submit”, the Tax Return data gets prefilled.
Adding schedules
The main form consists of the following sections.
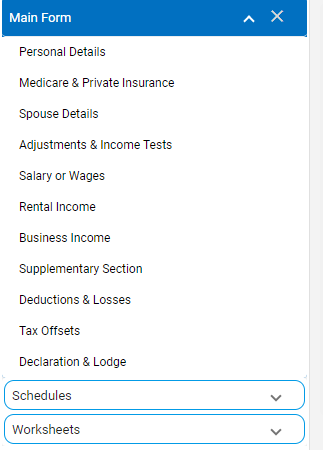
The additional components other than the main form sections are Schedules and Worksheets.
The worksheets and schedules have the detailed data entry which also includes calculation methods.
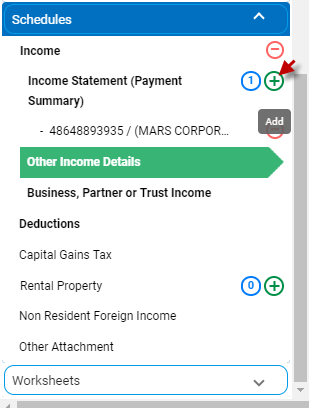
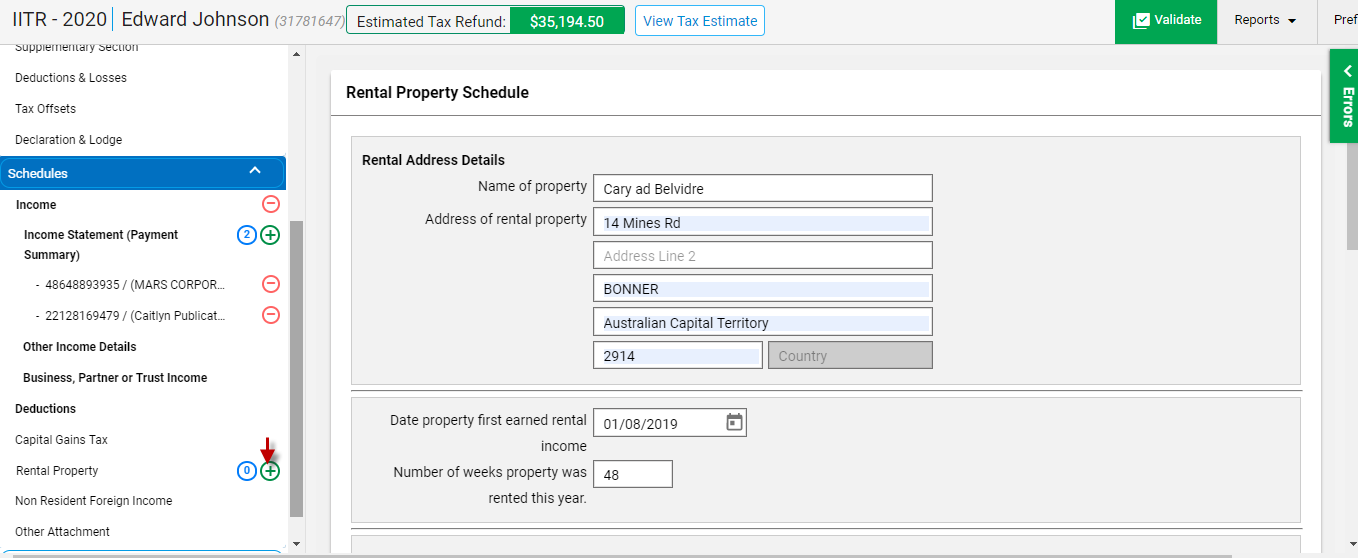
You can add an Income schedule or a Rental Schedule by clicking on Schedule -> Select “Plus” icon next to the schedule name.
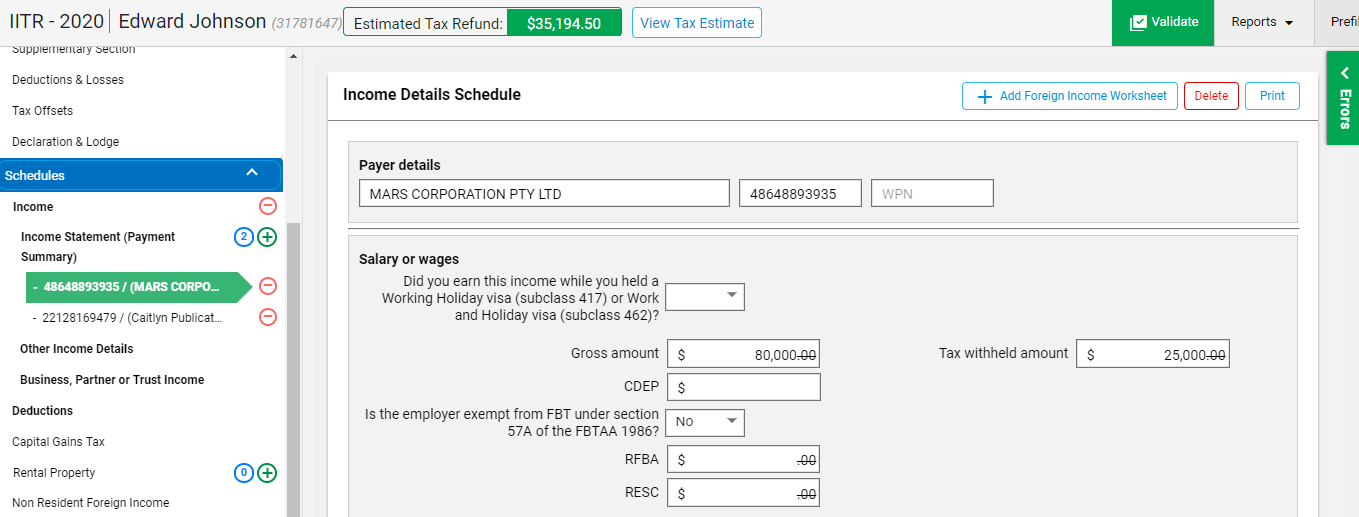
The Income Details schedule opens up. You can enter the details under various headings (highlighted) or add via “Foreign income worksheet” if it is “Foreign Income”.
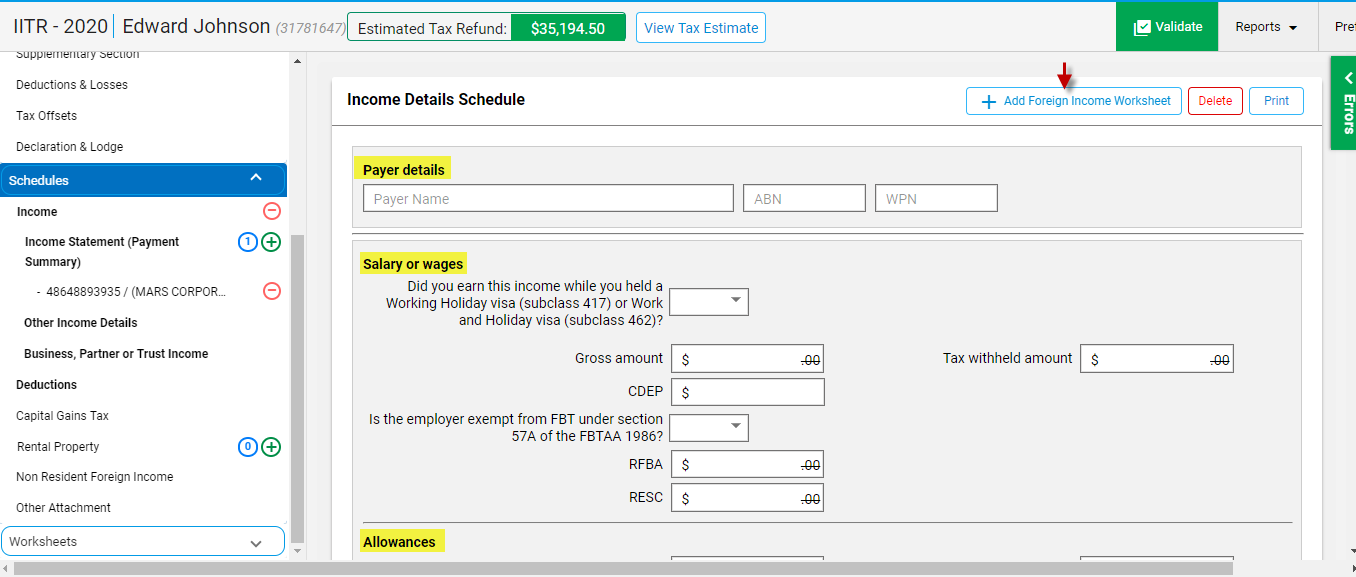
Once you finish entering the schedule, you can save it.
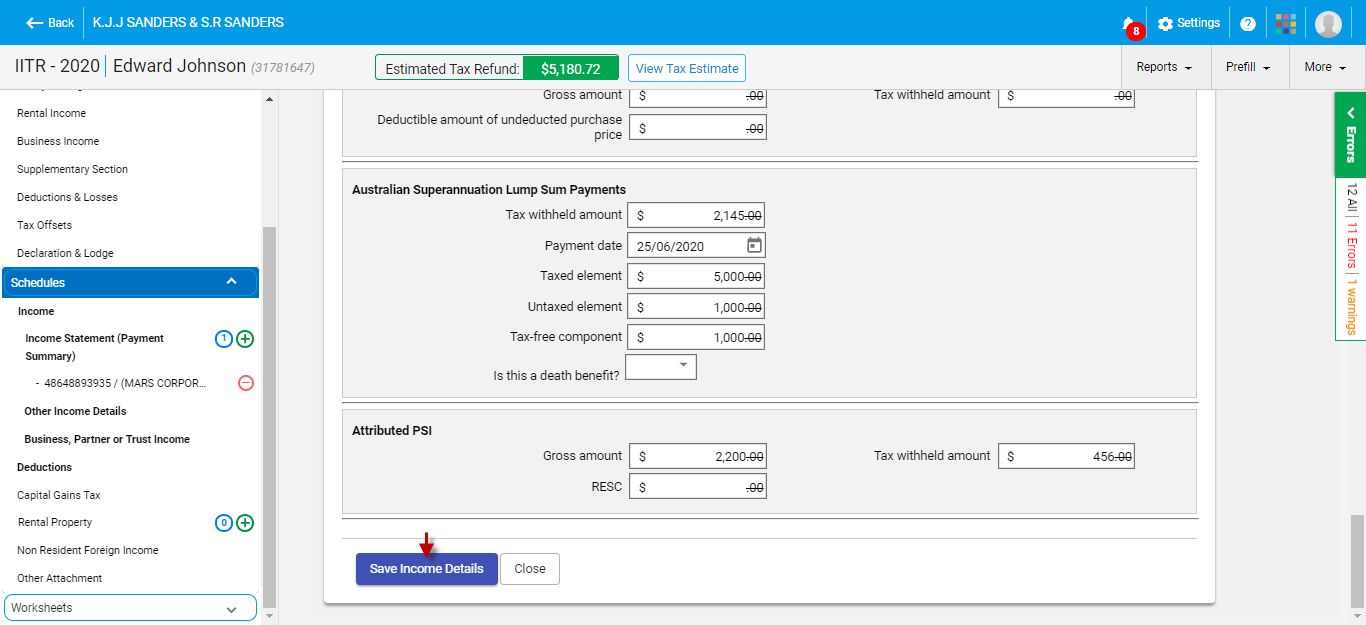
You can notice that now 2 schedules under income has been added.
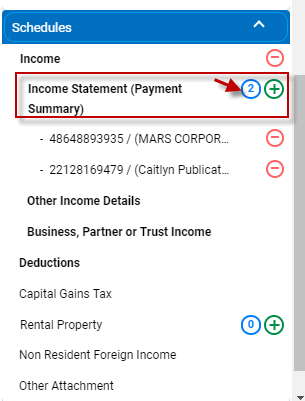
You can navigate to a particular schedule by just clicking on the name.
Similarly, the Rental Property schedule can be created by clicking on the “Plus” icon.
Save the schedule.
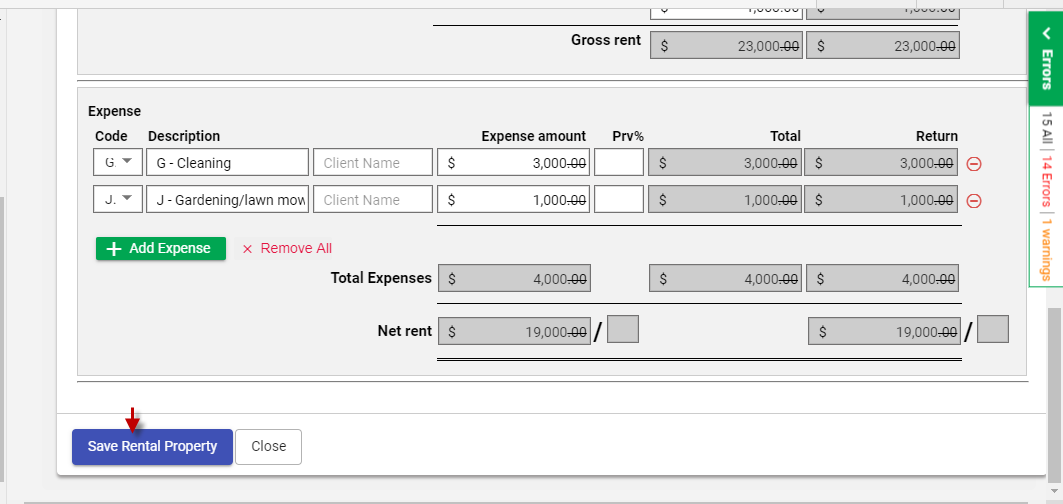
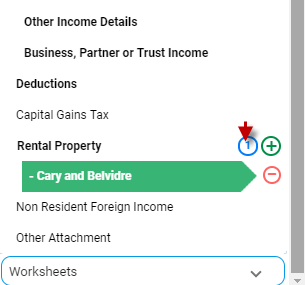
After saving, you can notice that the rental schedule is displayed.
Adding worksheets
Go to Worksheets -> Select the name of the worksheet.
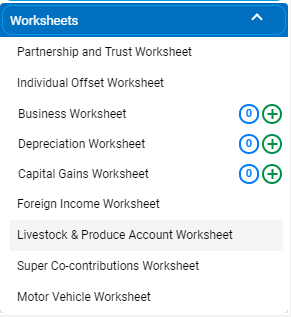
For example, to add Partnership and Trust worksheet, you can click on it.
Enter the data.
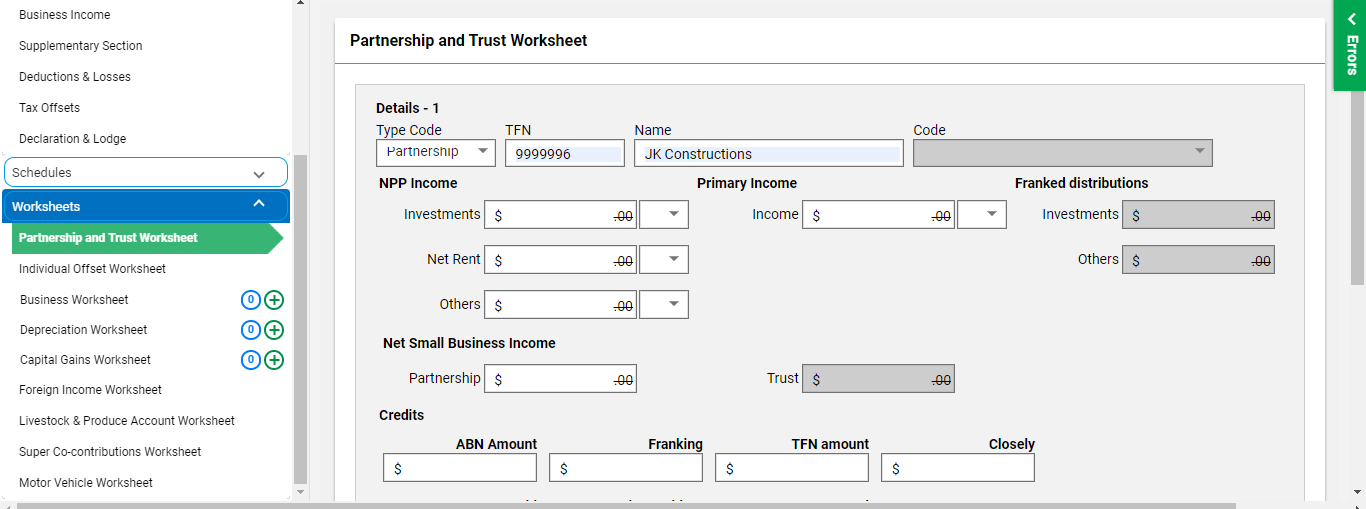
You can click “Add Partnership details” to add another Partnership or Trust income details.

Save the worksheet.
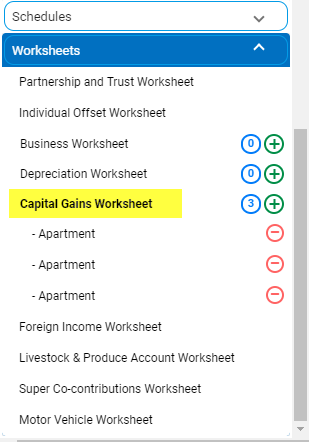
You can add Business/ Depreciation/ Capital Gains worksheet by clicking on the “Plus” icon.
Adding multiple Worksheets and Schedules
You can add multiple worksheets under a single worksheet. Similarly, a schedule can have multiple schedules in it.
You can add it just by clicking the “Plus” icon.
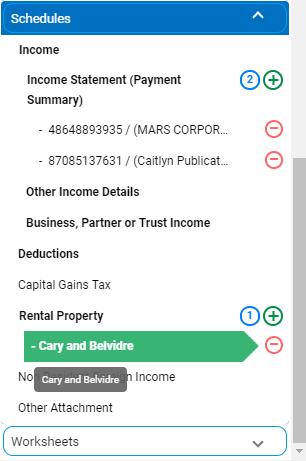
For example, under “Income Statement”, you can click on “Plus” icon to add multiple income schedule.
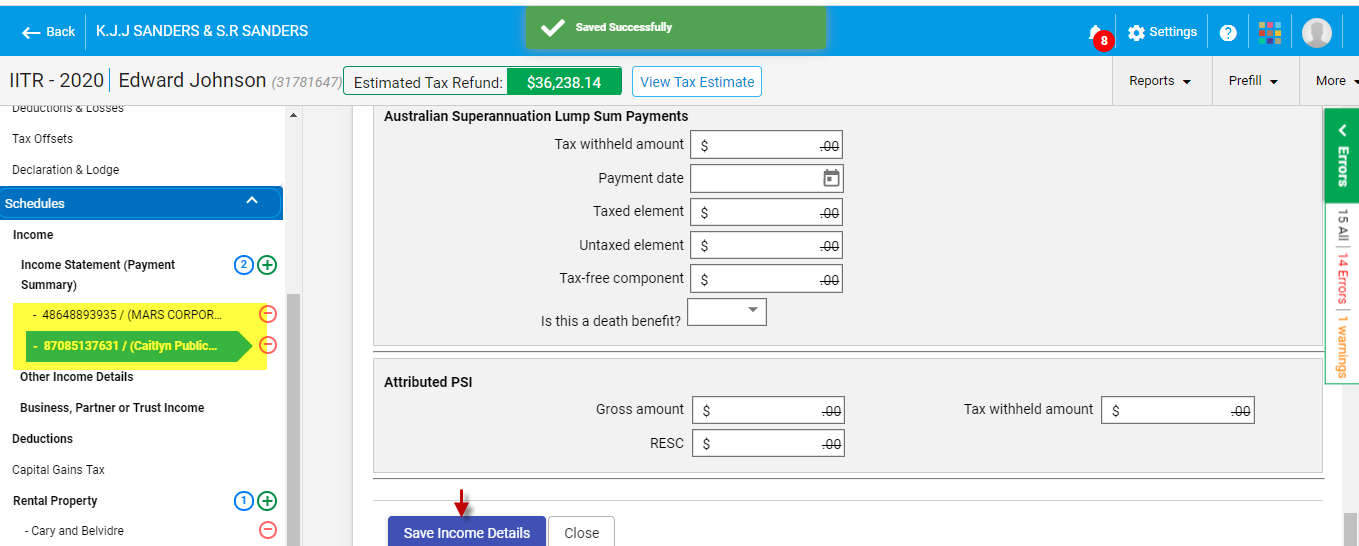
You can see that 2 income schedules are added. Any number of schedules can be added as required.
Also, in the worksheets, you can add as many worksheets as required by clicking on the “Plus” icon.
Editing the worksheet and schedule
At any point of time, you can edit the worksheet or schedules by just clicking on the schedule/ worksheet name.
The worksheet/schedule opens. You can start re-entering or editing the values and also by saving the worksheet/schedule.
Send for Signature
After you have prepared the worksheets and schedules, the data will be transferred into the appropriate sections of the main form.
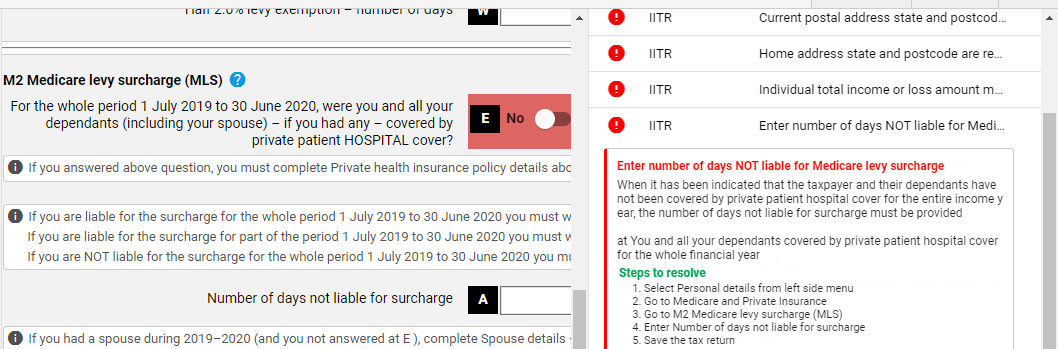
The errors can be viewed when the “Errors” button on the right is clicked.
The error message when clicked, explains the steps to resolve and the relevant field is highlighted for the user to easily identify the location to rectify the error.
After rectifying all the errors, select “Declaration and Lodge”
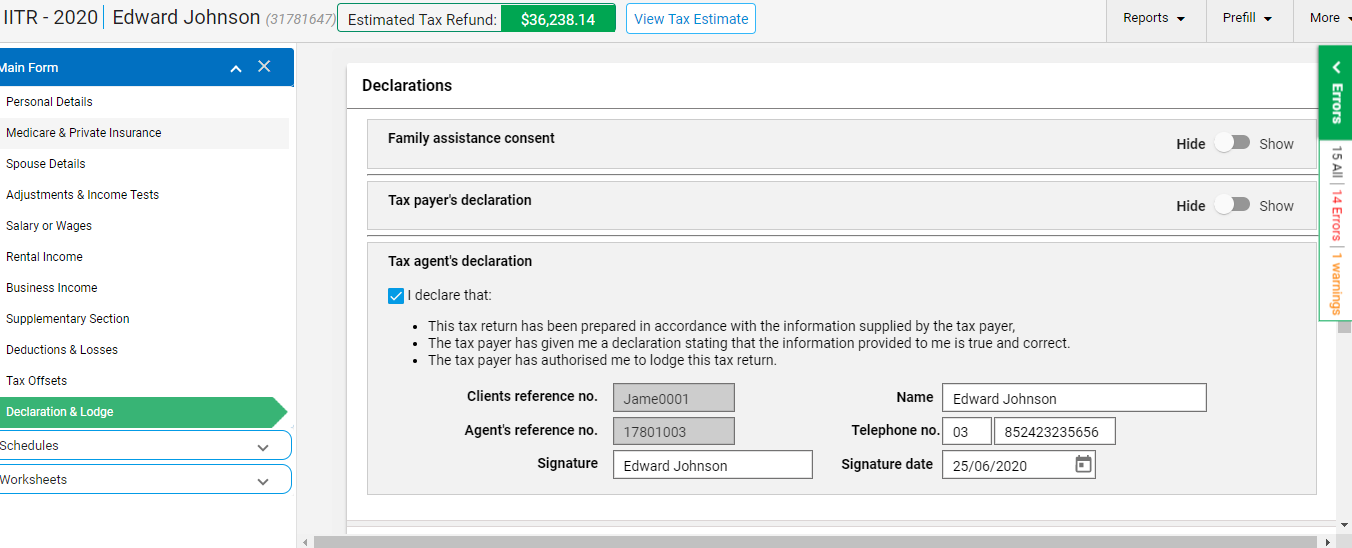
In the Save and Lodge section, you can select “Save, Validate and Send for Signature”. Click “Submit”
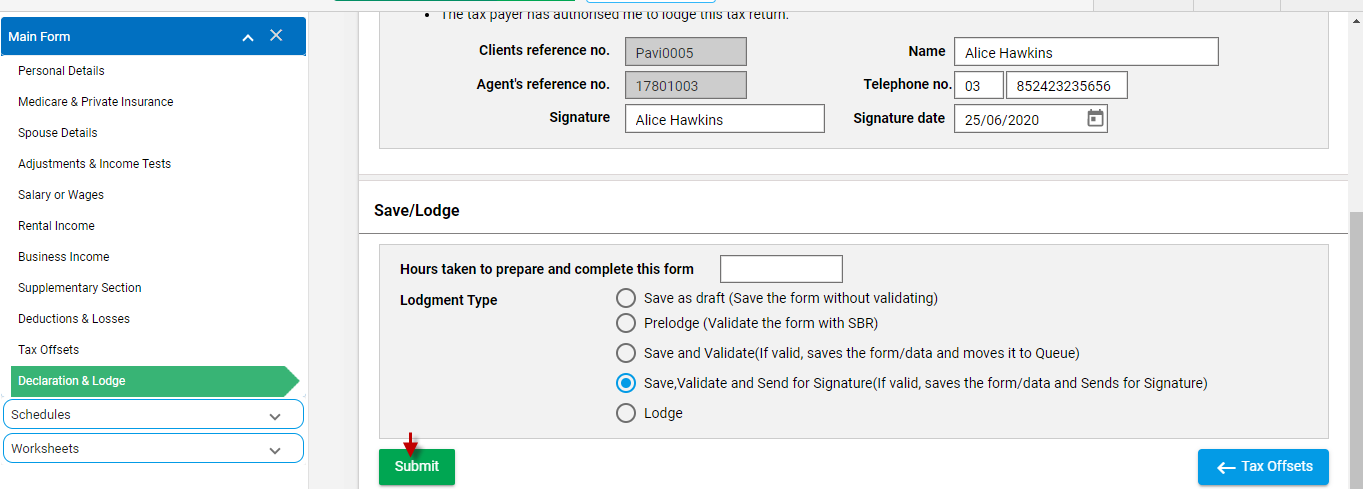
The Tax Return form will be saved and moved to the “Saved Reports” screen, where the form will be in “Valid” status.The Digital Authentication screen opens,
attached with the client’s email added under “Recipients”. You can proceed to send it for Signature.
Lodgment
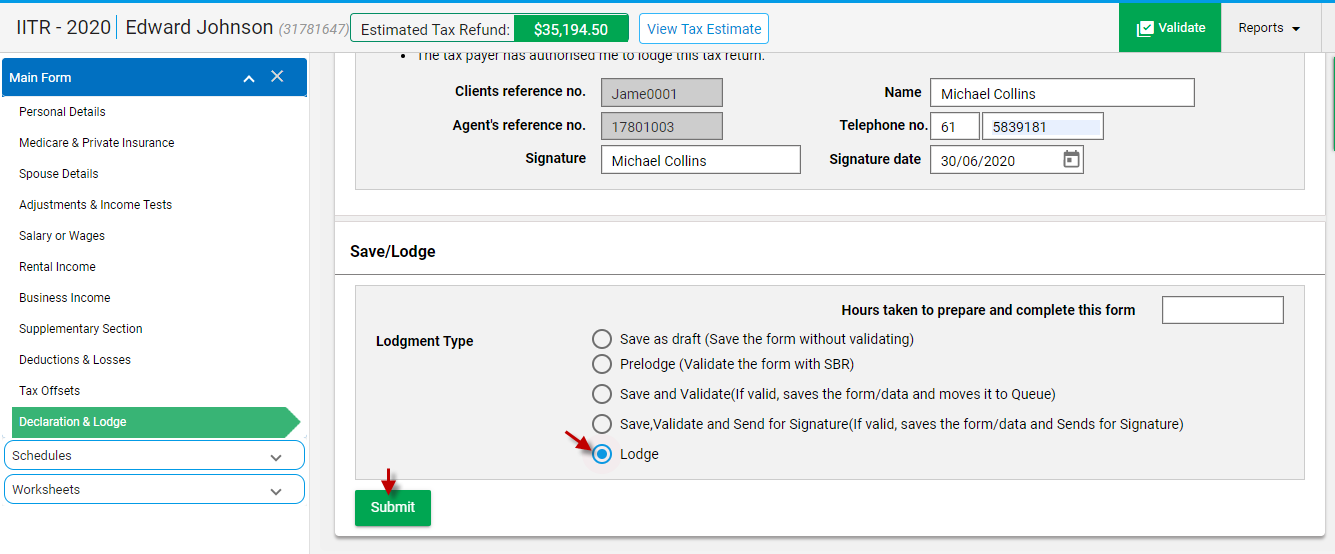
After preparing the Tax Return, you can lodge directly or lodge after sending it for Signature.
To lodge straight away, go to “Declaration & Lodge”, under “Save/Lodge” section, select “Lodge” as the lodgment type.
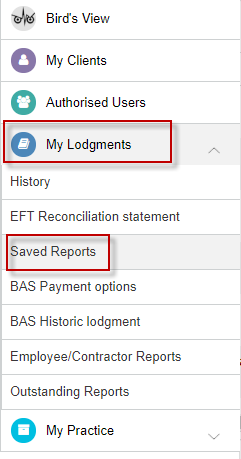
After the client has signed the document, you can also lodge via My Lodgments -> Saved Reports.
Deleting the worksheet and schedule
You can delete the worksheet or schedule by just clicking on the “Minus” icon.
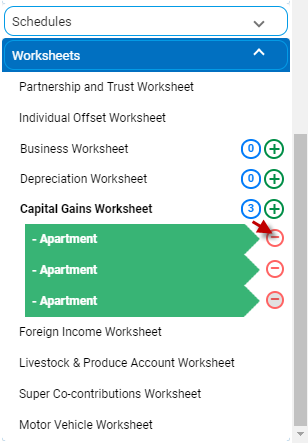
The particular worksheet which has “Apartment” will be deleted.