Jobs
There are 4 sections in Jobs
My Jobs
Based on your calendar’s schedules, jobs and tasks assigned or pre-set will be listed under My Jobs on the main Dashboard.
All jobs created and scheduled to be completed for the day with the tab to access to Overdue or Upcoming Jobs scheduled or assigned to the user with option to open the job for editing, view or update status of the job.
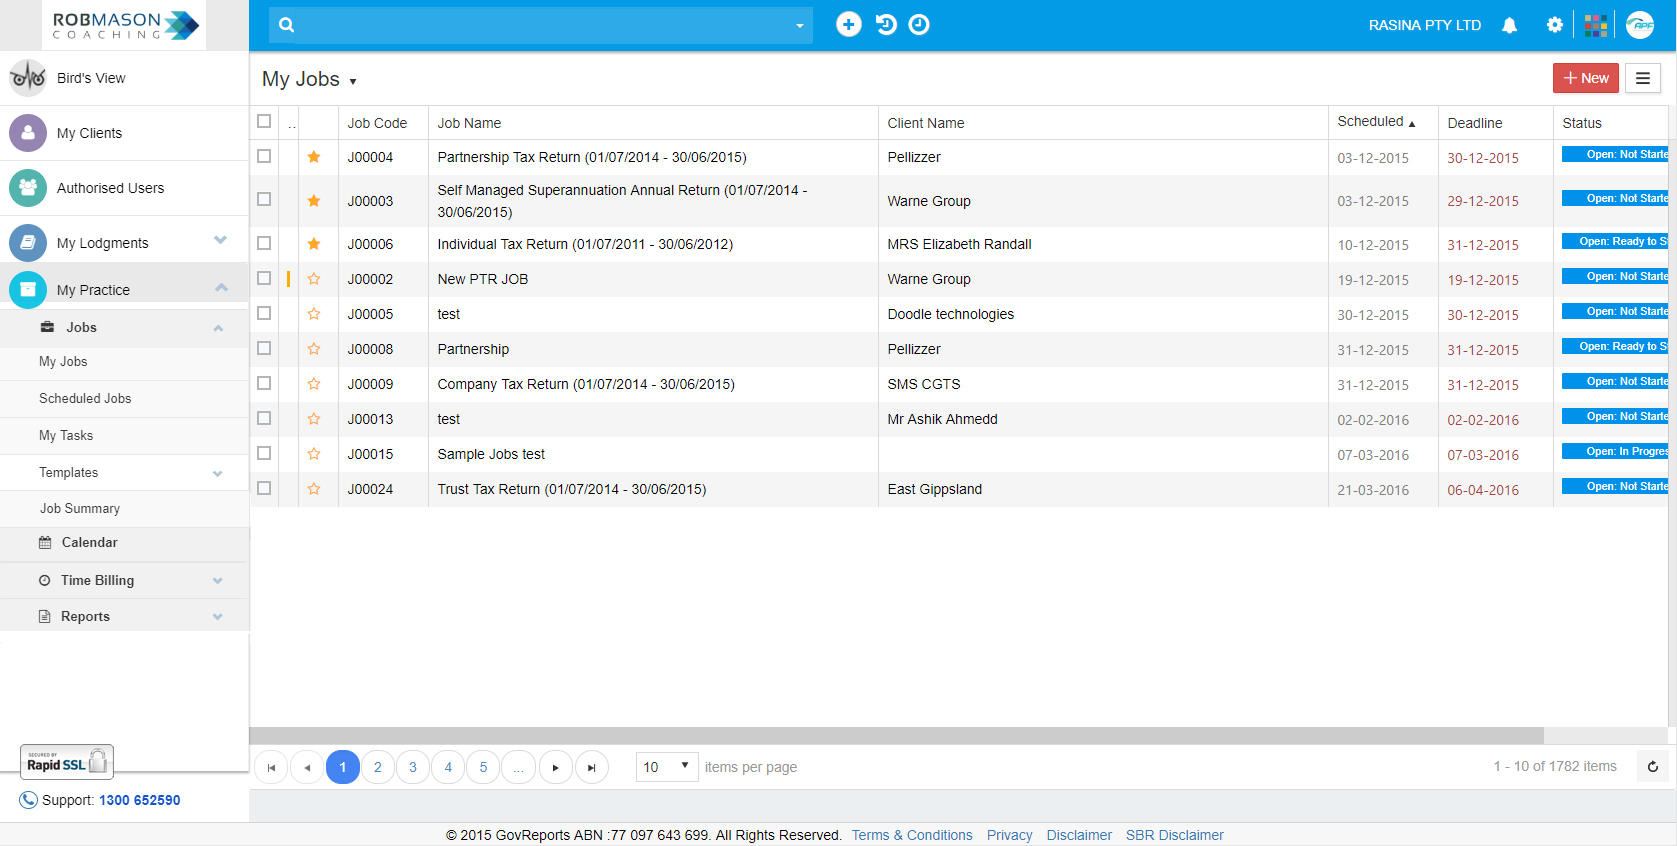
You can click to expand and view the details of the job, make changes and update the status of the job if require. To open the job or expand the job on display, click on the left drop down arrow.
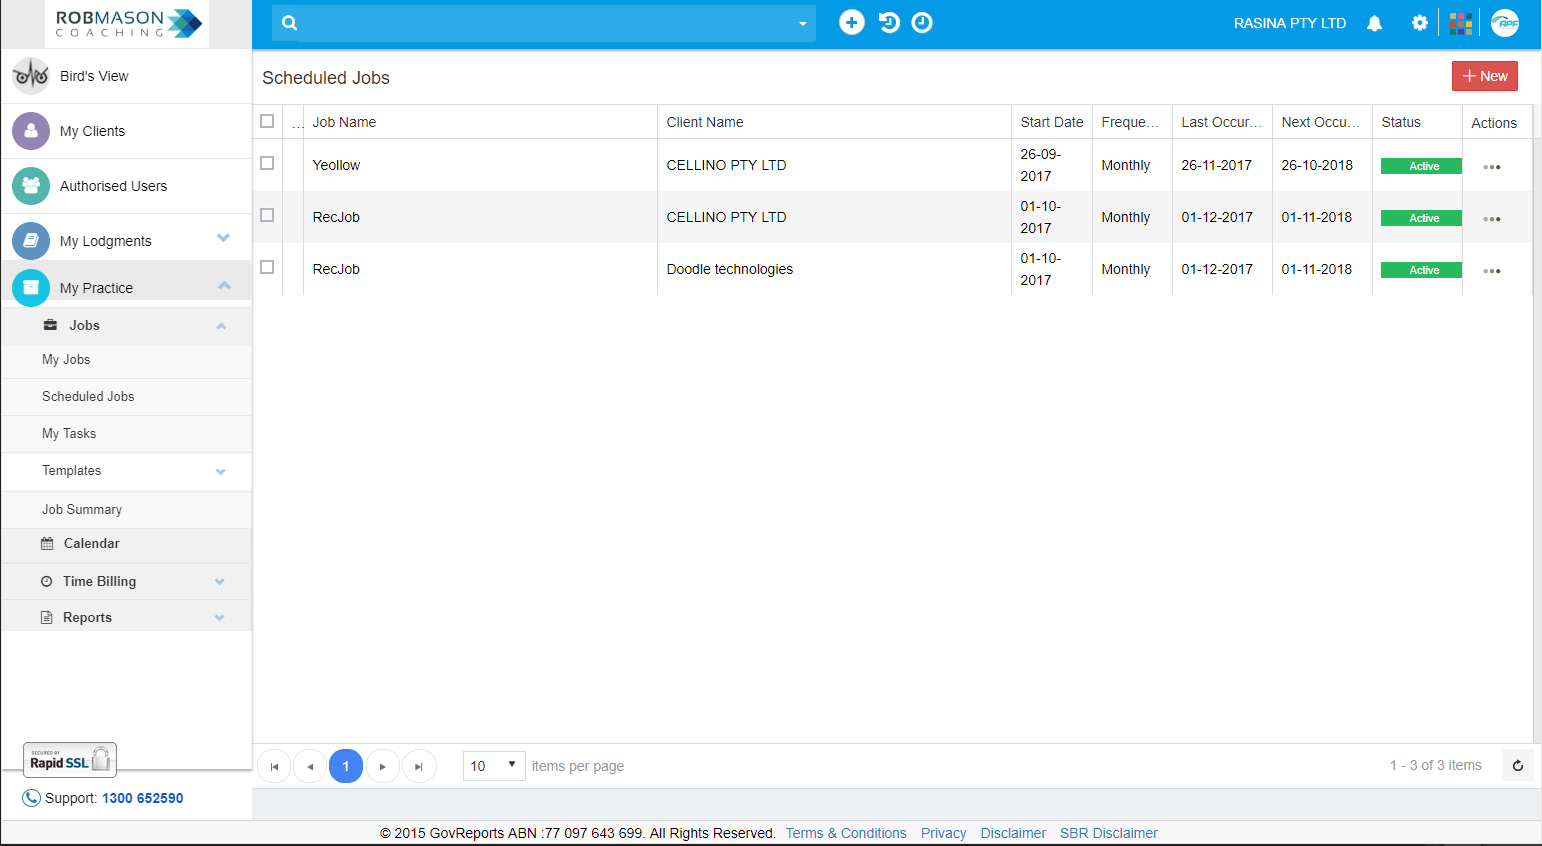
Scheduled Jobs
listing of recurring jobs as scheduled on your calendar and to do list and its work in progress status . You can also add a new recurring job and allocate to an authorised user from here.
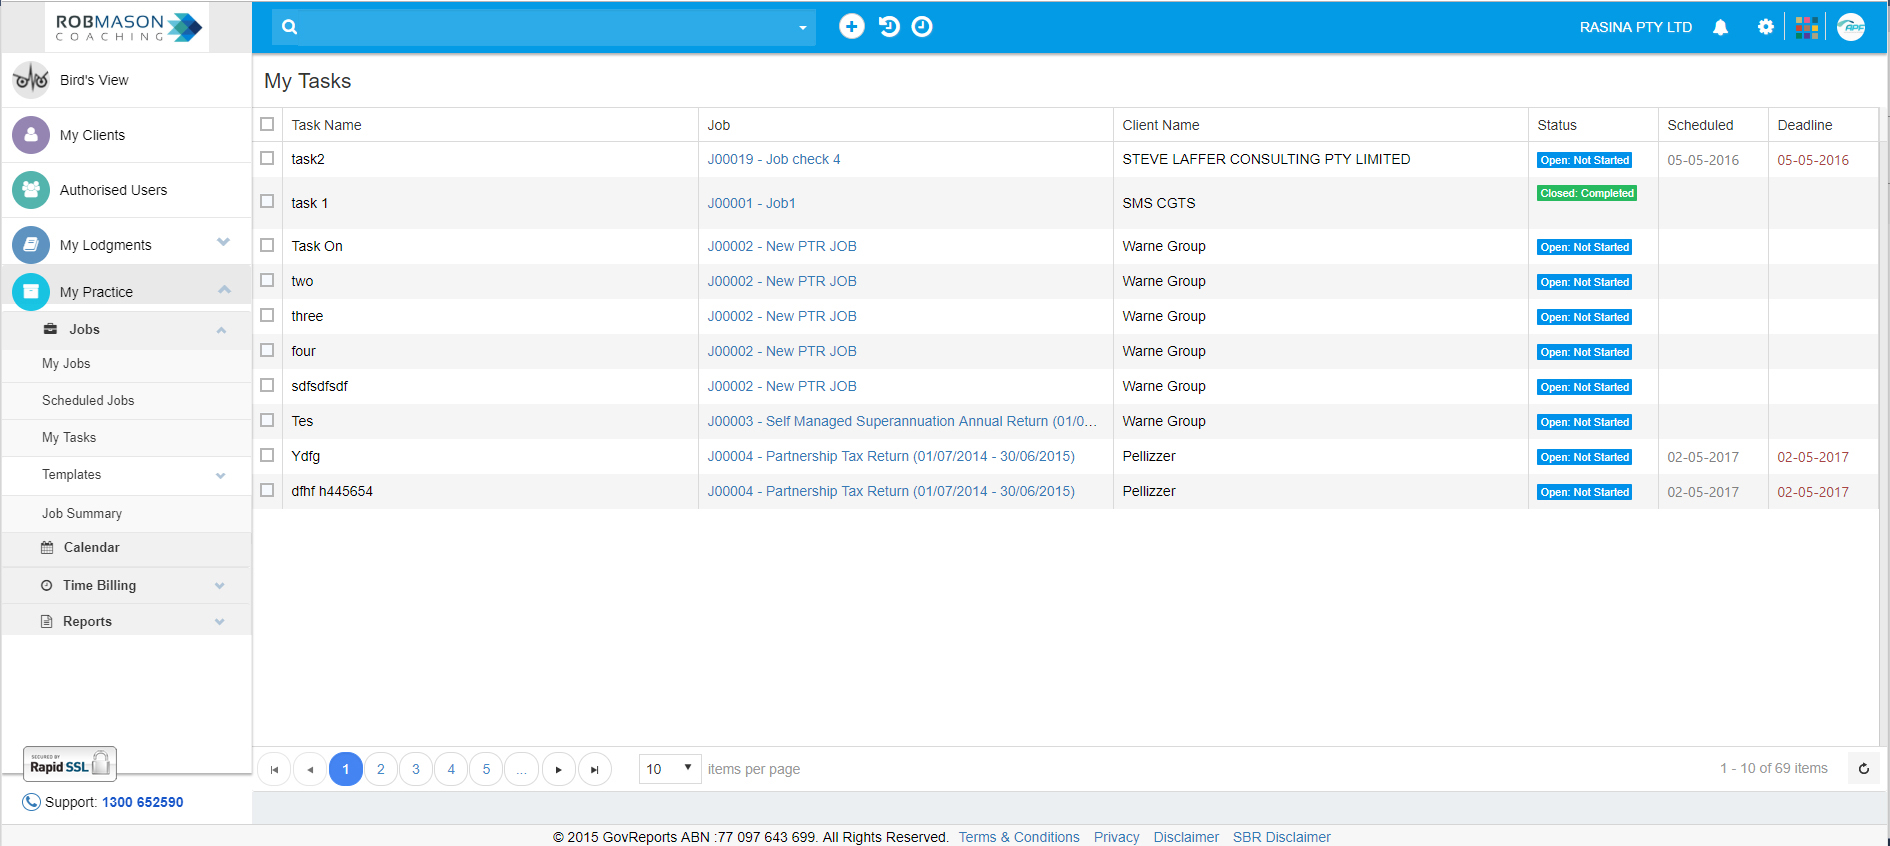
 My Tasks
All the tasks that have been created and or assigned to you to be completed within each of the jobs.
Templates
Default Task Template
OPM has some default task templates that you can select and apply to the jobs you work on
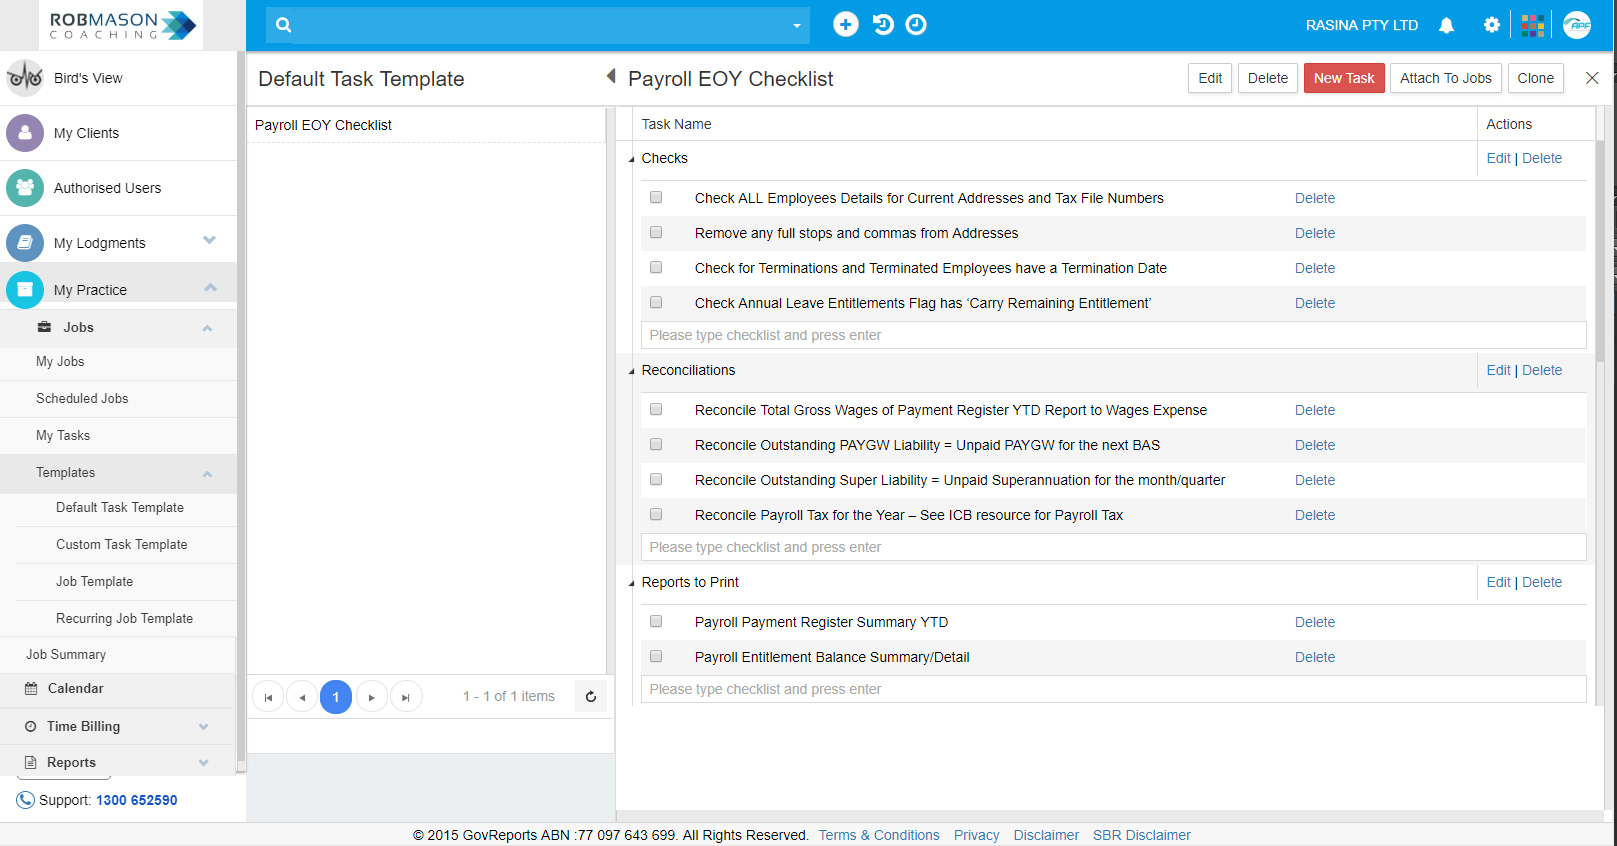
Alternative if you do not wish to use the default task templates, you can create your own customised task templates and saved to your account for later use
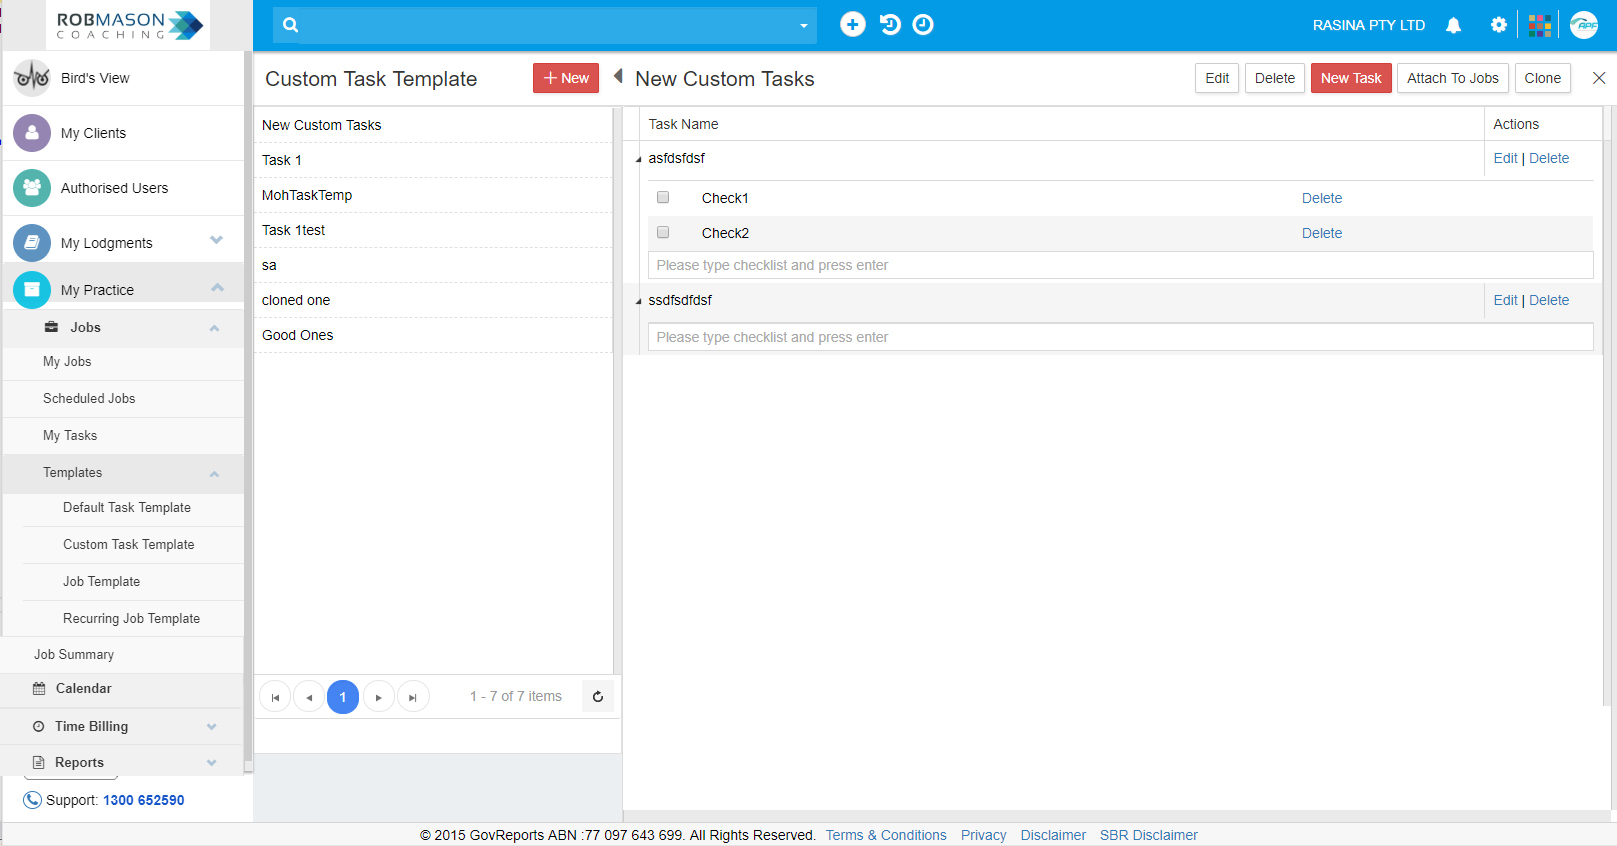
Custom Task Template
This template help the user to make a form template that are based on user requirement and it will easier to manage and easy to process the task.
 Job Template
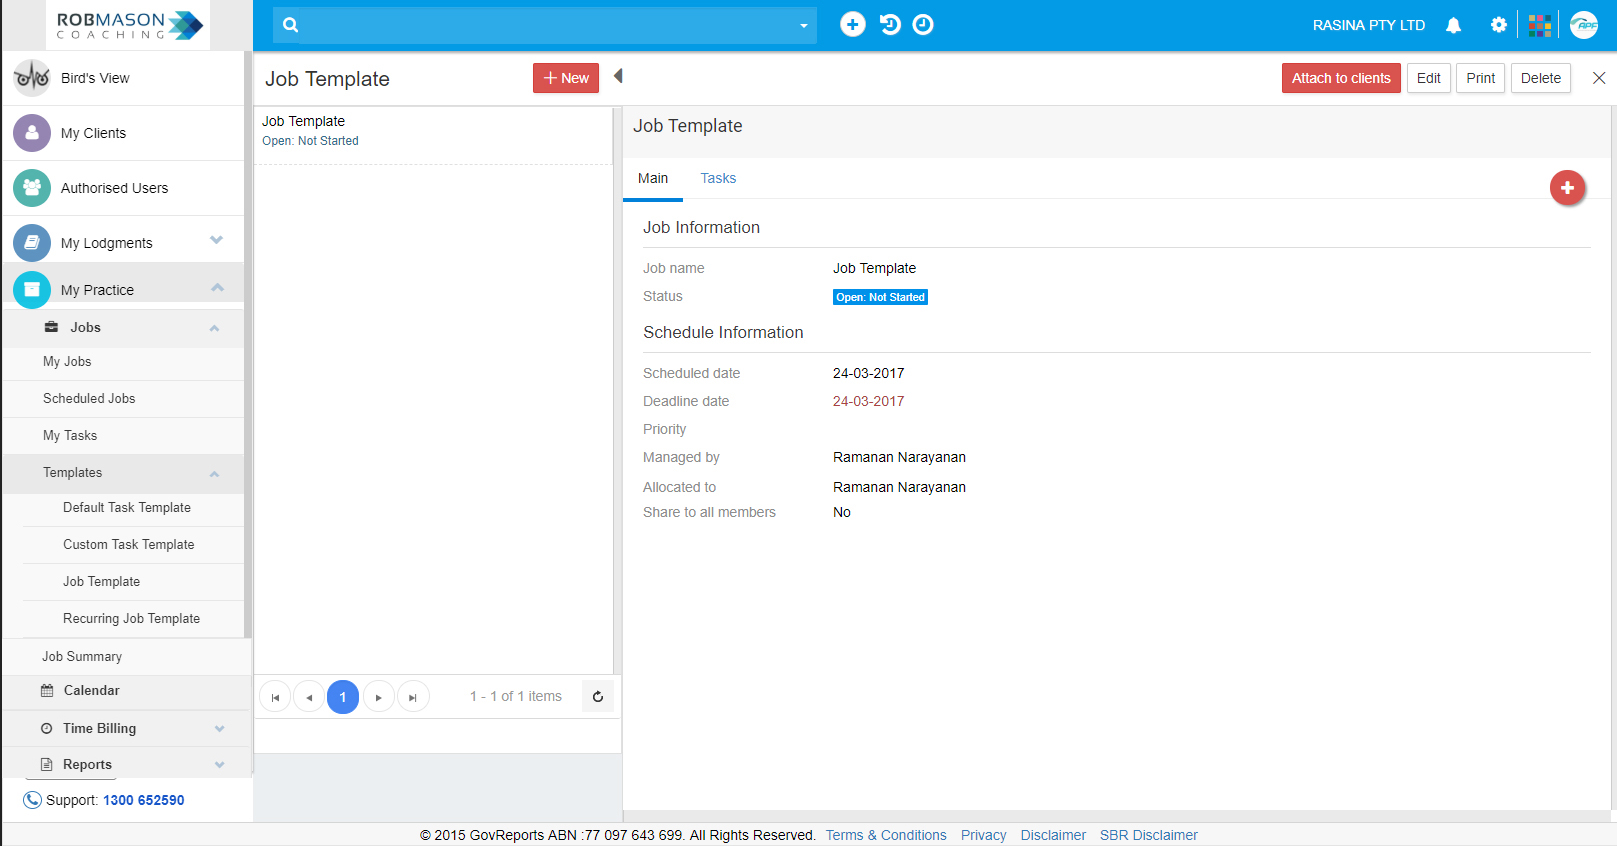
Job template can be created to be used regularly as a guide to complete the job as per your standard process or procedure
 Recurring Job Template
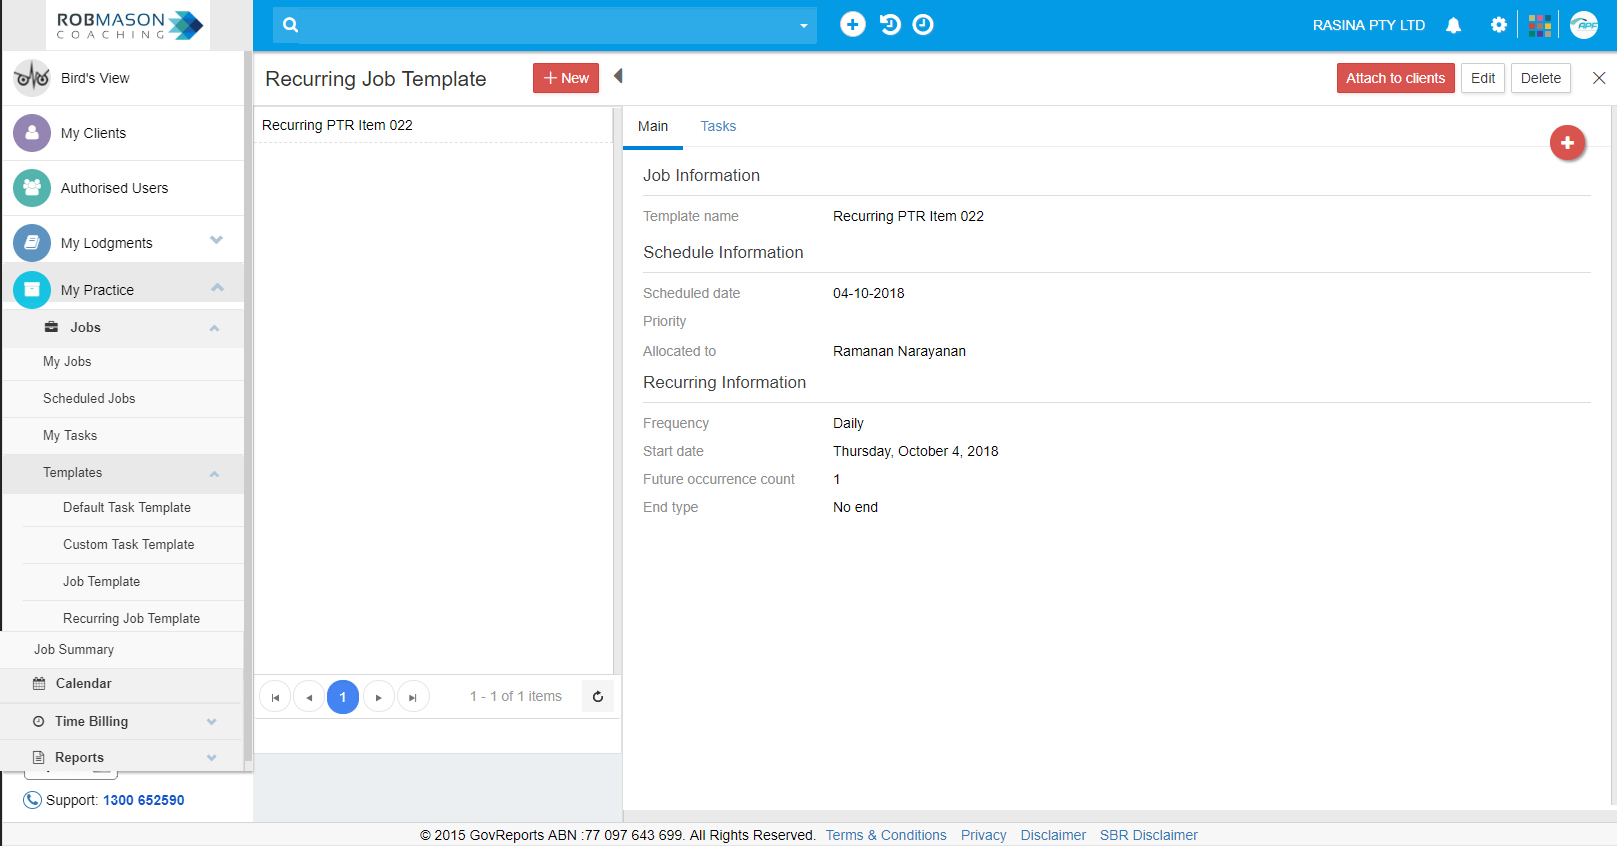
Suitable for those jobs required to be done frequently for example daily, weekly, monthly, half yearly... etc. By setting up recurring job template, for every new client or staff, the template can be used to allocate or set up work to be completed as according to the standard and procedure set up in the template.
Job Summary
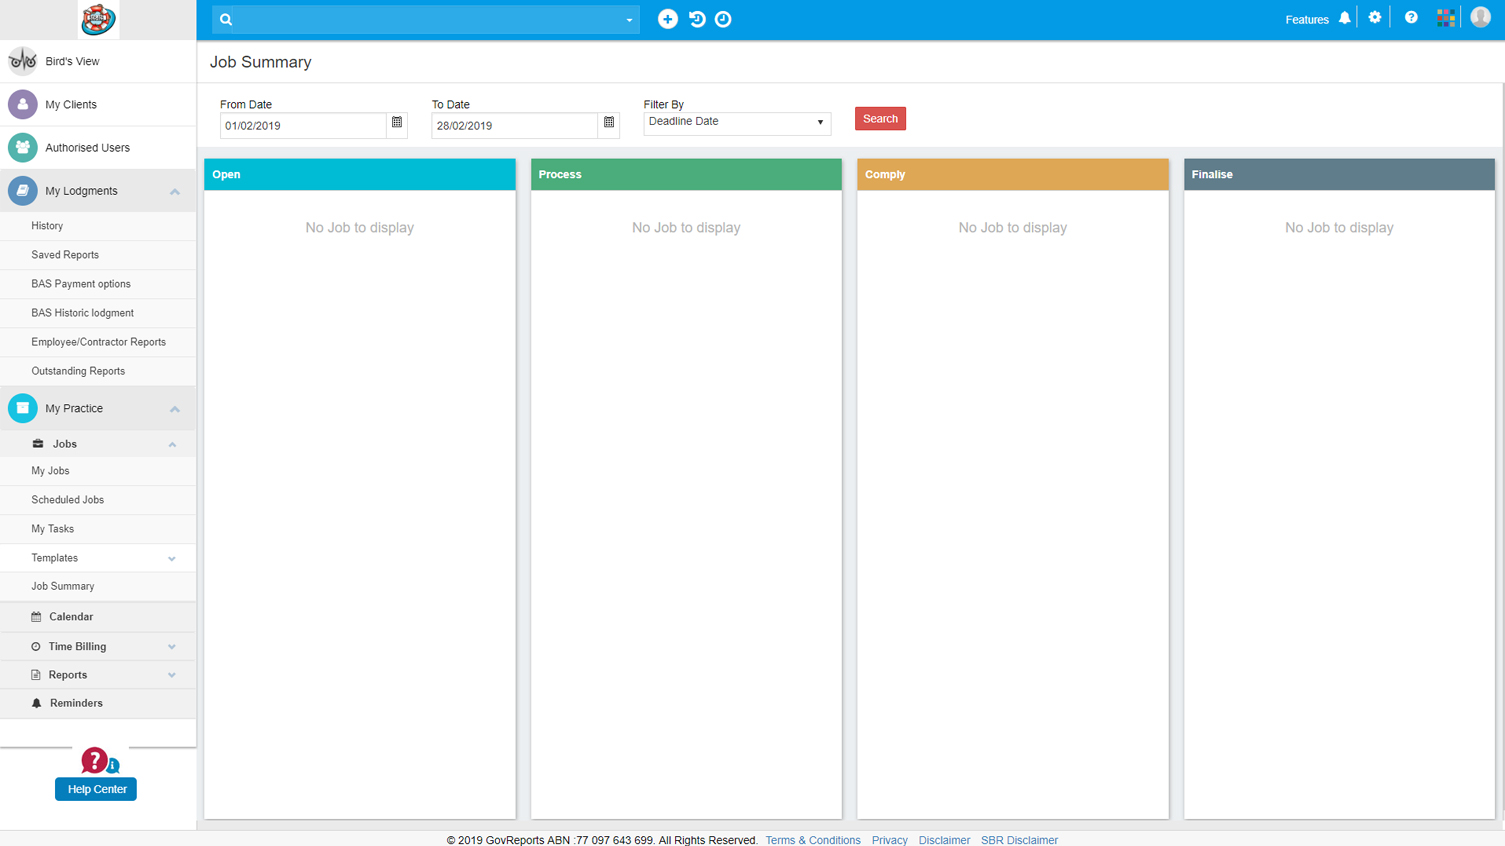
The Practice’s Dashboard displays the jobs and its statuses in 4 categories as a summary. Each of the job will be filtered by its scheduled date and can be searched or extracted based on the period of which it is scheduled on and or its deadline.
To access and view new job summary window
Go to My Practice => Jobs => Job Summary
Calendar
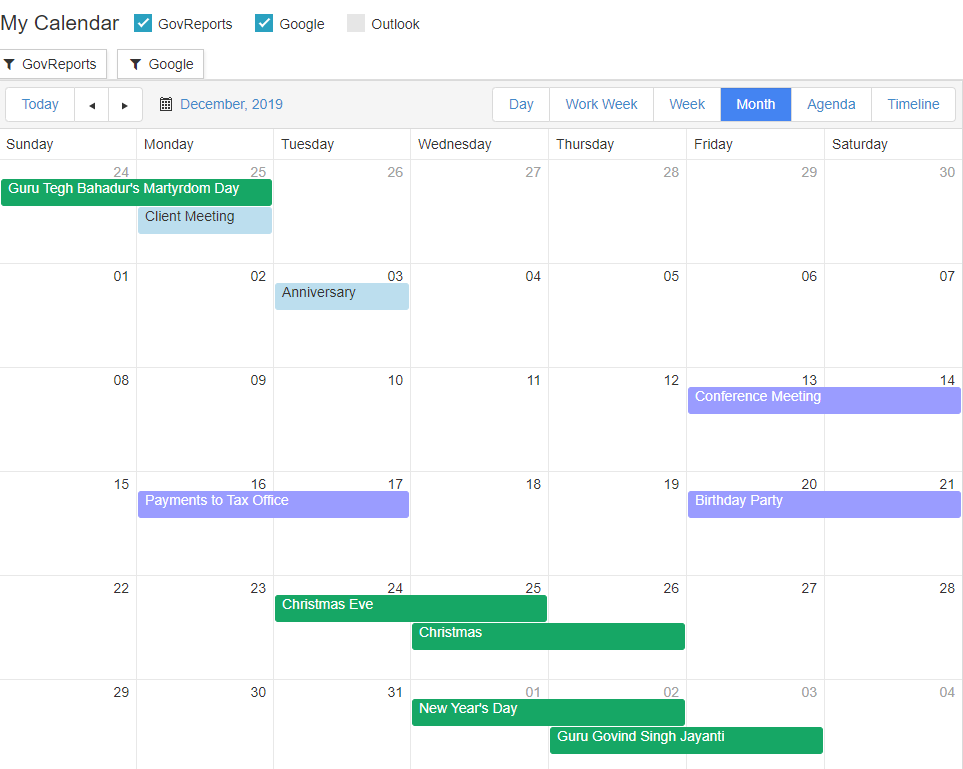
If you have set up your account with staff, clients, jobs and recurring jobs and all your schedules. My Calendar will enable you to easily keep track of all the jobs, tasks and clients assessment or created by or for you.
You can view all jobs/events in one place either on the day, week, month or year depending on your selection.
Google and Outlook Calendar integration with GovReports enables you to oversee your overall work plan, client meetings and schedules as well as your personal events – satisfying the requirement of a total picture of your day to day’s activities on one screen.
Below are the steps for integrating Google/Outlook calendar with GovReports.
I.Enable your Google/Outlook calendar for integrating with your GovReports account
There are 2 ways to enable the Google/Outlook calendar either from Settings or from dashboard.
Method 1:
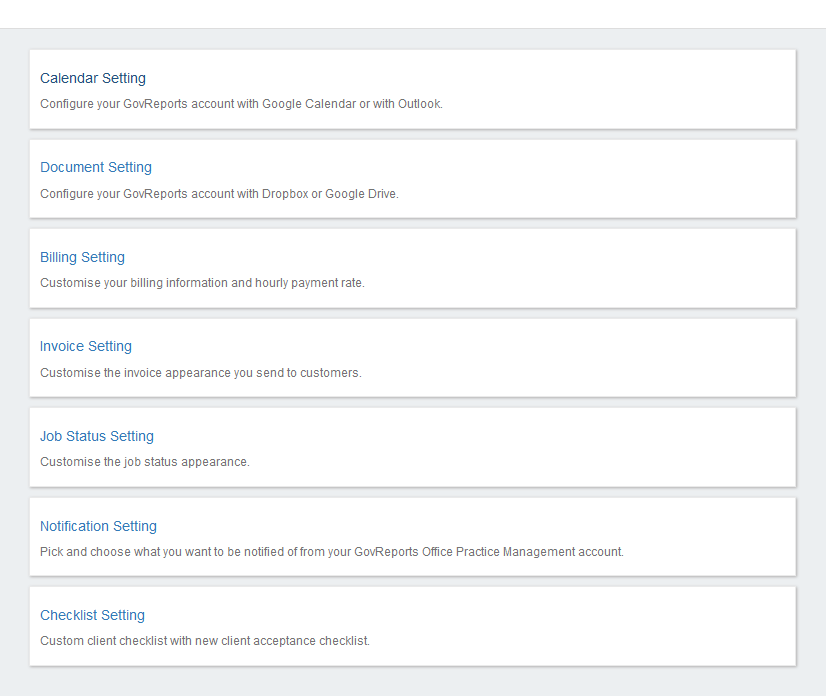
1. After logging into your account, on the top right corner, click on Settings -> Practice Settings

2. Select “Calendar Setting”
3. In Calendar Setting page, you will see the “Enable” option for Google calendar and Outlook calendar
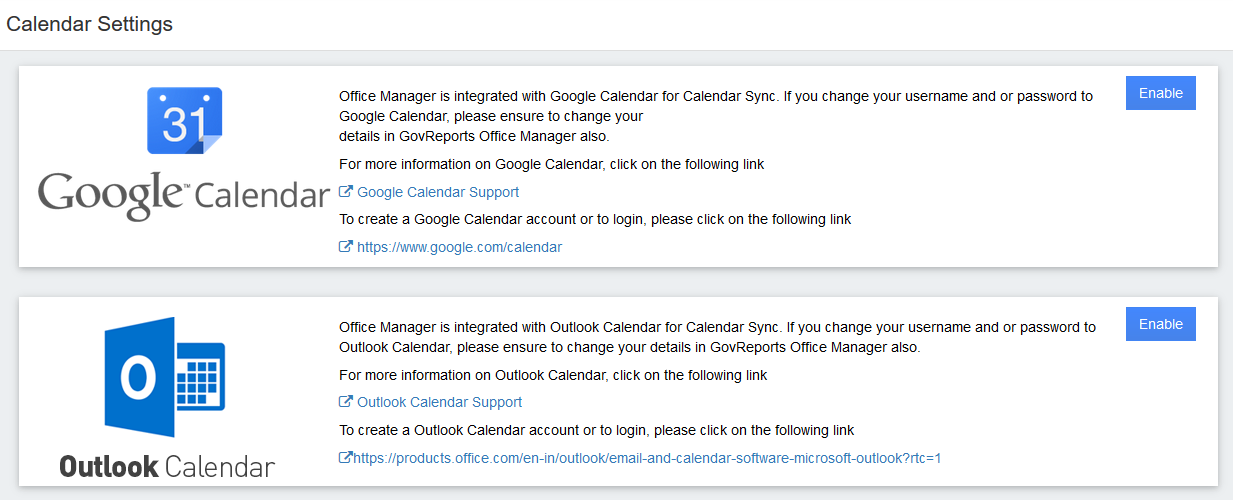
4. For instance, let’s select “Enable” next to Outlook calendar to enable the Outlook calendar integration with GovReports
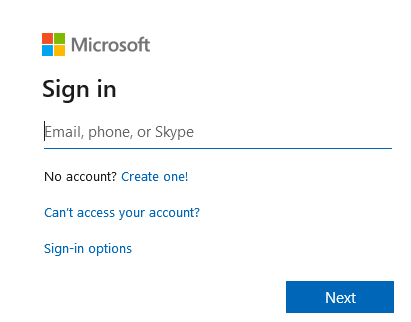
5. The Microsoft sign in screen appears where you can enter your email address and password to connect

6. Click on “Yes” to enable the permission to access the calendar

7. The calendar will be successfully integrated. When you come back to GovReports Calendar settings page, you can see that the “Enable” option has been changed to “Disable”.

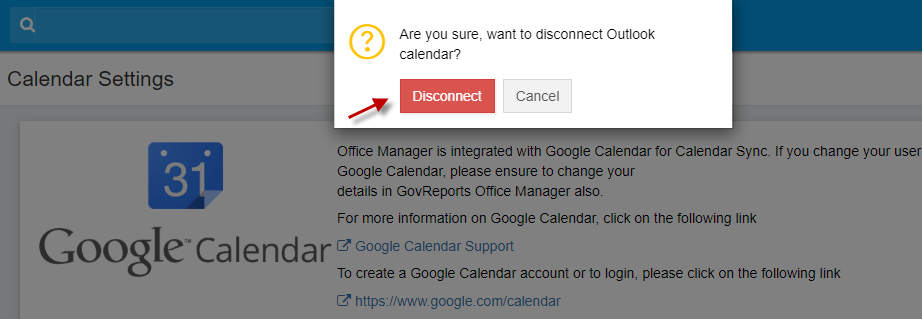
8. You can click on “Disable” button whenever you wish to cancel the calendar integration for Outlook
 Method 2:
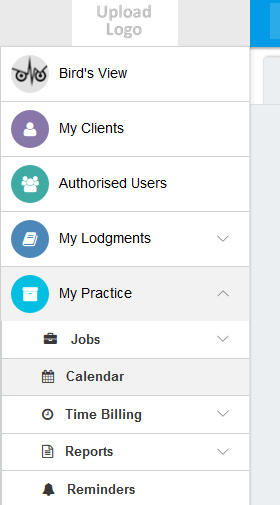
1. After logging into your account, you will see the dashboard
2. On the left side menubar, select My Practice -> Calendar
3. You will see GovReports calendar with options to integrate “Google” or “Outlook” calendar on top
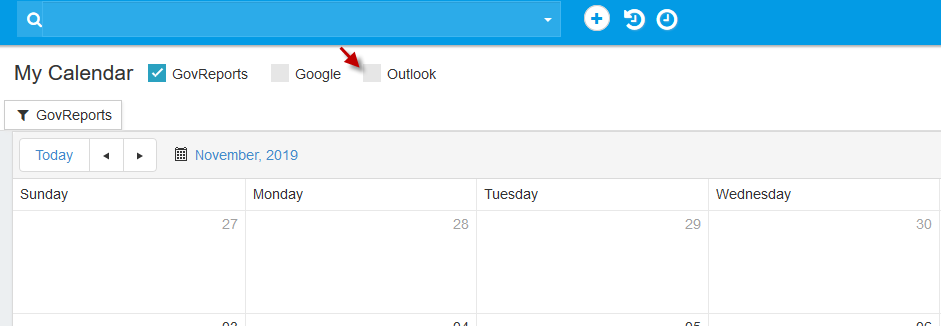
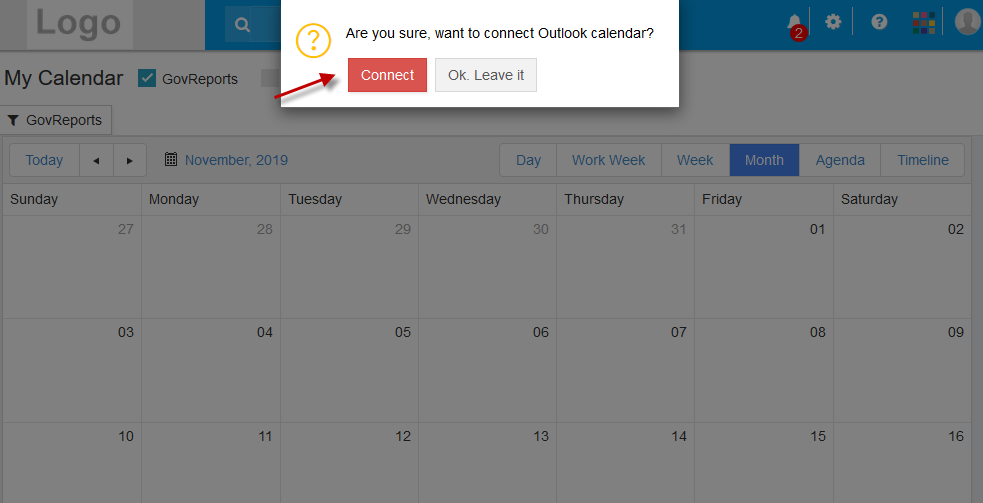
4. Tick on Google or Outlook calendar. For instance, tick the checkbox on Outlook calendar. A pop-up appears asking a confirmation to connect. Click on “Connect”
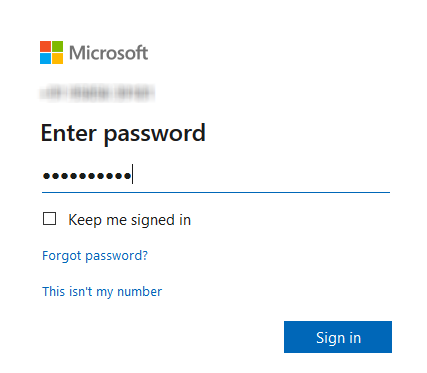
5. The Microsoft sign in screen appears where you can enter your email address and password to connect

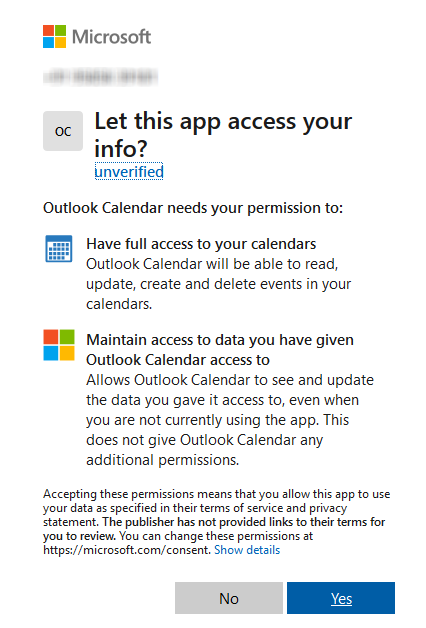
6. Click on “Yes” to enable the permission to access the calendar
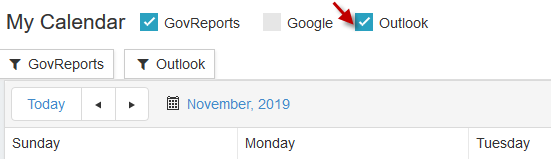
7. The calendar will be successfully integrated. You will see a tick mark next to “Outlook”
Please note that you can have both Google and Outlook calendars enabled at a time. But when you create events in GovReports, you can synchronize only to either Google or Outlook. This is because integration is available only between GovReports-Google calendars and GovReports-Outlook calendars. But there is no integration between Google-Outlook calendars.
II.Add or Edit Events from GovReports calendar or Outlook:
1. In GovReports calendar, you can add or edit events and that will be synchronized and updated to Outlook or Google calendar.
2. Also if you add or edit events in Outlook or Google calendar, it will be updated to GovReports calendar
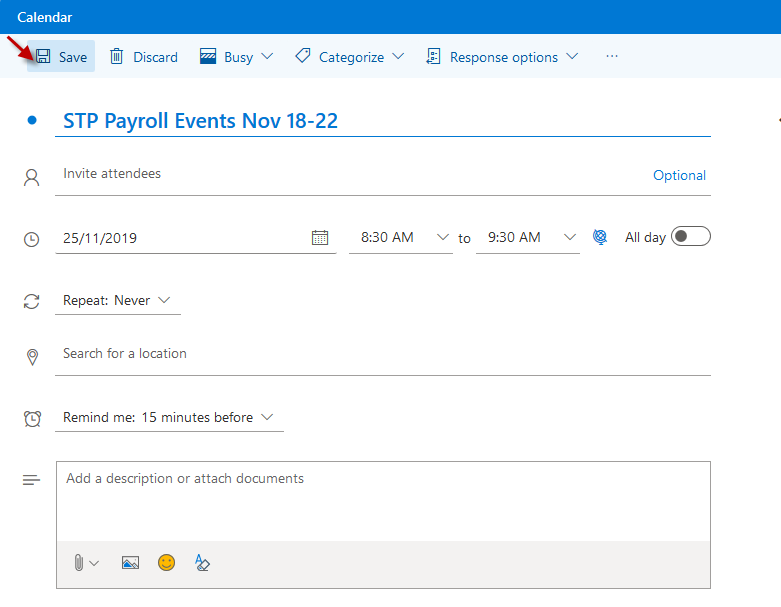
3. For instance, to add an event in GovReports calendar, double click on the date. The Event pop-up window opens.
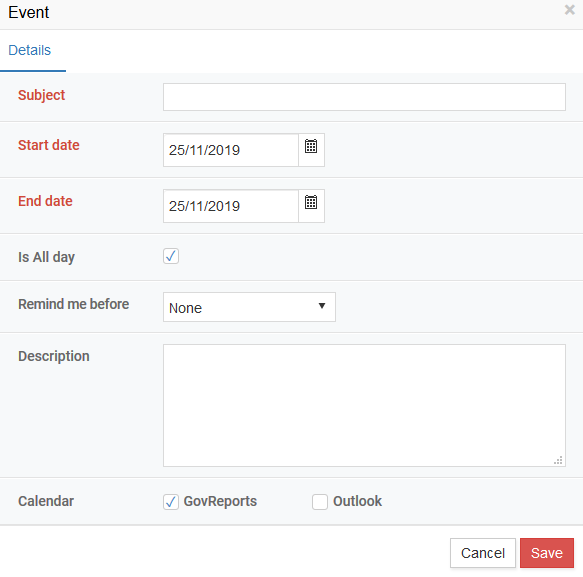
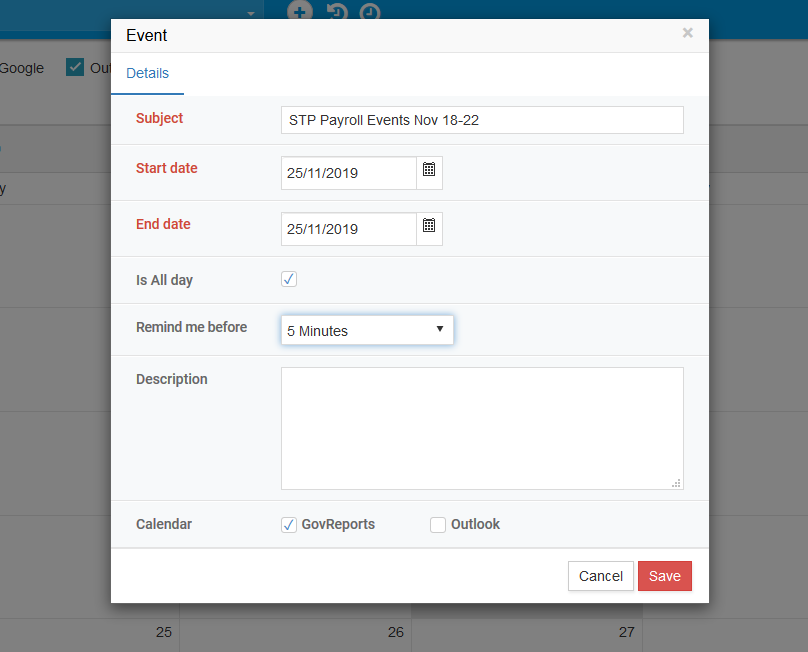
4. You can enter the subject, start and end date of the event and other details. By default the event you add will be in GovReports.
5. If you want this event to be also synchronized to Outlook calendar, you can tick the checkbox of Outlook in the Calendar section
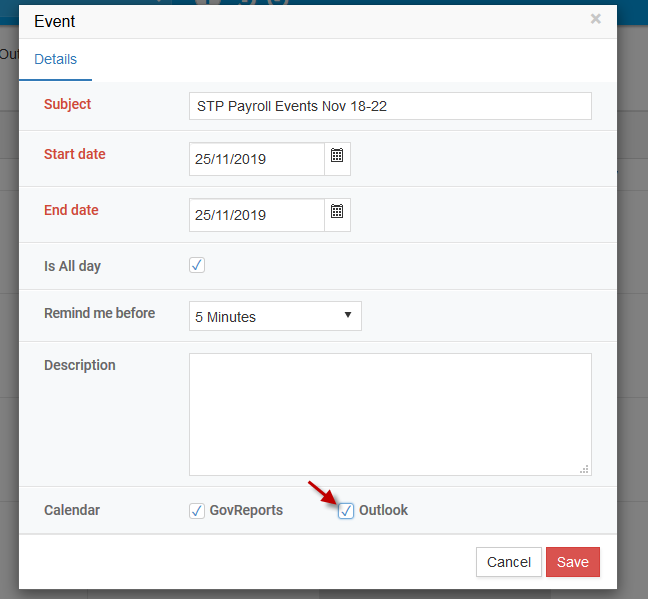
6. Click on “Save” to save the event.
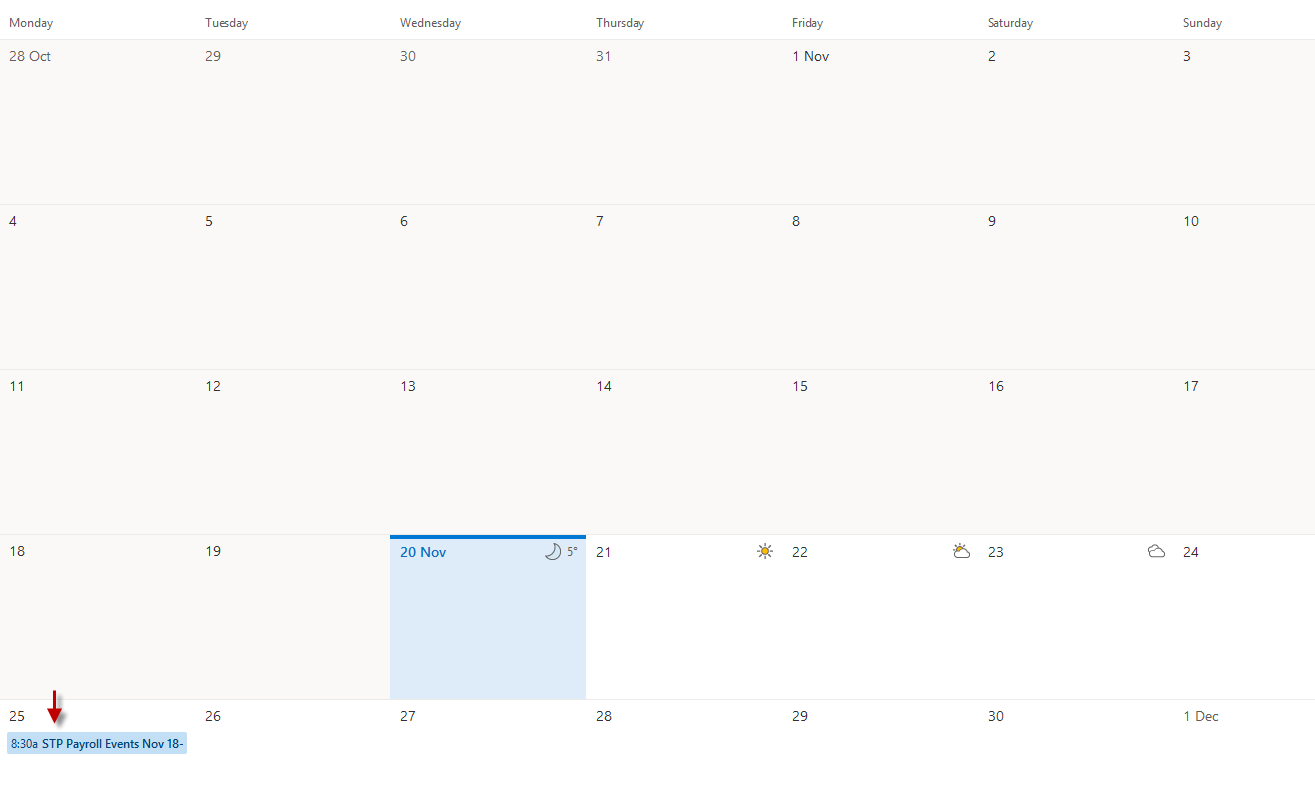
7. You can see that the event has been added to the calendar
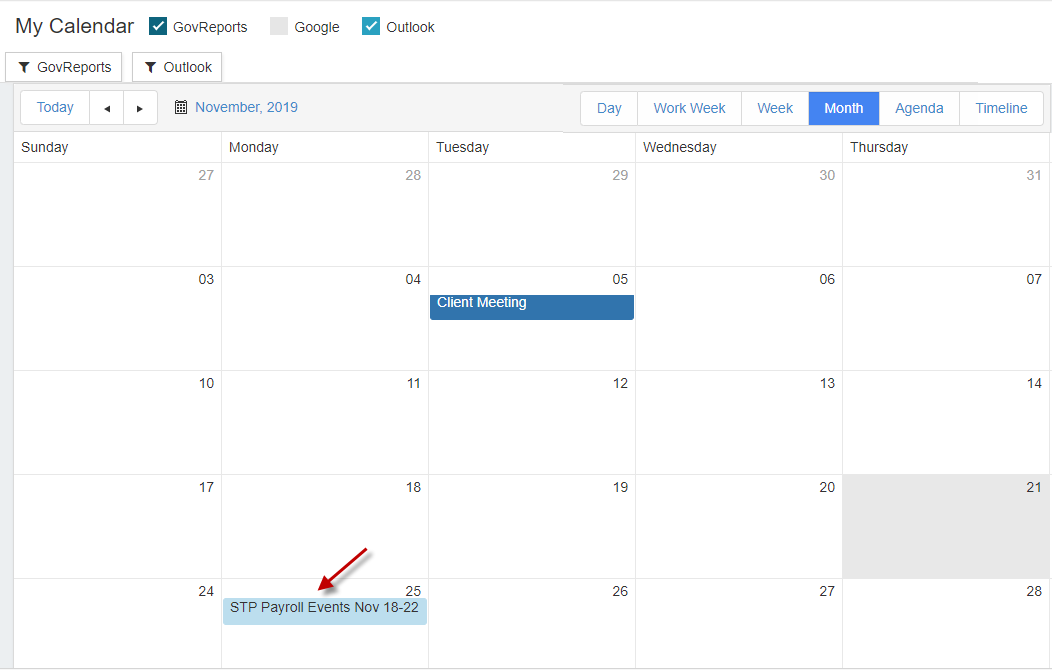
8. You can also see that the event has been added to Outlook calendar as well.
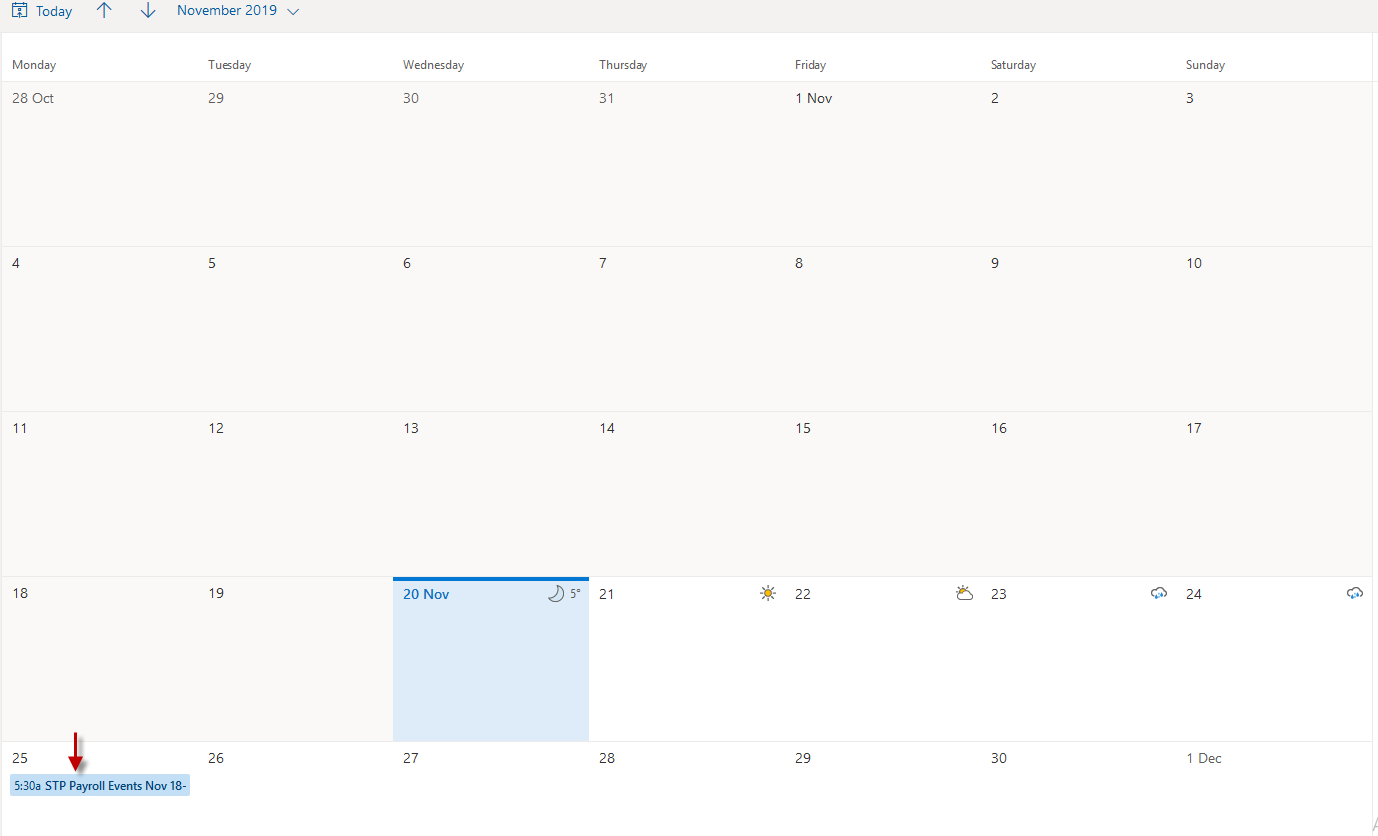
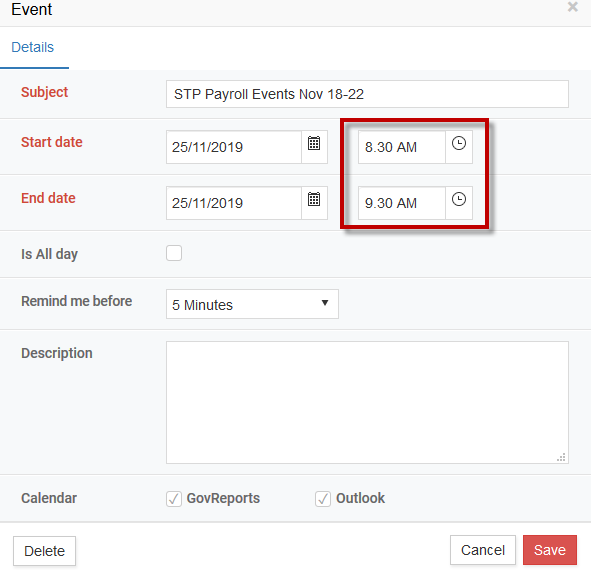
9. You can also edit an event in either GovReports or Outlook calendar and that will be updated in the other calendar. To edit the event, double click on the event
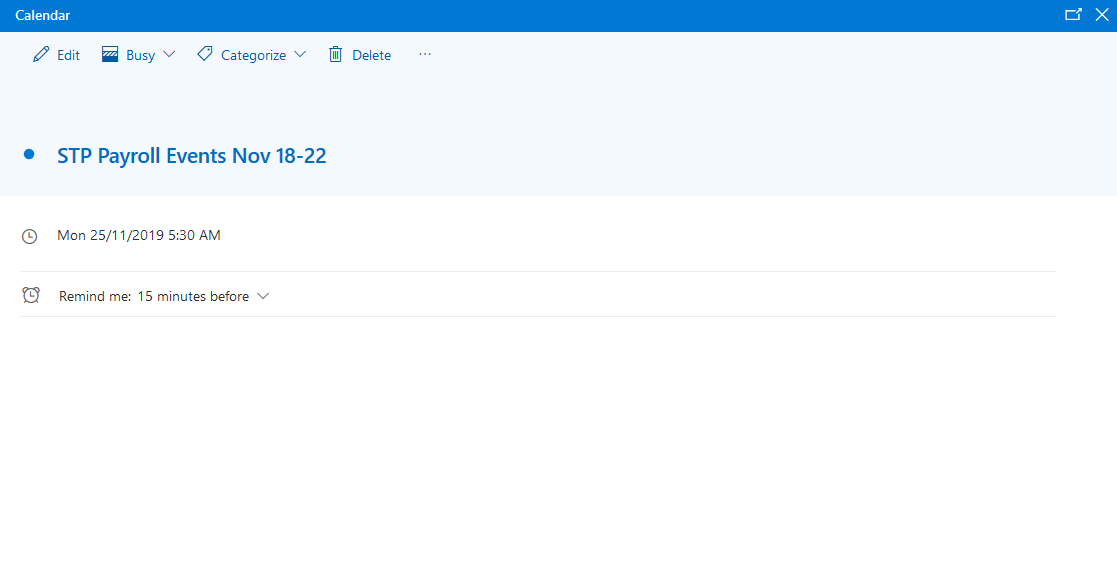
10. Click on “Edit”

11. The event details screen opens.
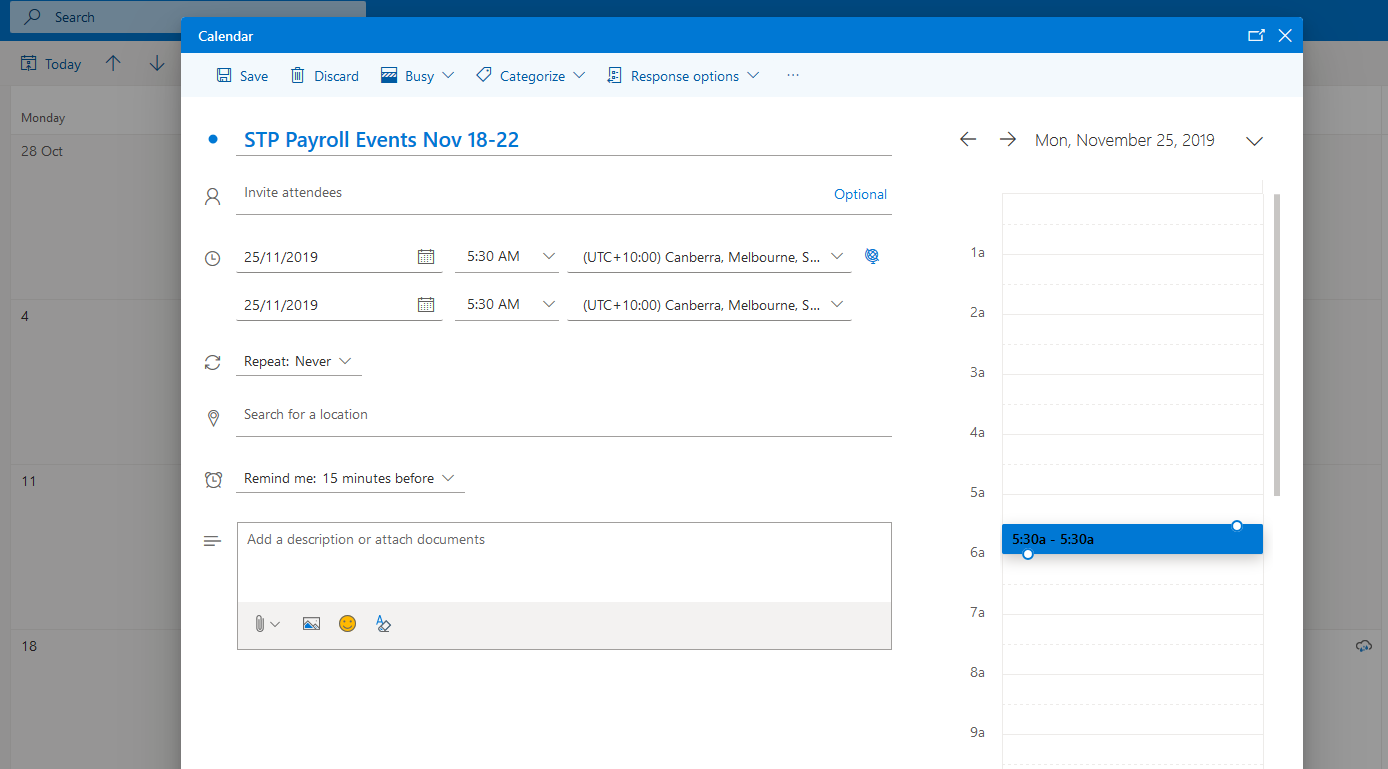
12. For instance, edit the start and end time
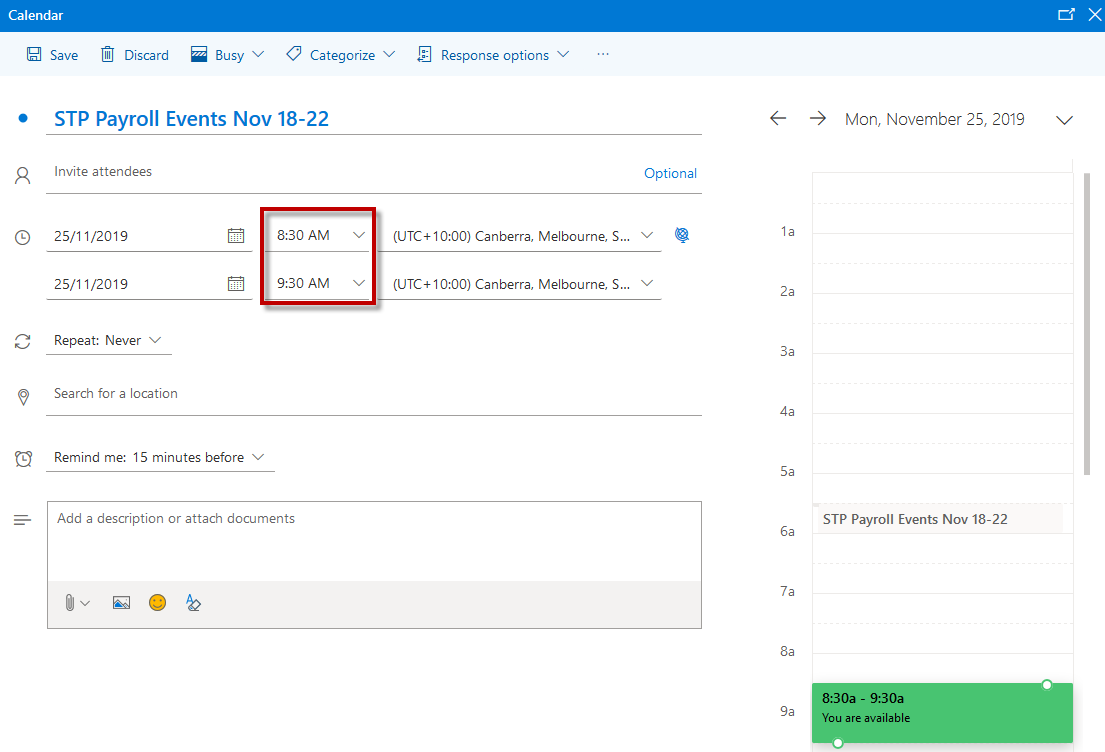
13. After making the required changes, click on “Save”.
14. The Outlook calendar will have updated time in the event.
15. When you click on GovReports calendar page or refresh that page, you can see the corresponding change in Outlook calendar updated here as well. Double click on the event to check for the changes.
 Events, once deleted in GovReports will not be synchronized to Google/Outlook calendar
Time Billing
Events, once deleted in GovReports will not be synchronized to Google/Outlook calendar
Time Billing
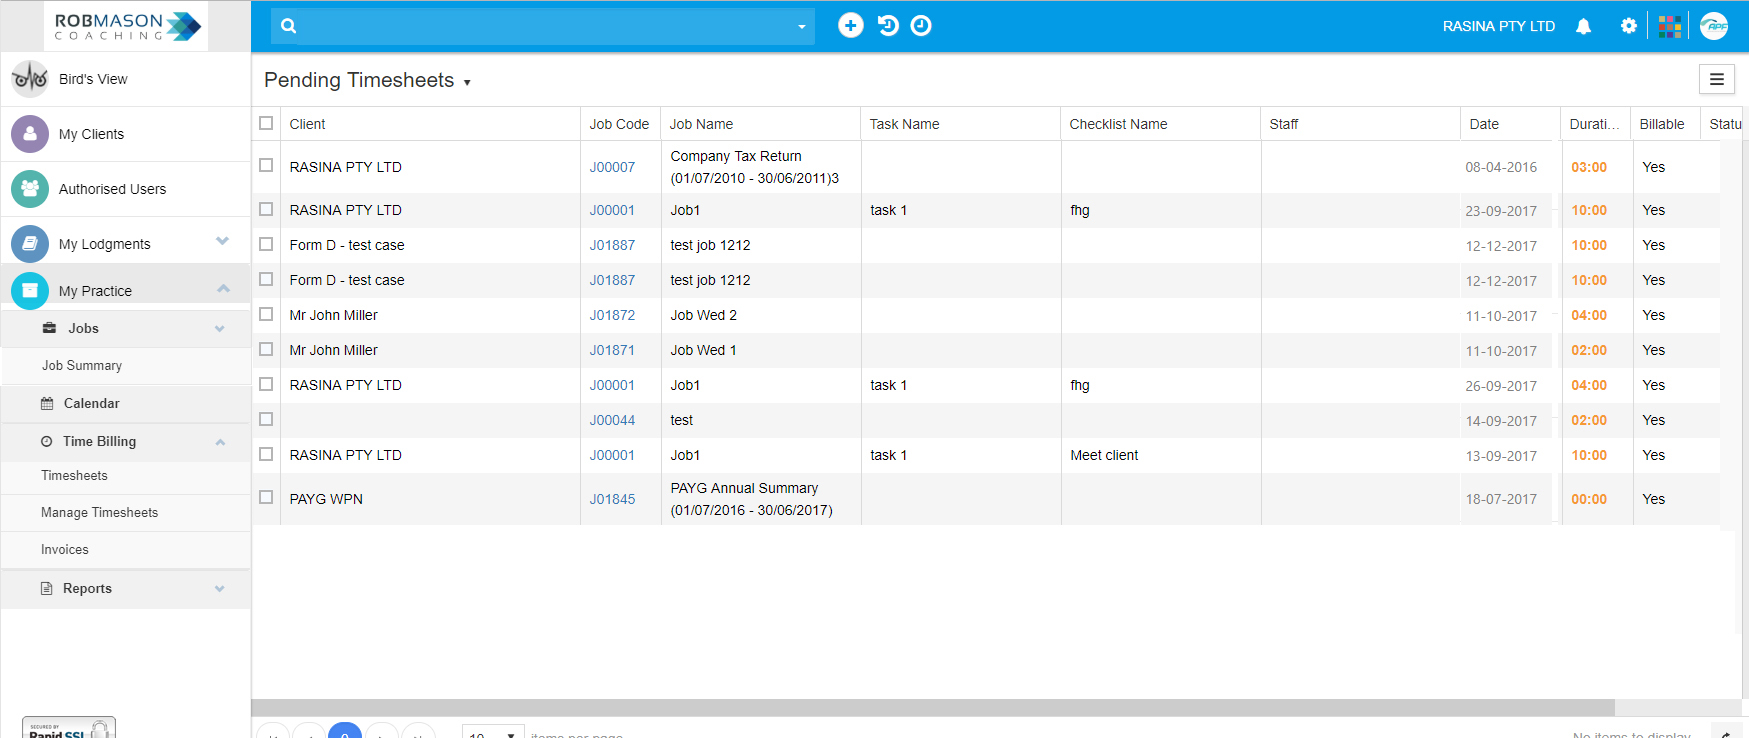
Time Sheets
Tracking the time that an authorised user spends to complete a job, task or work on the client. To start the clock, click +New or from the dashboard with Quick Add + or Auto Timer
 Manage Time Sheets
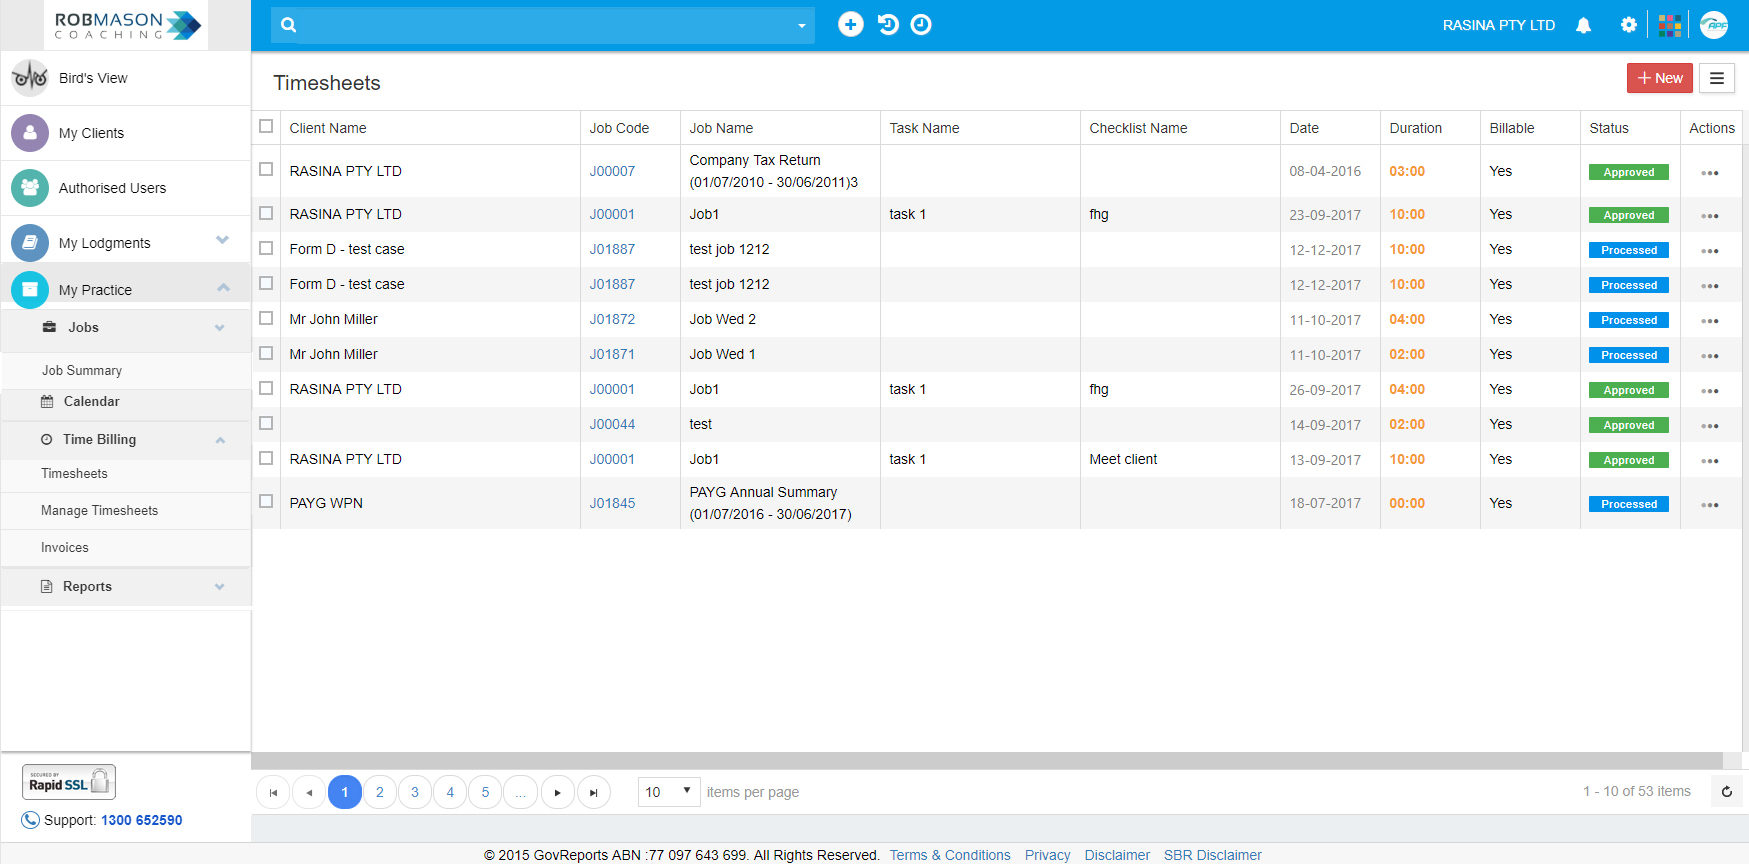
Providing a list of all the timesheets recorded for each of the job and or task and by which authorised user so you can manage time already spent on each of the job and its progress. If it is pending for approval, then you can approve the timesheet for staff member to proceed with billing. If it is not ready for approval, then you can view the progress of the job or task and time already spent. The approved timesheets will also be shown for overview.
 Invoices
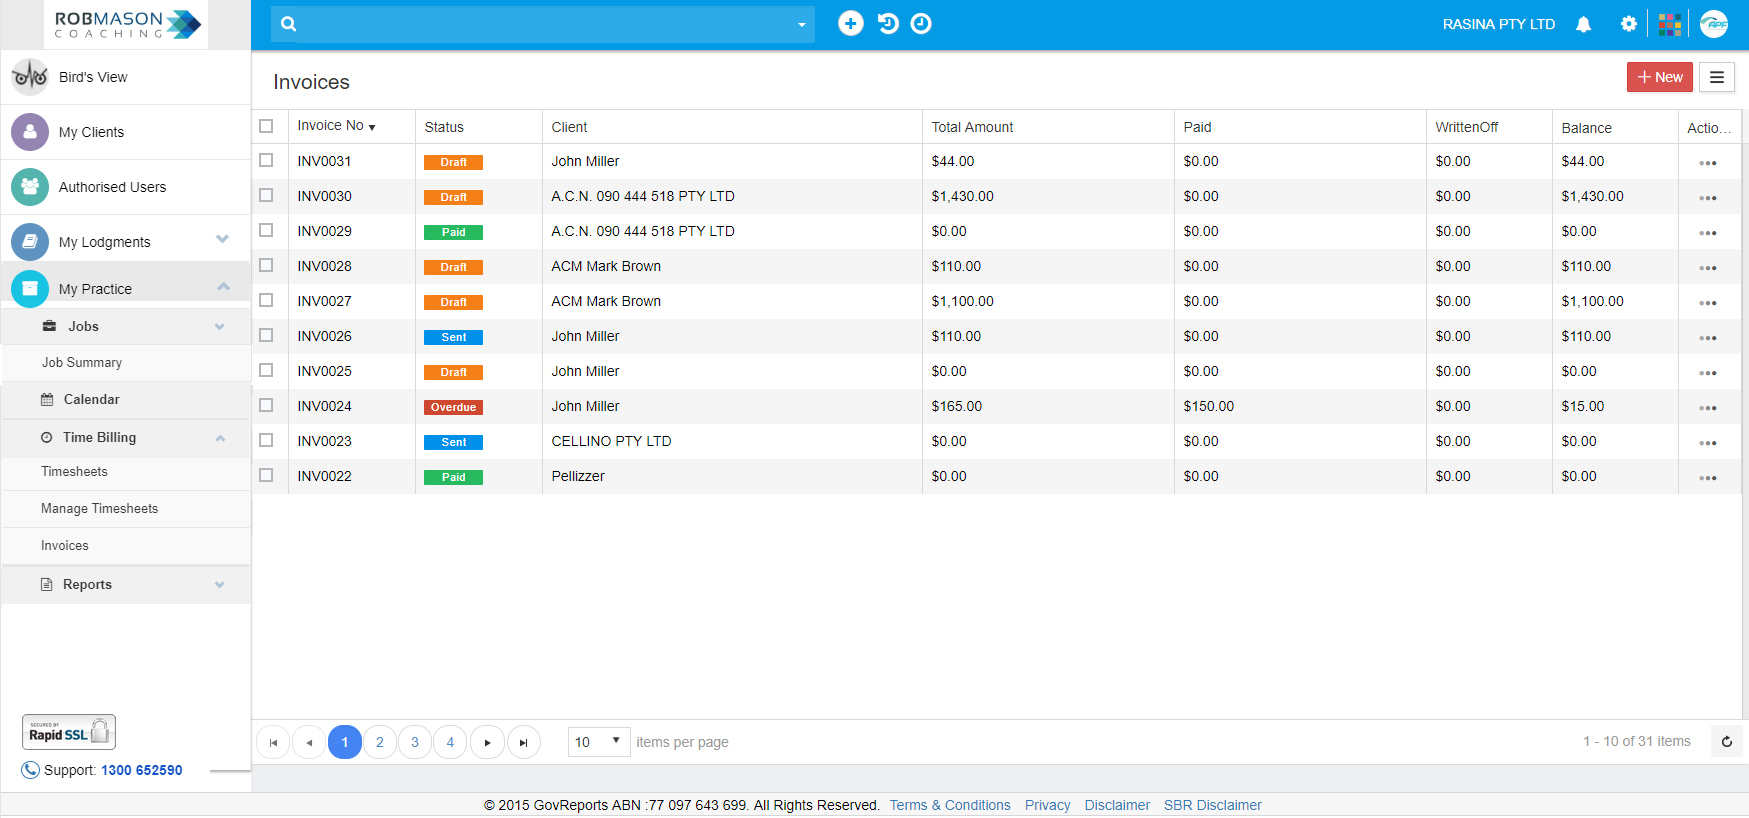
Invoice reports a comprehensive overview of all invoices that have been generated in a given time period.
Reports
Report selection has below options:
- Staff time Detail Report
- Job Time Detail Report
- Running Time Detail Report
- Invoice Report
Staff Time Detail Report
Shows the timesheets and billable information for each task done by a particular staff. This is particularly useful when you need to follow up with client or reviewing staff performance.
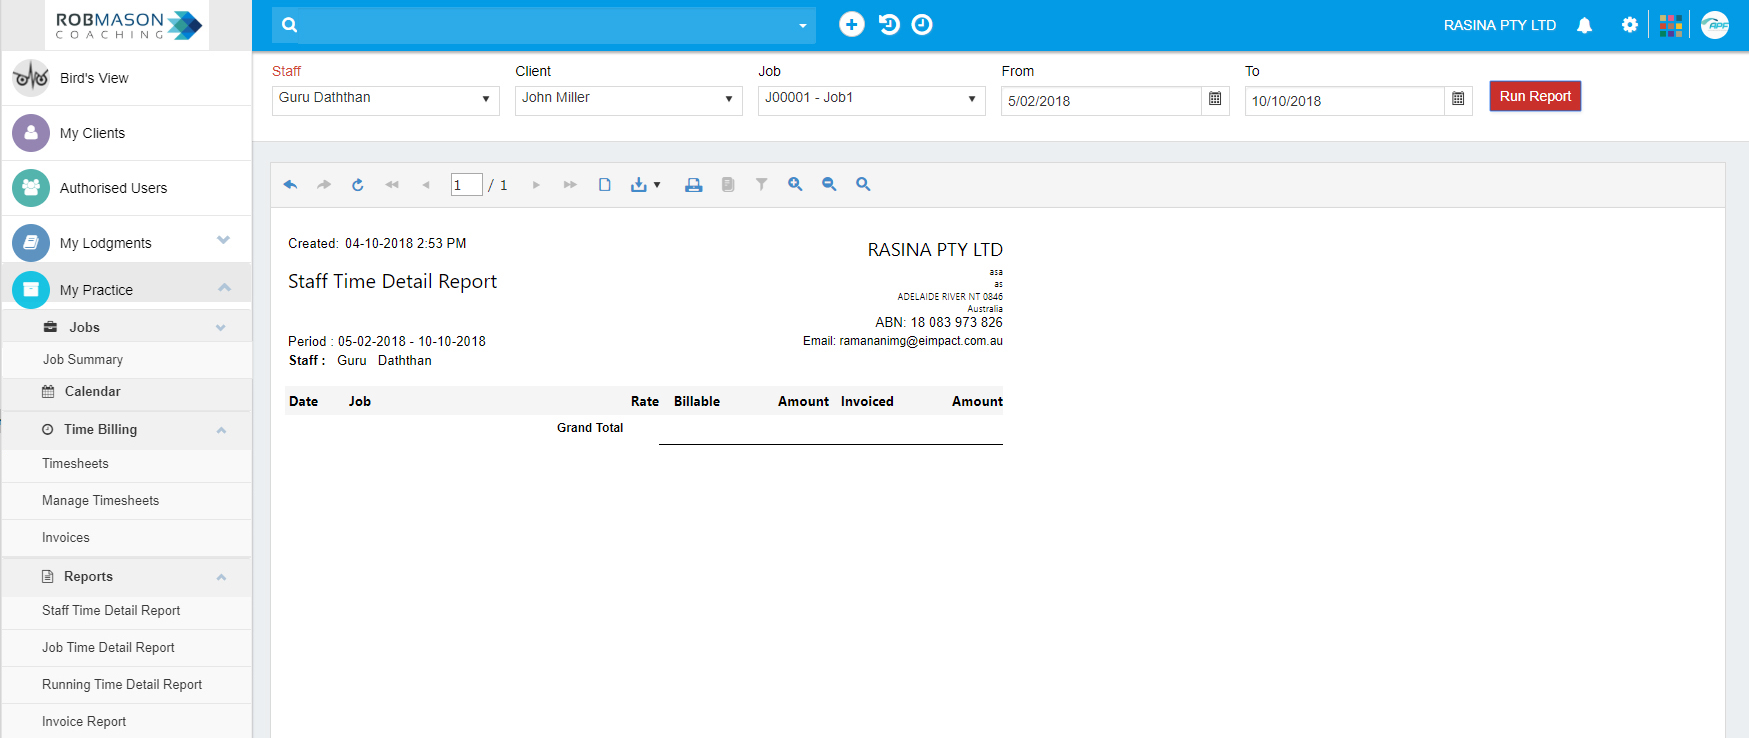
To generate the report,
- Select the Staff name
- Client name that the staff have done the task
- Enter the date range for which the job was donee
Job Time Detail Report
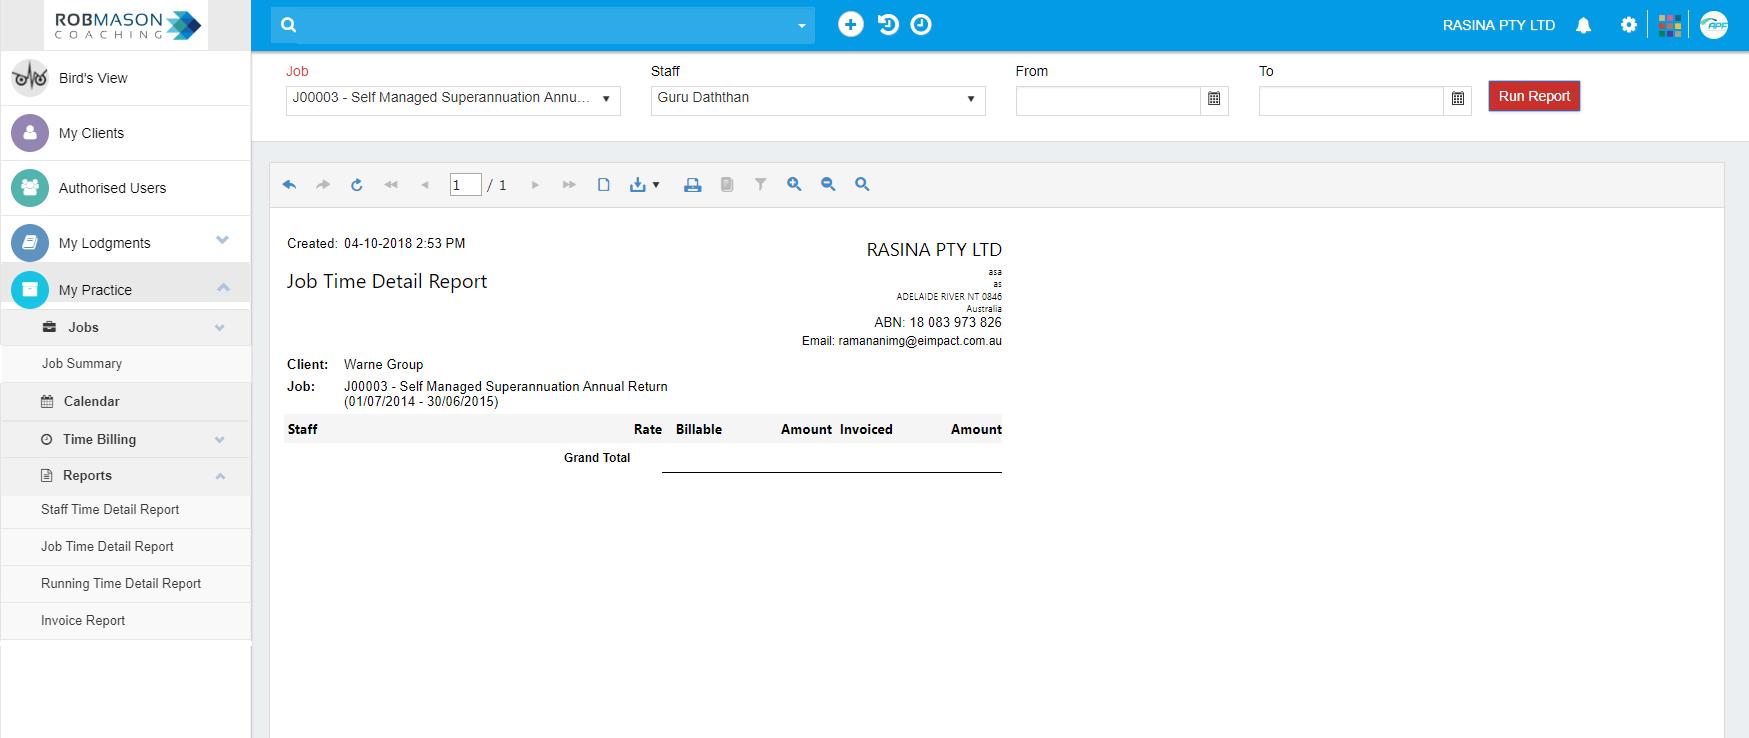
Generating a report that shows all transactions assigned to selected job with the invoice detail. This is useful when you want to justify the total time spend on the job. To generate the Job Time Detail Report,
- Select the Job name
- Select the Staff name
- Specify the period which the task or job has taken place to generate the report, click Run Report tab.
Running Time Detail Report
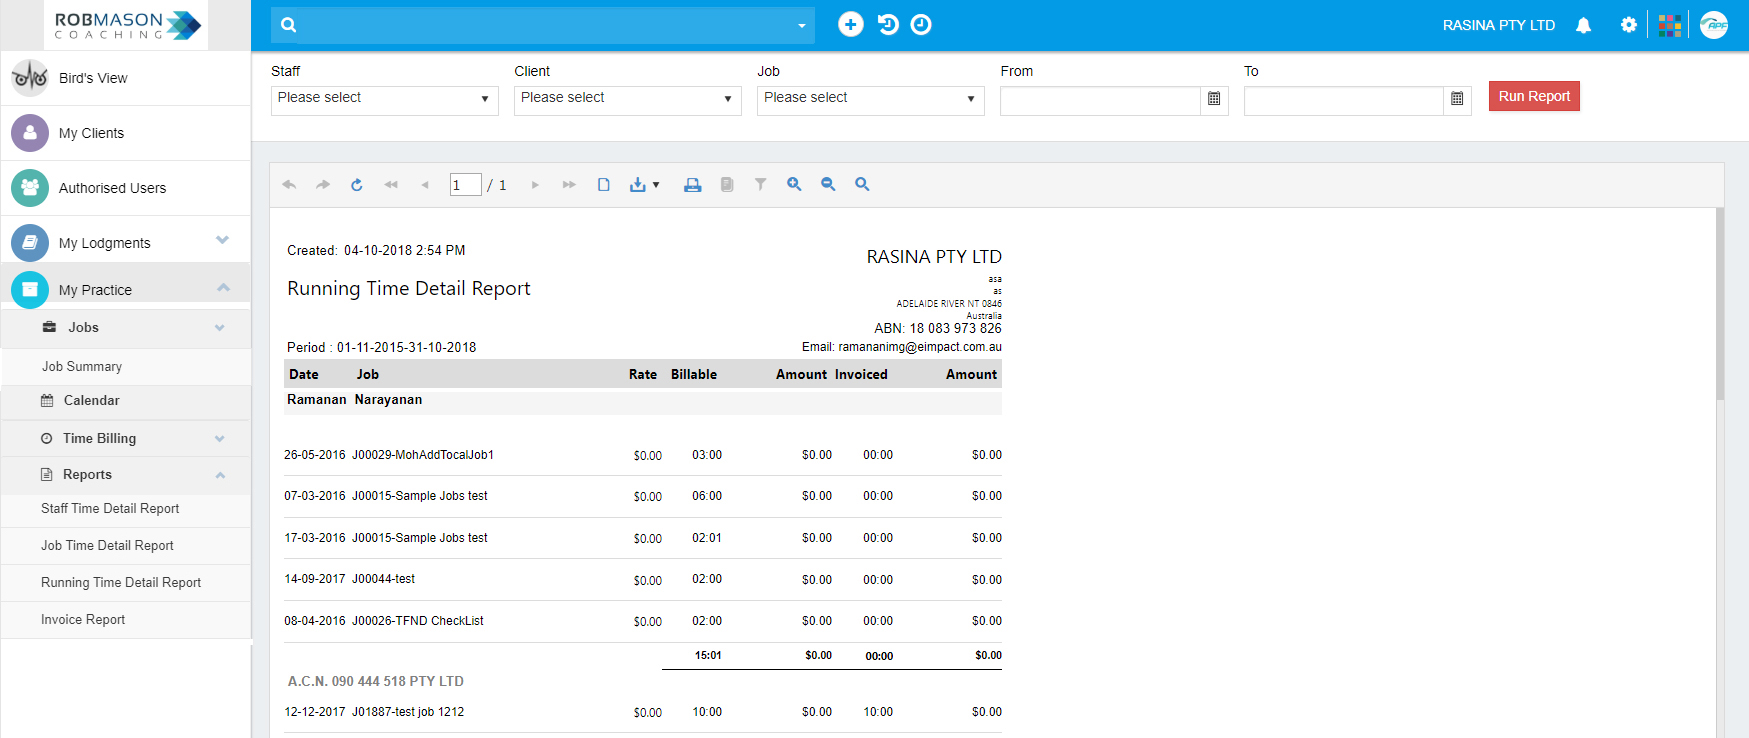
Reporting total running time spent on the job or task from the allocated authorised user.
Invoice Report
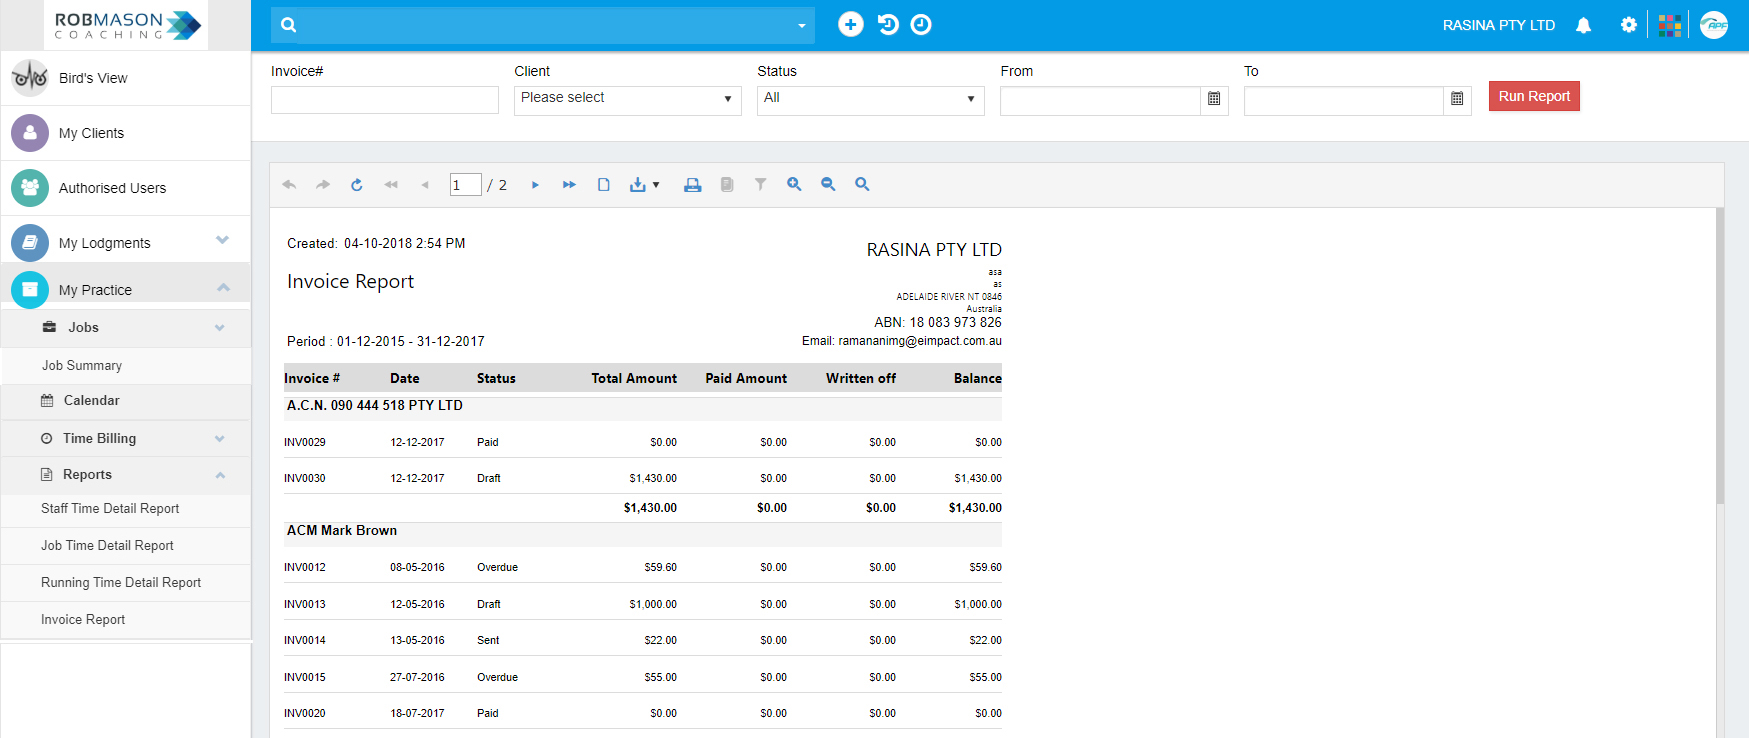
Invoice Report generate the total invoices generated for the selected client for the specified period.
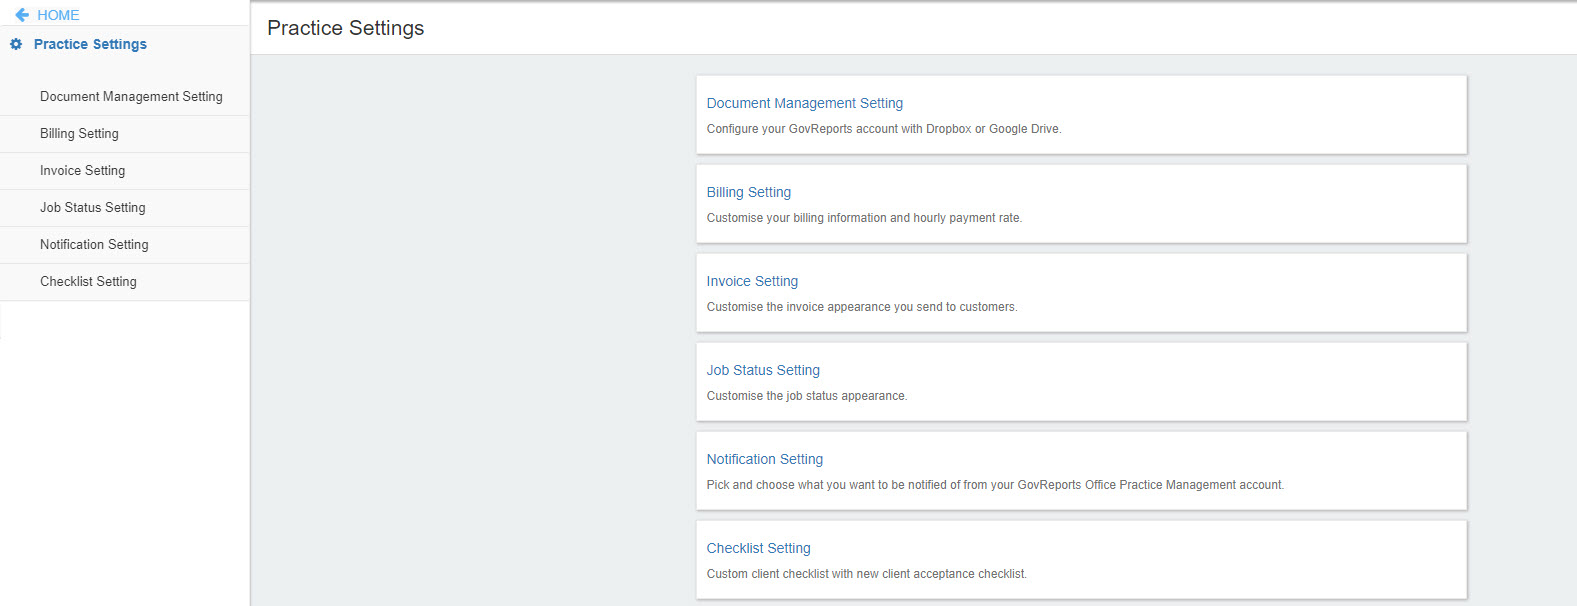
To access to your Practice settings and other related common setting services such as:
- Document Management Setting
- Billing Setting
- Invoice Setting
- Job Status Setting
- Notification Setting
- Checklist Setting
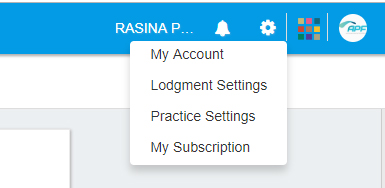
Goto Settings => Practice Settings
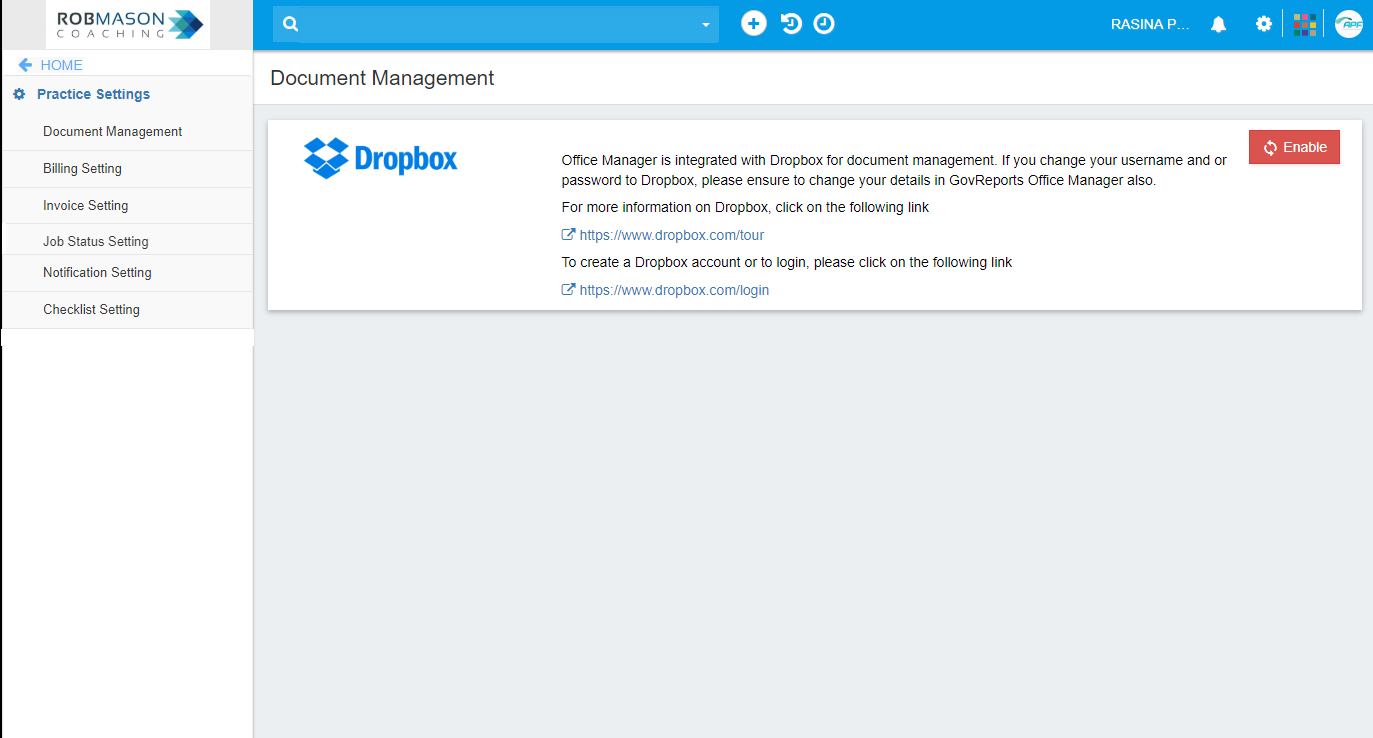
 Document Management Setting
Configure your GovReports account with Dropbox or Google Drive.
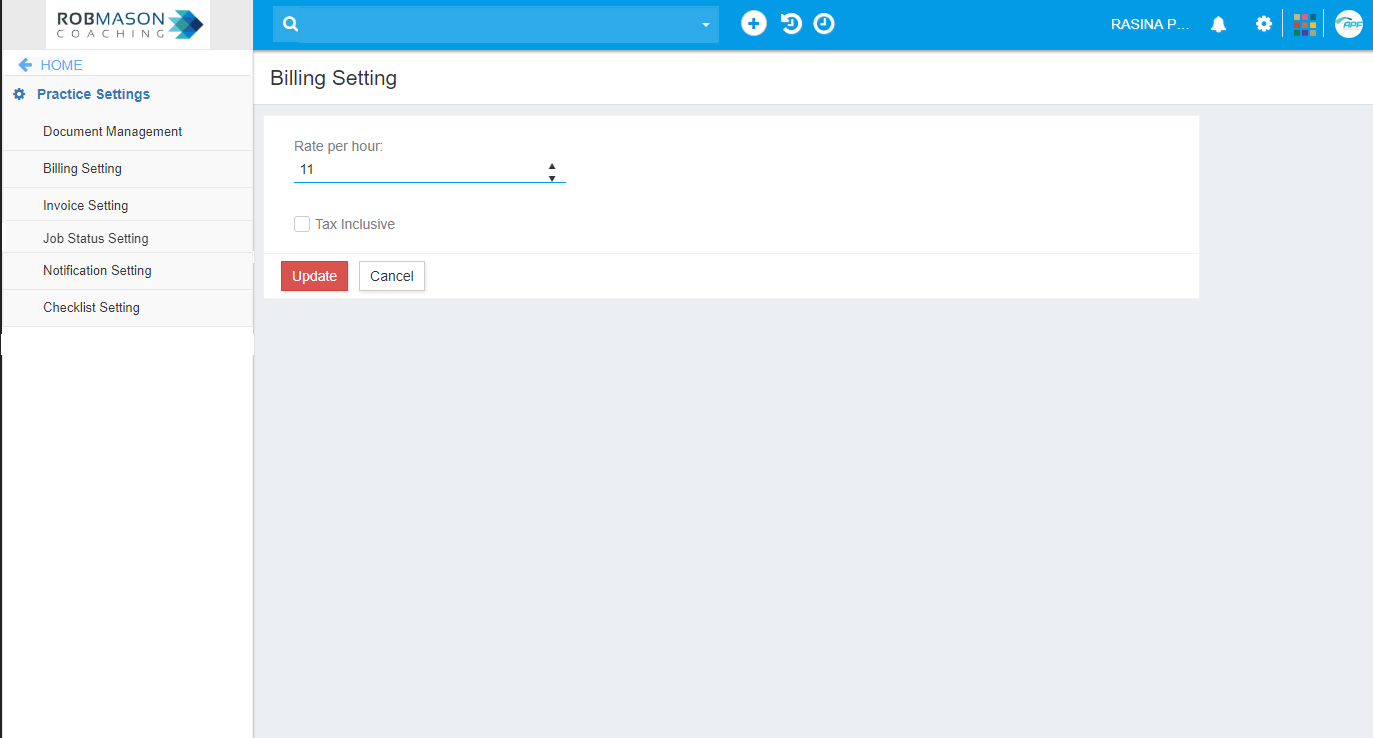
 Billing Setting
Customise your billing information and hourly payment rate.
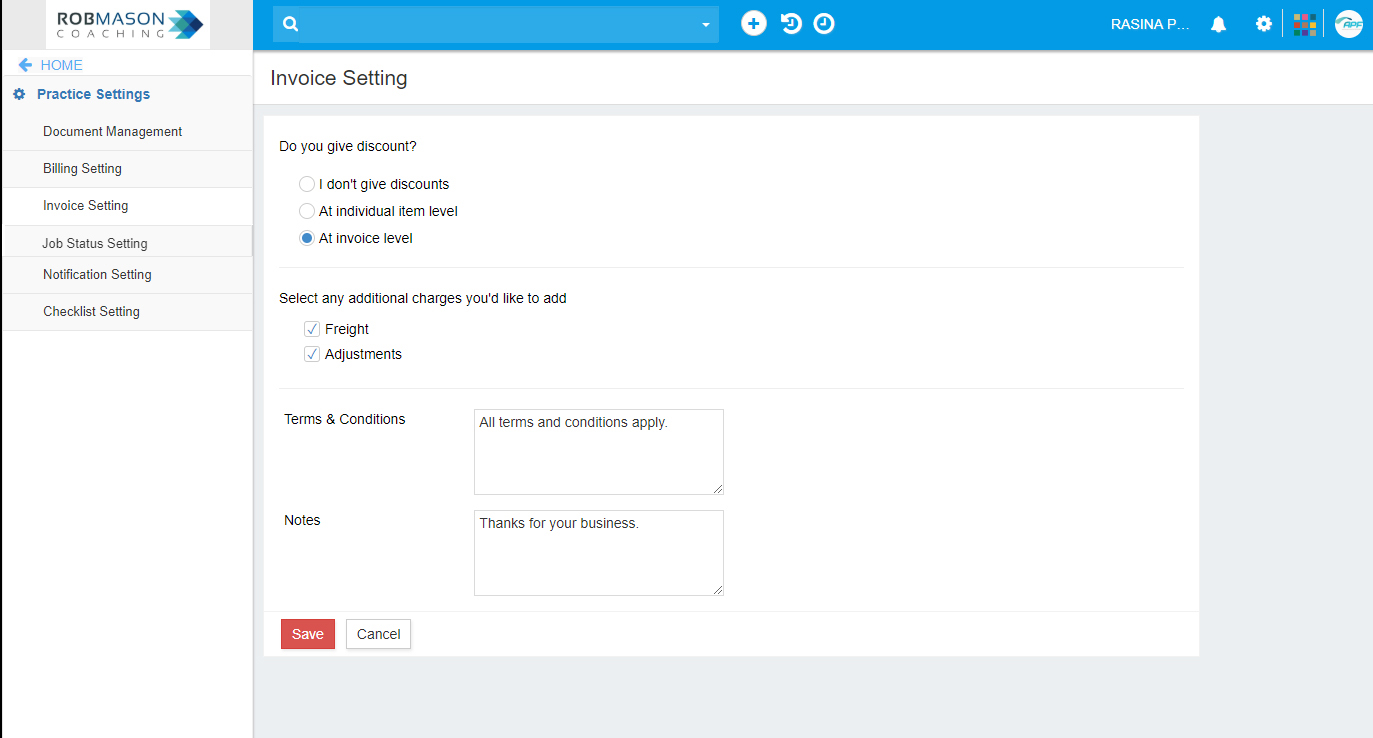
 Invoice Setting
Customise the invoice appearance you send to customers.
 Job Status Setting
Default Job Statuses will be showed under 4 main categories:
- Open
- Process
- Comply
- Finalise
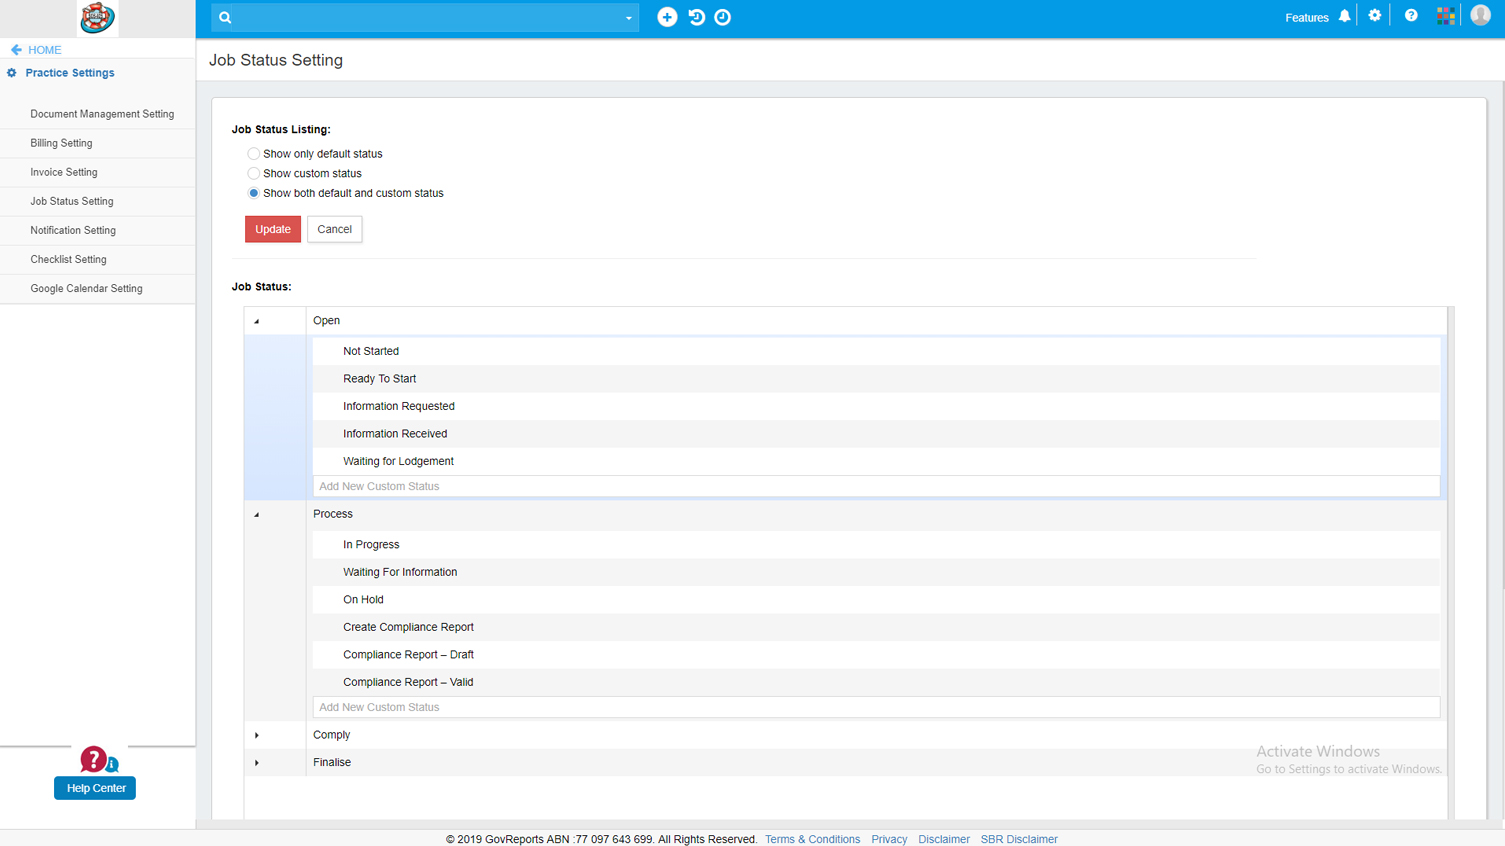
Under each main category of the job status, there will be additional default sub job statuses or you can create and use your own customised job statuses according to your practice’s process.
You can set to use only the default job status options or your own customised job status only or both default and your own custom job status options under the 4 main categories.
| Category |
Job Status |
Display Name |
| Open |
Not Started |
Open: Not Started |
| Open |
Ready To Start |
Open: Ready to Start |
| Open |
Information Requested |
Open: Information Requested |
| Open |
Information Received |
Open: Information Received |
| Open |
WaitingforLodgement |
Open: Waiting for Lodgement |
| Process |
In Progress |
Process: In Progress |
| Process |
Waiting For Information |
Process: Waiting For Information |
| Process |
On Hold |
Process: On Hold |
| Process |
Create Compliance Report |
Process: Create Compliance Report |
| Process |
Compliance Report – Draft |
Process: Compliance Report – Draft |
| Process |
Compliance Report – Valid |
Process: Compliance Report – Valid |
| Comply |
Ready For Review |
Comply: Ready For Review |
| Comply |
Under Review |
Comply: Under Review |
| Comply |
Review – On Hold |
Comply: Review – On Hold |
| Comply |
Reviewed |
Comply: Reviewed |
| Comply |
Sent For Client Authorisation |
Comply: Sent For Client Authorisation |
| Comply |
Client Authorised |
Comply: Client Authorised |
| Comply |
Client Authorisation Pending |
Comply: Client Authorisation Pending |
| Finalise |
Completed |
Finalise: Completed |
| Finalise |
Lodgment Deferred |
Finalise: Lodgment Deferred |
| Finalise |
Ready For Lodgment |
Finalise: Ready For Lodgment |
| Finalise |
Lodgement Attempted |
Finalise: Lodgement Attempted |
| Finalise |
Lodgement Rejected |
Finalise: Lodgement Rejected |
| Finalise |
Lodged |
Finalise: Lodged |
| Finalise |
Cancelled |
Finalise: Cancelled |
| Finalise |
Deferred |
Finalise: Deferred |
| Finalise |
Archived |
Finalise: Archived |
| Finalise |
UnLodged |
Finalise: Unlodged |
| Finalise |
Invalid |
Finalise: Invalid |
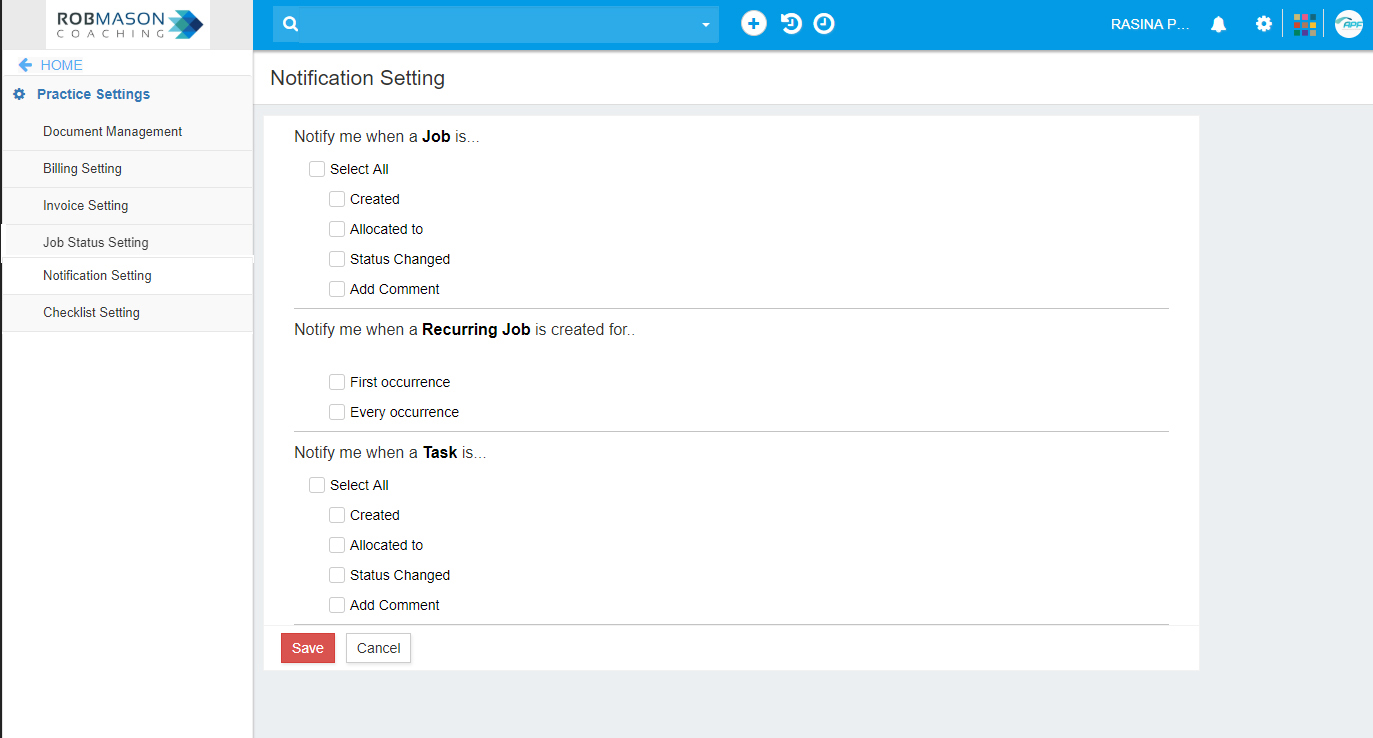
Notification Setting
Pick and choose what you want to be notified of from your GovReports Office Practice Management account.
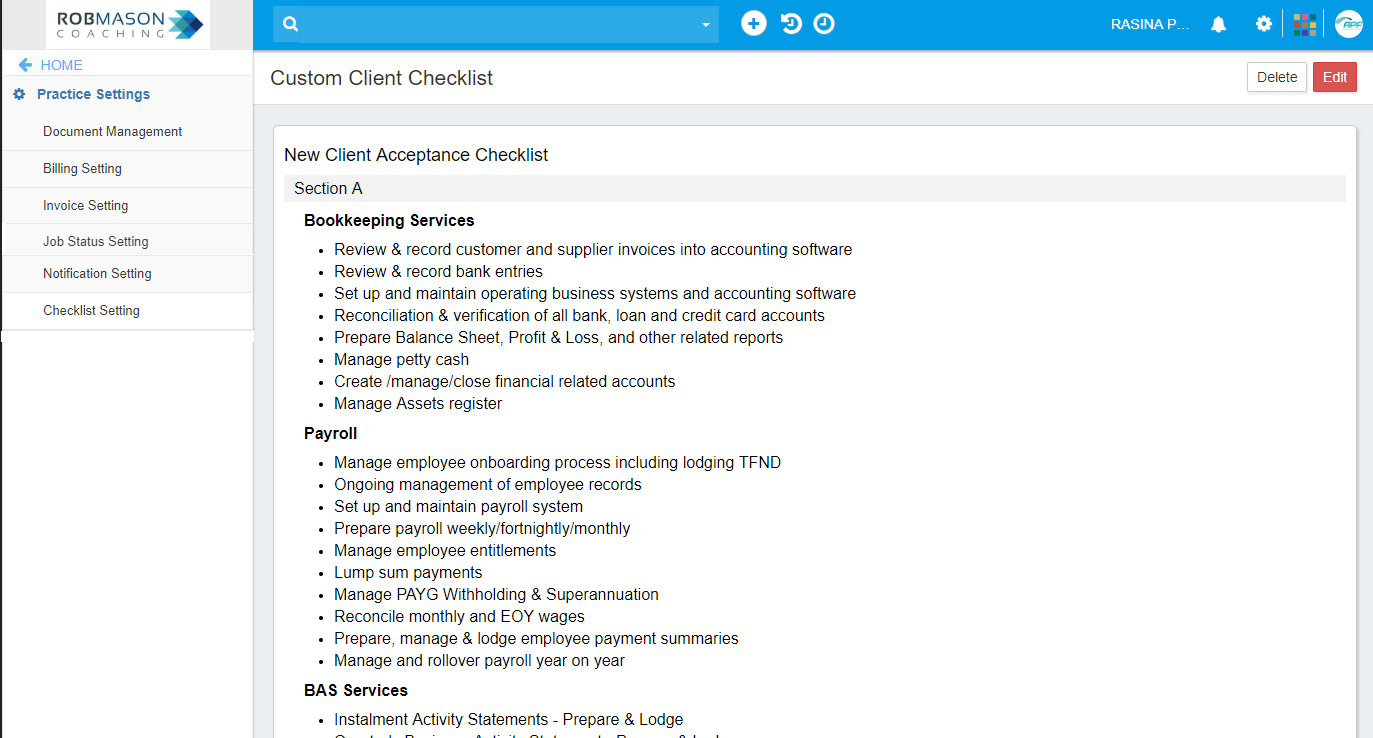
 Checklist Setting
Custom client checklist with new client acceptance checklist.
There are different kinds of templates and letters available for the Tax and BAS Agents to send to their clients based on their requirements.
Let's see the different status of clients:
Lead: Clients who require the services but have not yet added in the client list for making lodgments. Proposal can be sent to these clients for conversions
Active: Clients who have accepted the proposal and has been engaged for the lodgments
Lost:Lead clients who haven't accepted the proposal. Especially when the proposal has not been accepted for a long time after it is being sent to them.
Archived:Those clients who had been active before but currently not receiving any services from the Agent.
Starred:The clients can be highlighted by clicking on the "Star" icon to the left of the client name. This is used just for differentiating the client from the rest.
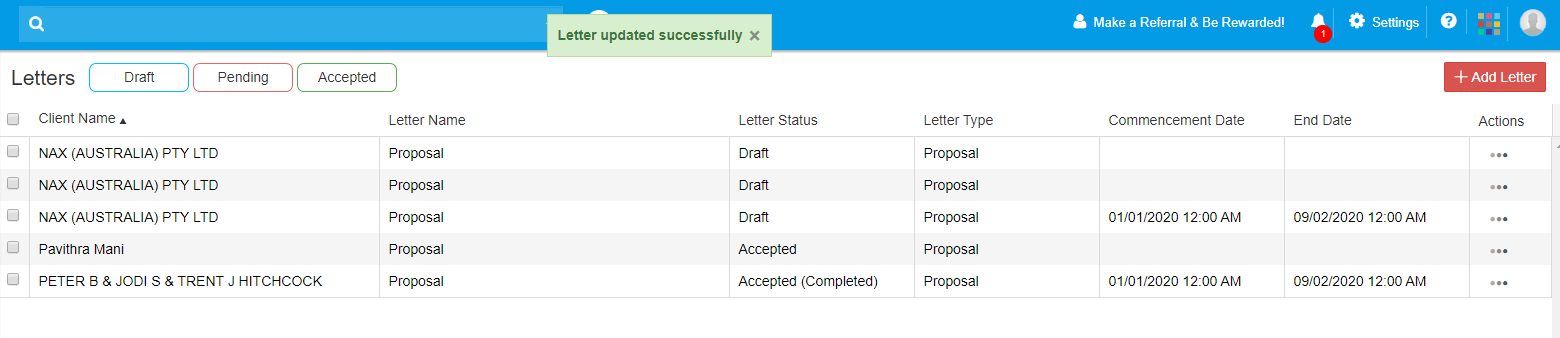
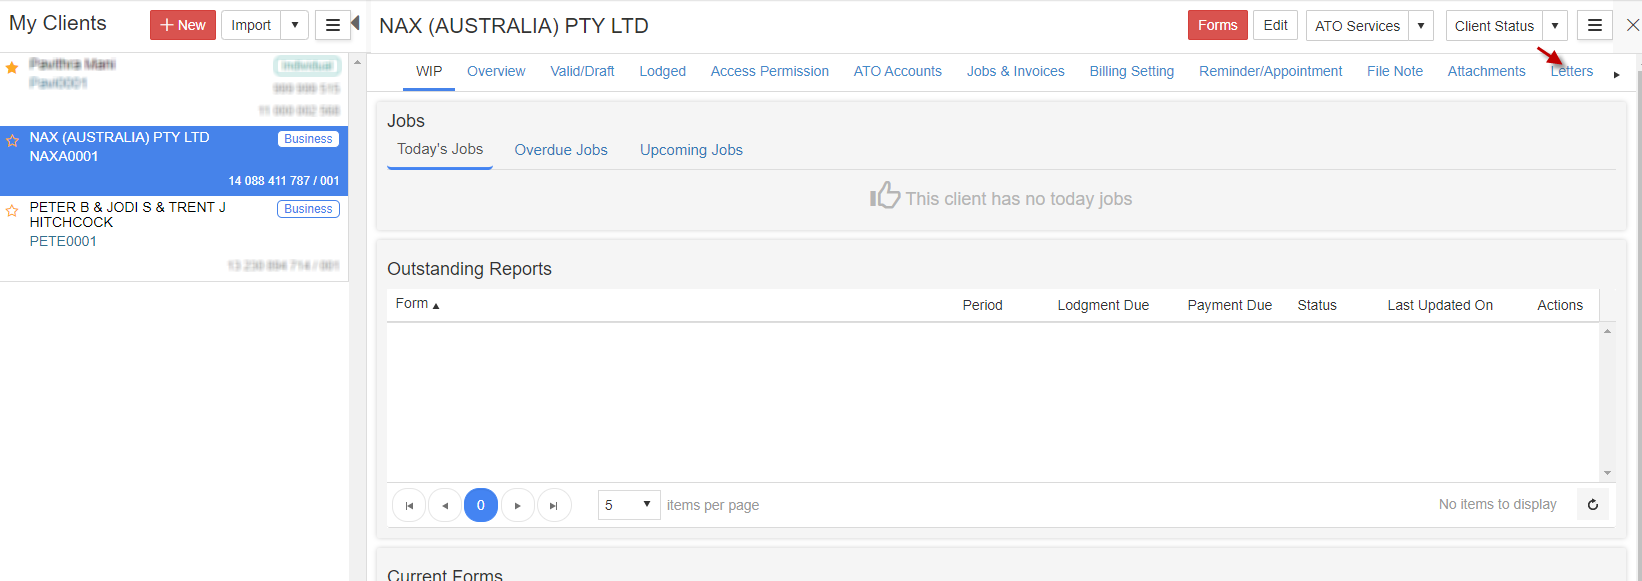
1.To send a proposal or engagement letter to the client, go to My Practice -> Templates and Letters. You can see the letter status and the count if you have added any letters previously, else you will see an empty screen with just an option to “Add Letter”.

2. You will see the "Letters" screen with the list of letters which has been prepared and sent to the clients. You can also add a new letter by clicking on “Add Letter” on the top right corner.

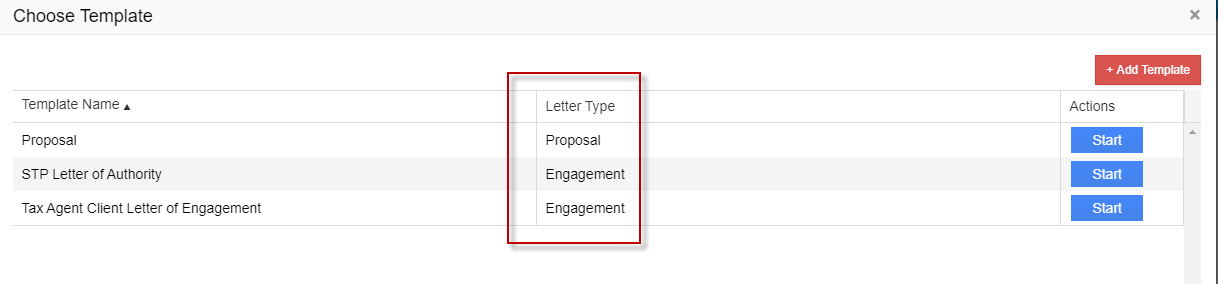
You can choose from the available templates. The types of letters are Proposal, Engagement and Ethical. Below are the list of templates available in GovReports by default.
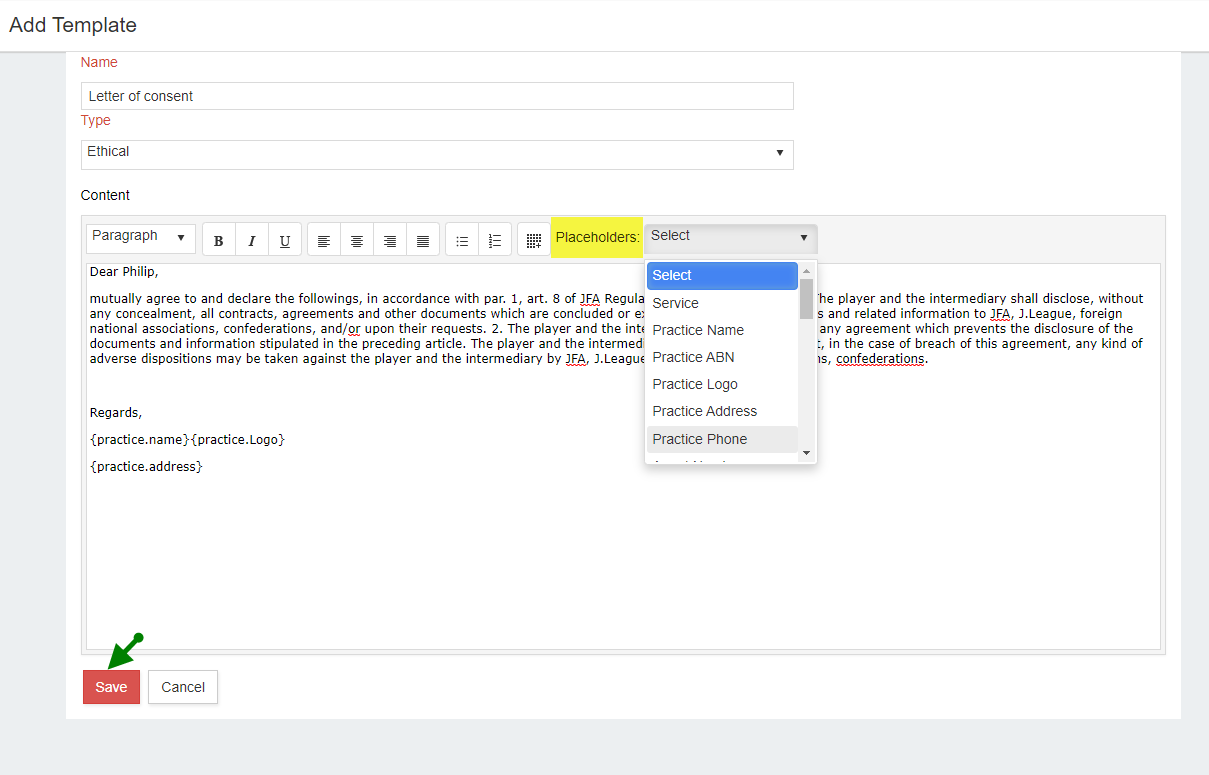
You can also add a template if you wish, by clicking on “Add Template”. You can choose the type of the letter.
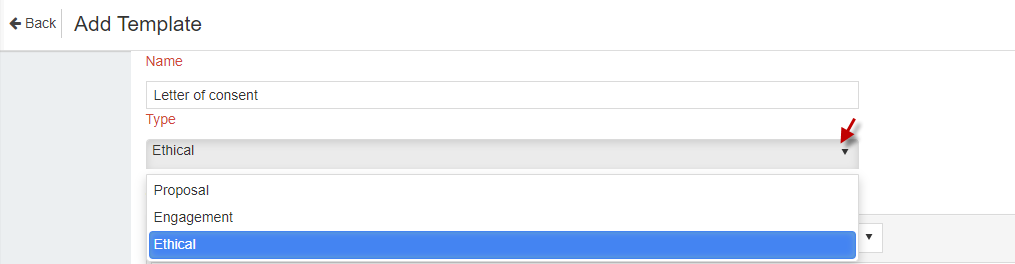
Enter the letter content, you can use any necessary formatting options, including required placeholders wherever necessary and click on “Save”
Otherwise, after you click on “Add letter”, you can click on “Start” to use any existing template to send the letter.
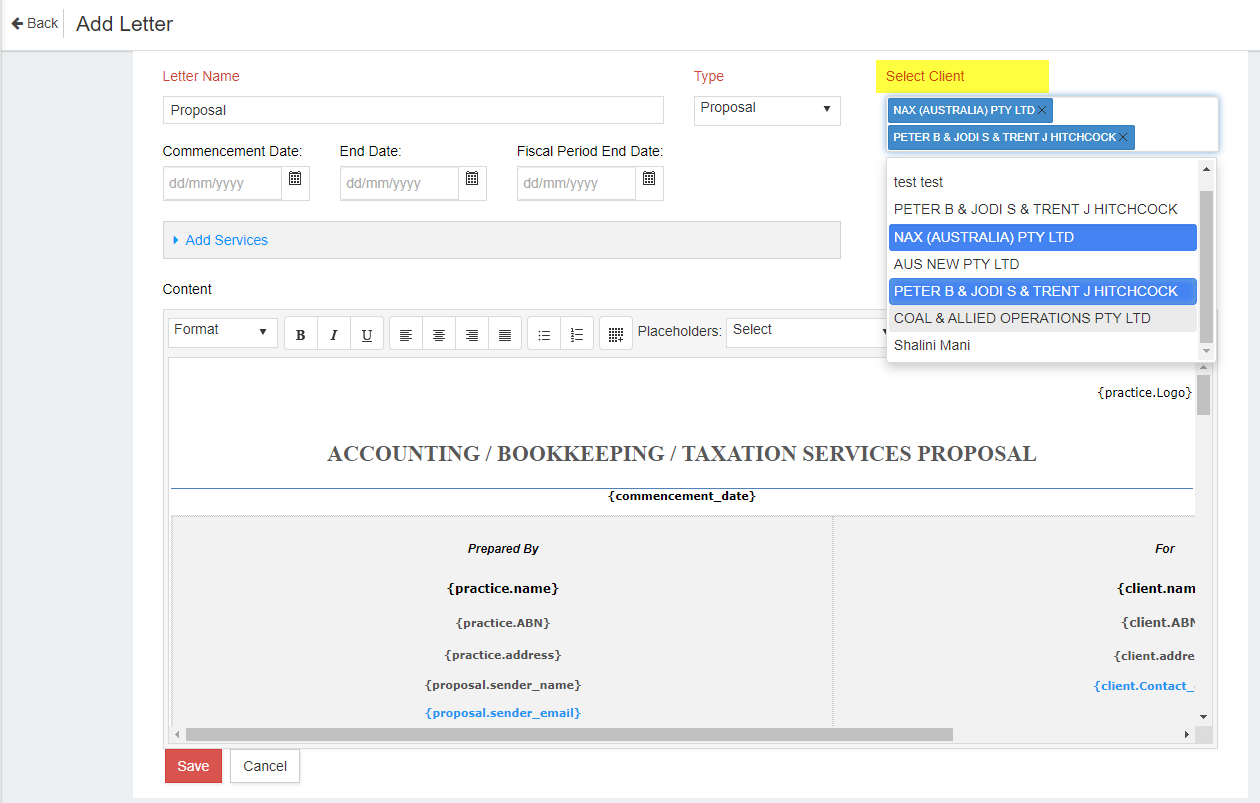
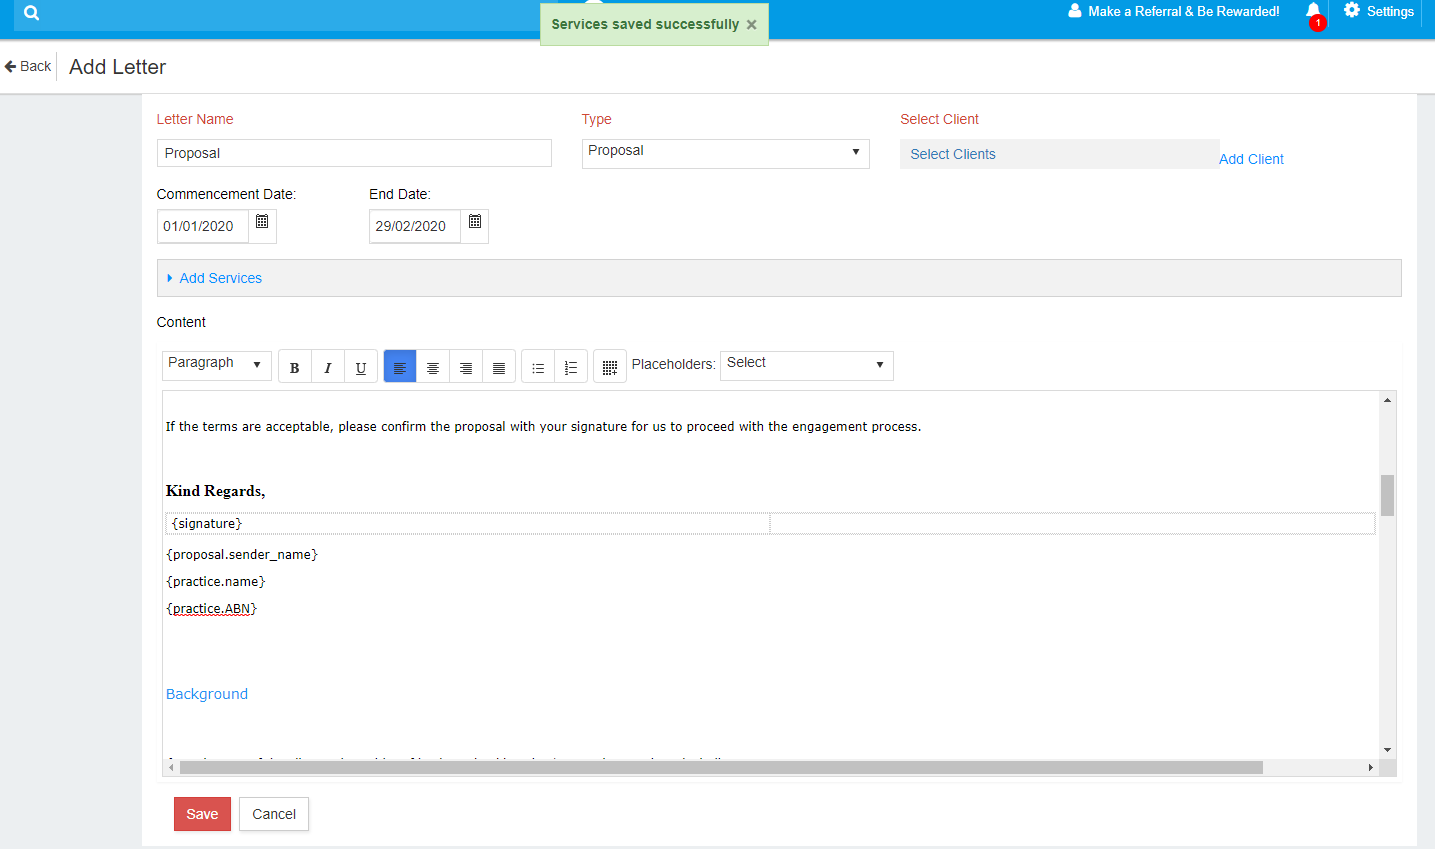
The Add Letter screen appears. You can select the clients to whom the letter is to be sent. You can select one or more client(s).
- Proposal is sent by a Tax/BAS agent to the clients (leads) stating the services which they can provide and other terms for providing the service. Once the client accepts it, the status of the client changes from lead client to active client. The active client will have the feature to lodge returns or use other services.
-
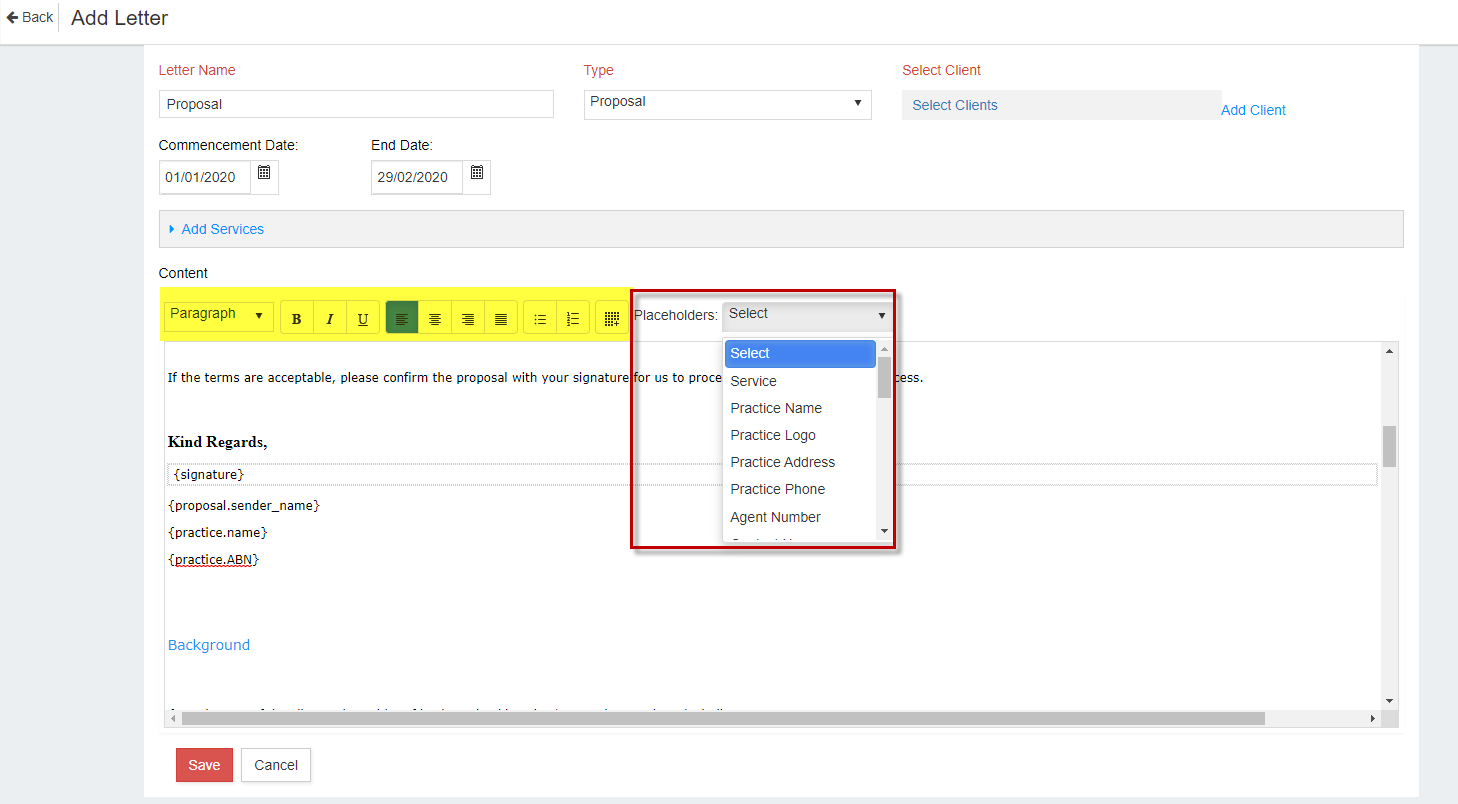
Enter the Commencement Date, End date and Fiscal Period End date but it is not mandatory.

-
Make any required formatting and corrections like adding placeholders, etc
-
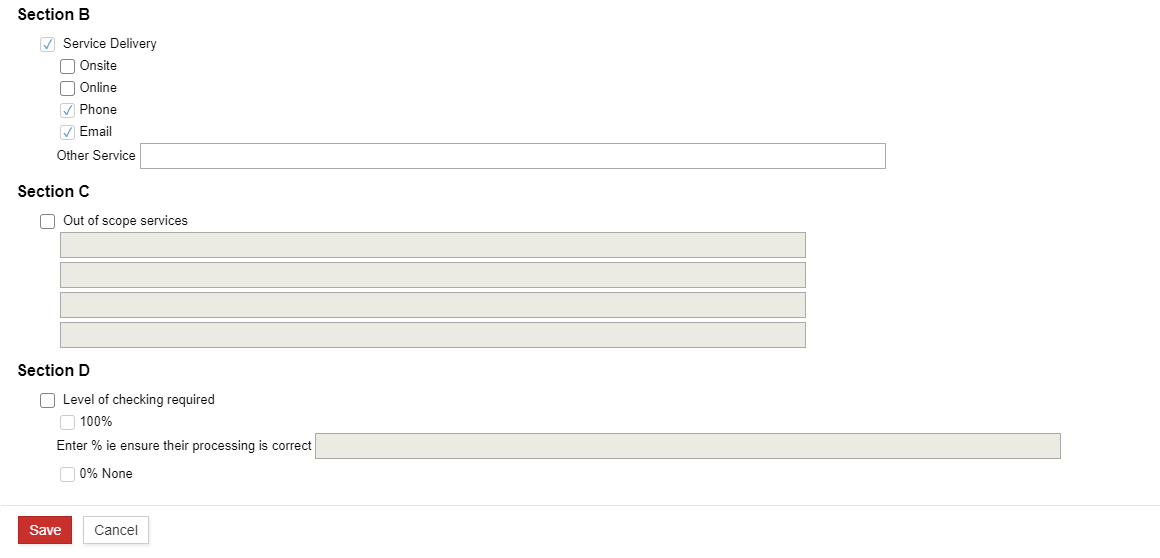
You can add any services by clicking on “Add Services”

Click on “Save”
If you wish to customise the services, please follow the steps below:
It is important to outline the list of services that can be provided to the clients.
You can update the services list periodically whenever you wish to add a new service or remove a service from the list.
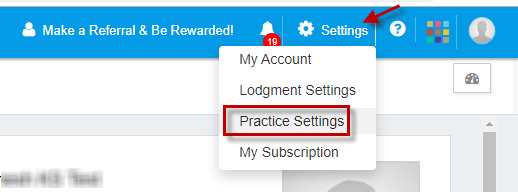
Click on Settings -> My Practice Settings.
-
Select “New Client Services”
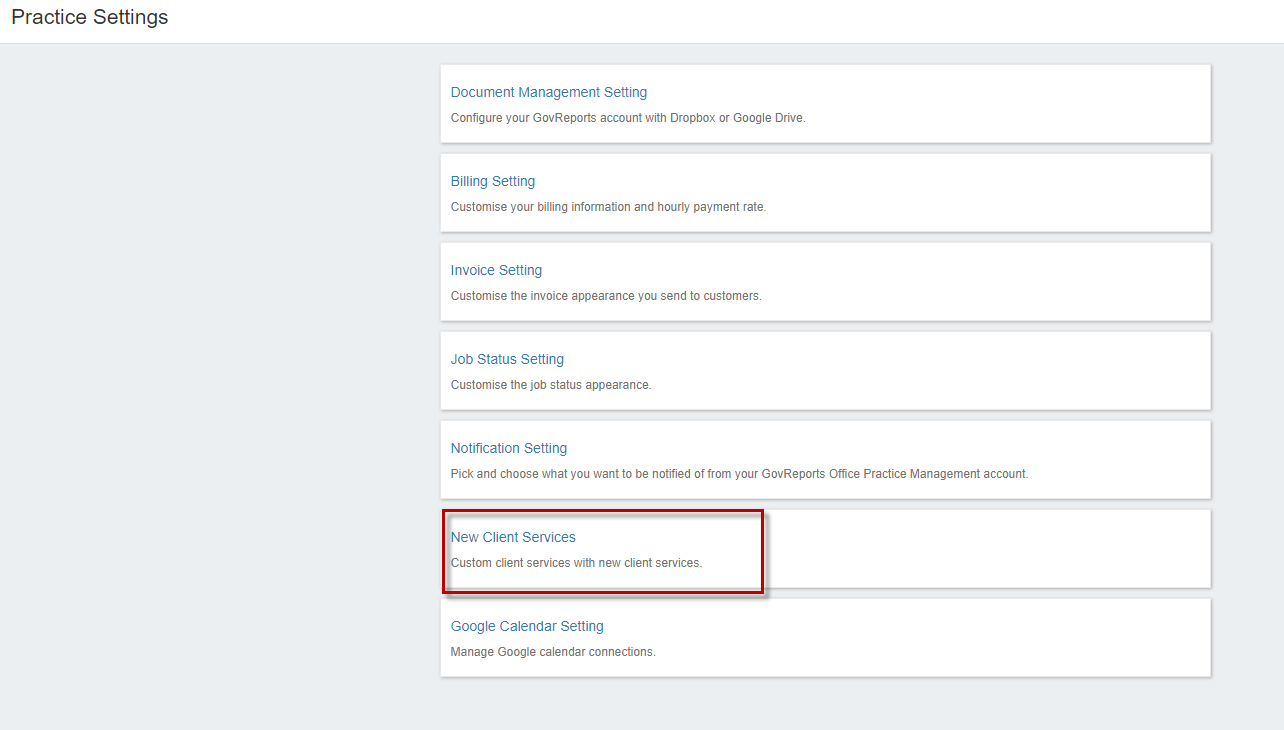
-
You will see “New Client Services”. You can click on “Customize” on the top right corner to delete or edit the existing items in the services list.
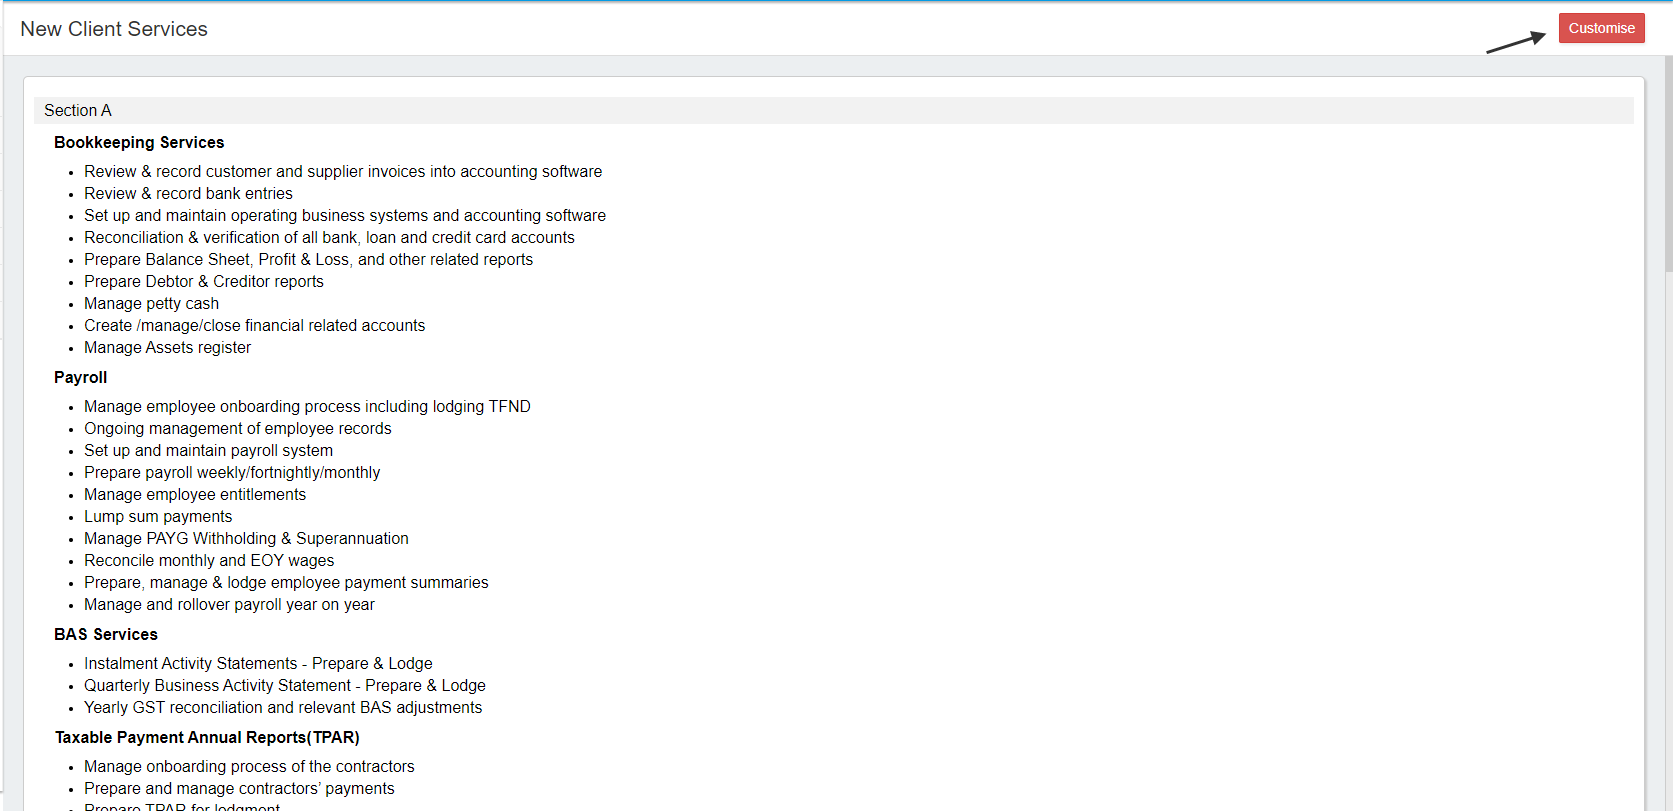
-
You can add, edit or delete the sections, title and items in the services to customise exactly to your needs
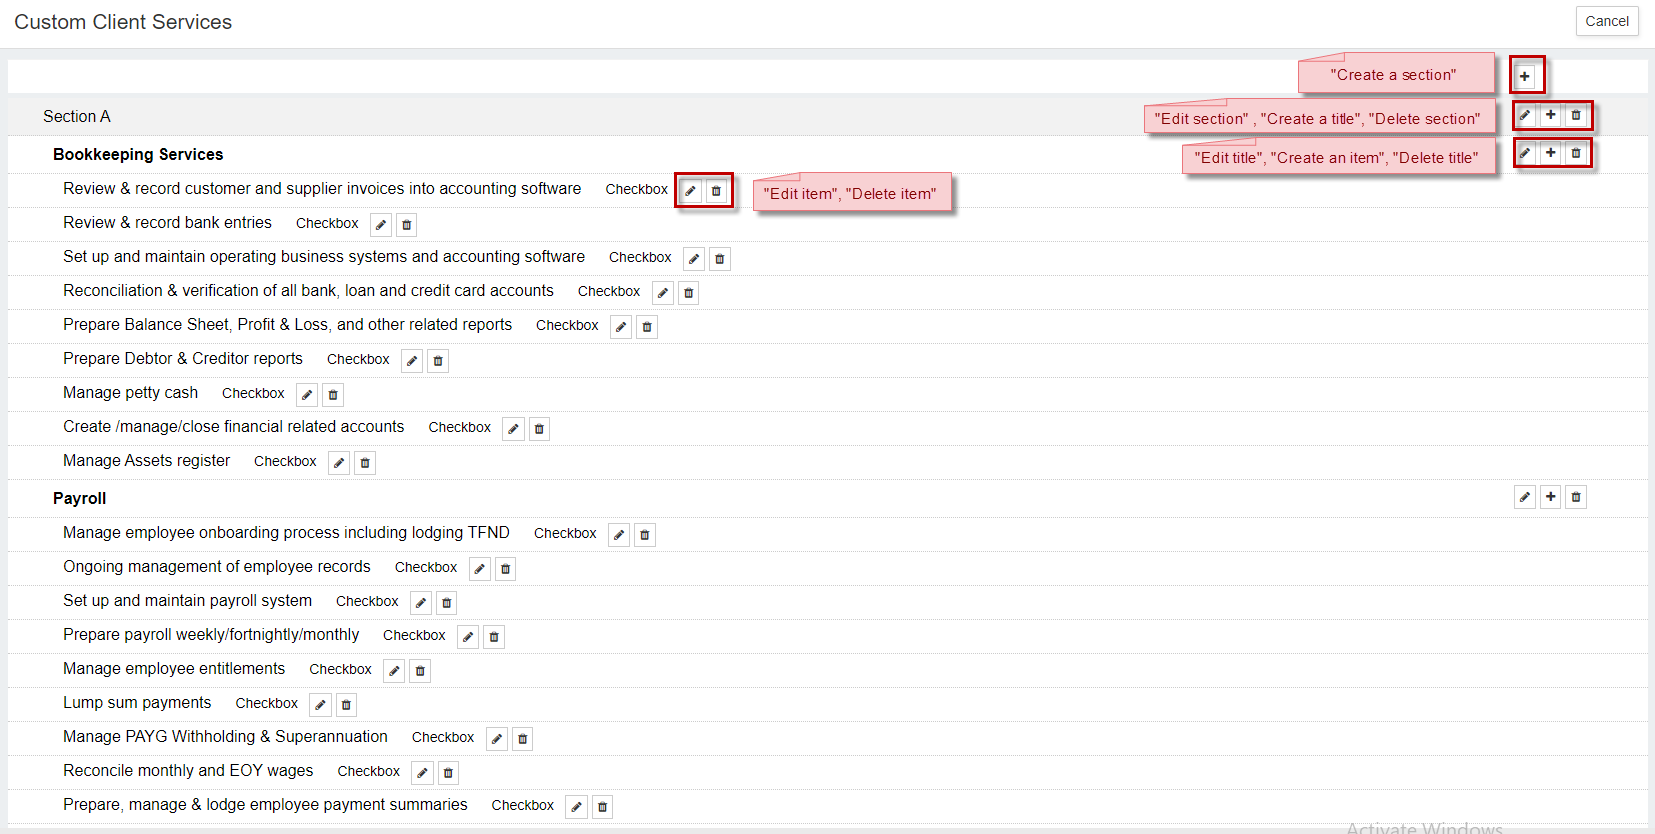
-
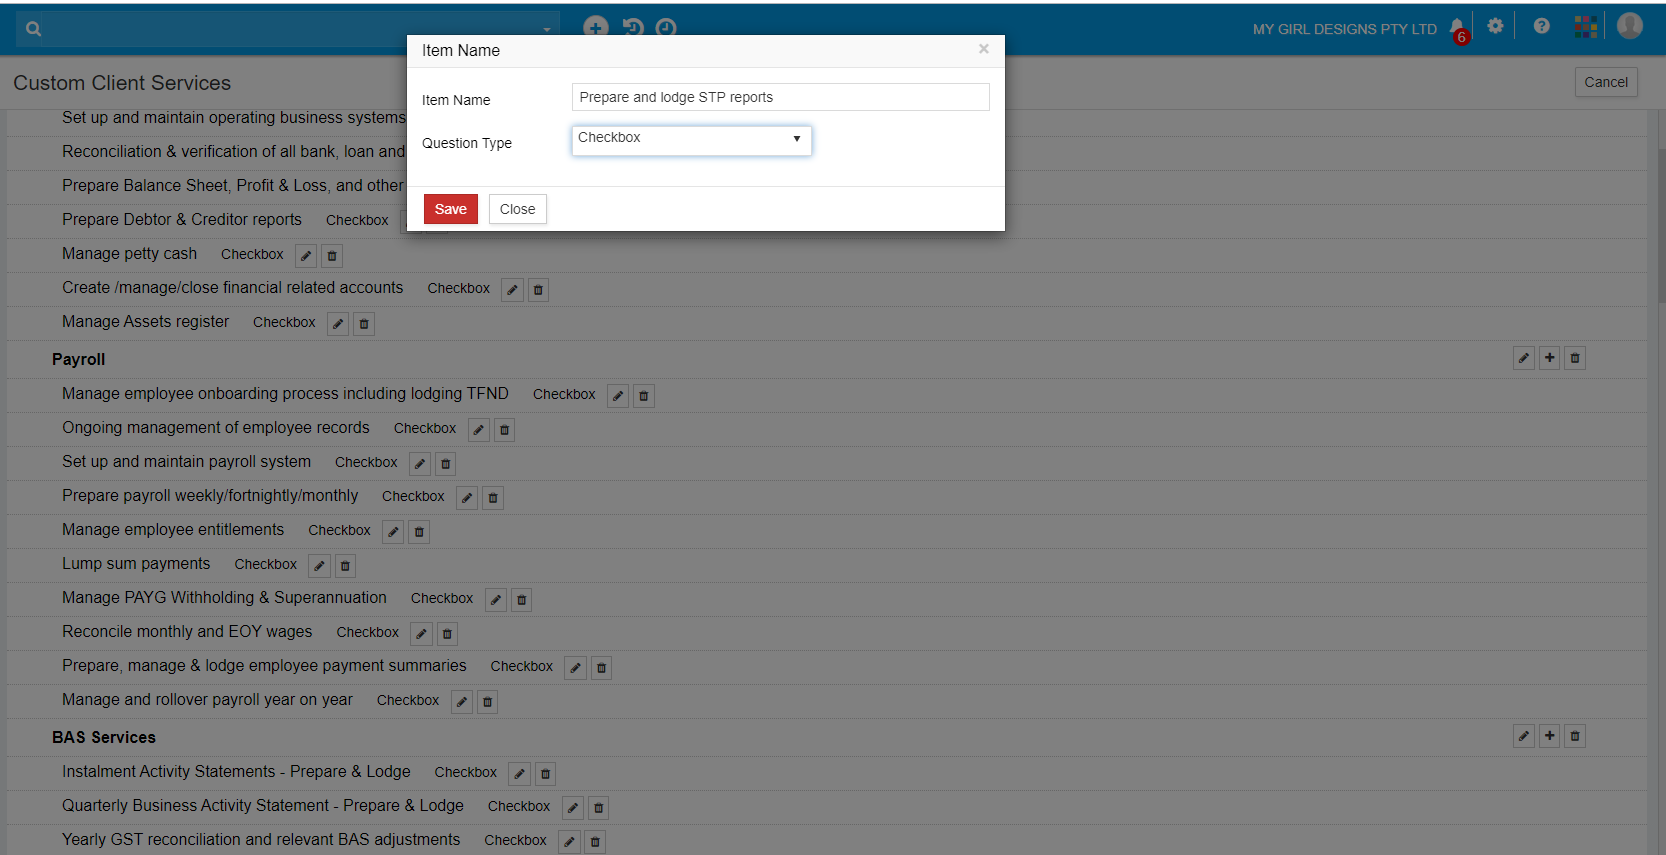
For example, you can click on “plus” icon next to the title to add a new item under the title
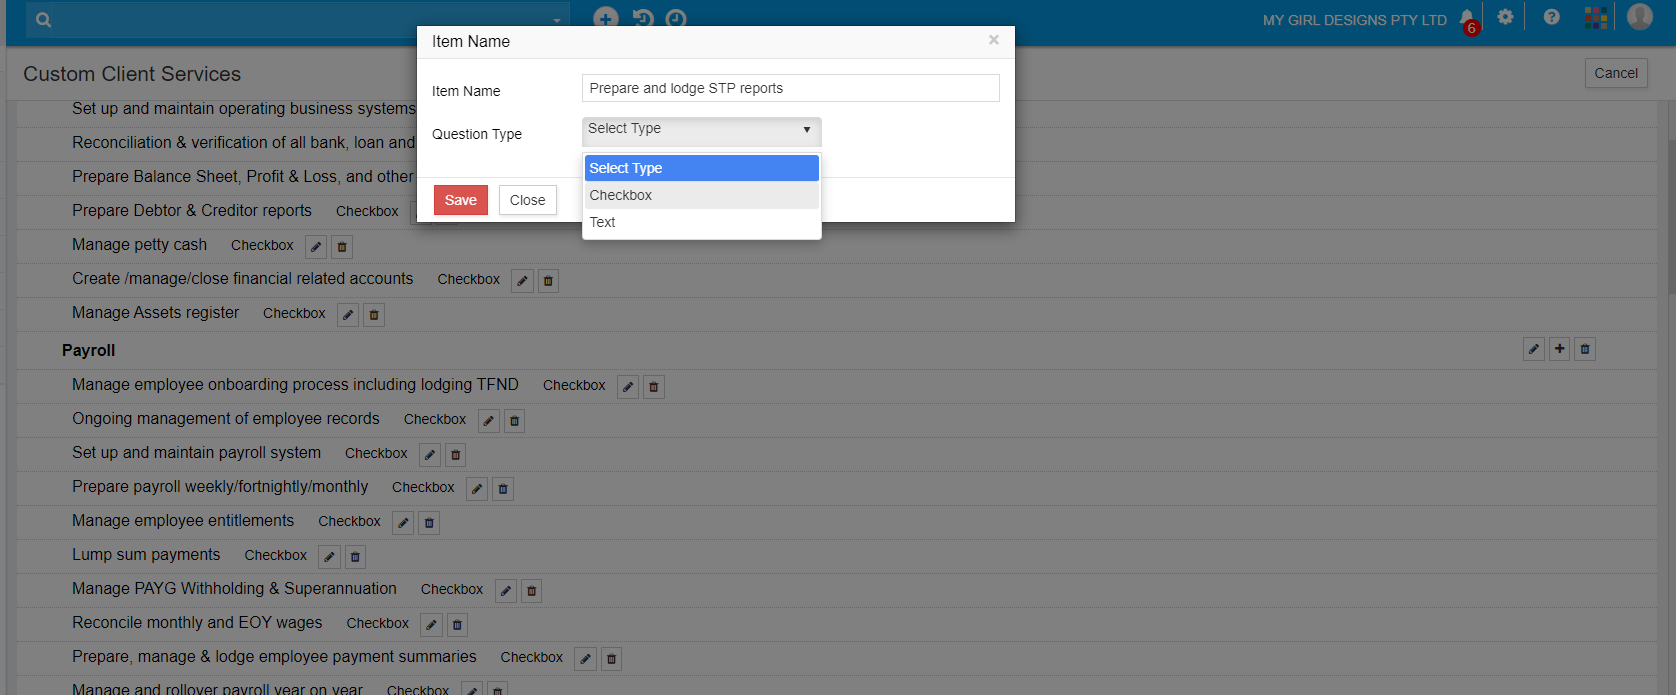
-
Enter the item name and whether you need it as a checkbox or question. Save the item and it will appear in the services list.
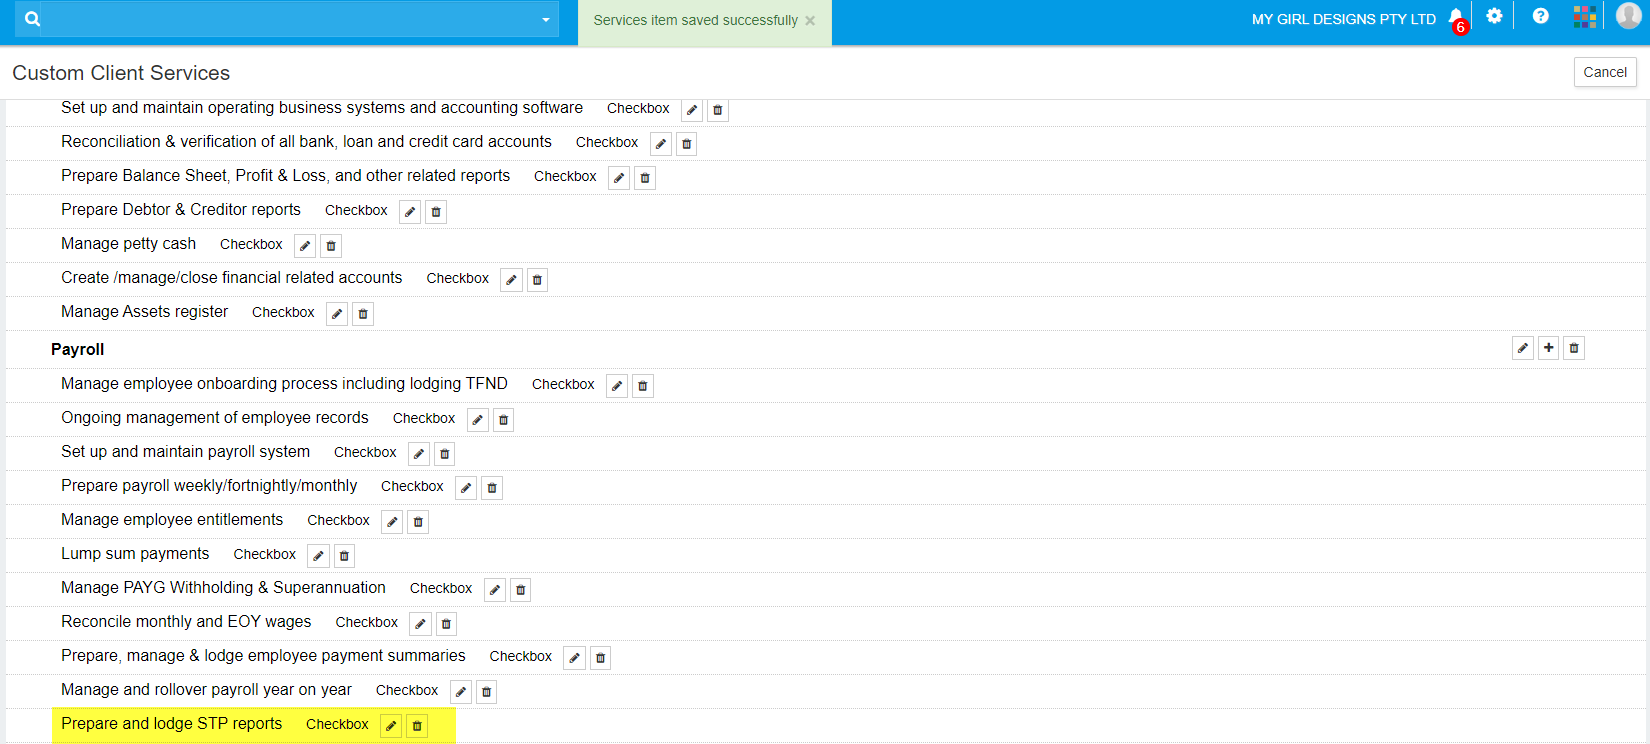
-
The new item added will appear in the services list.
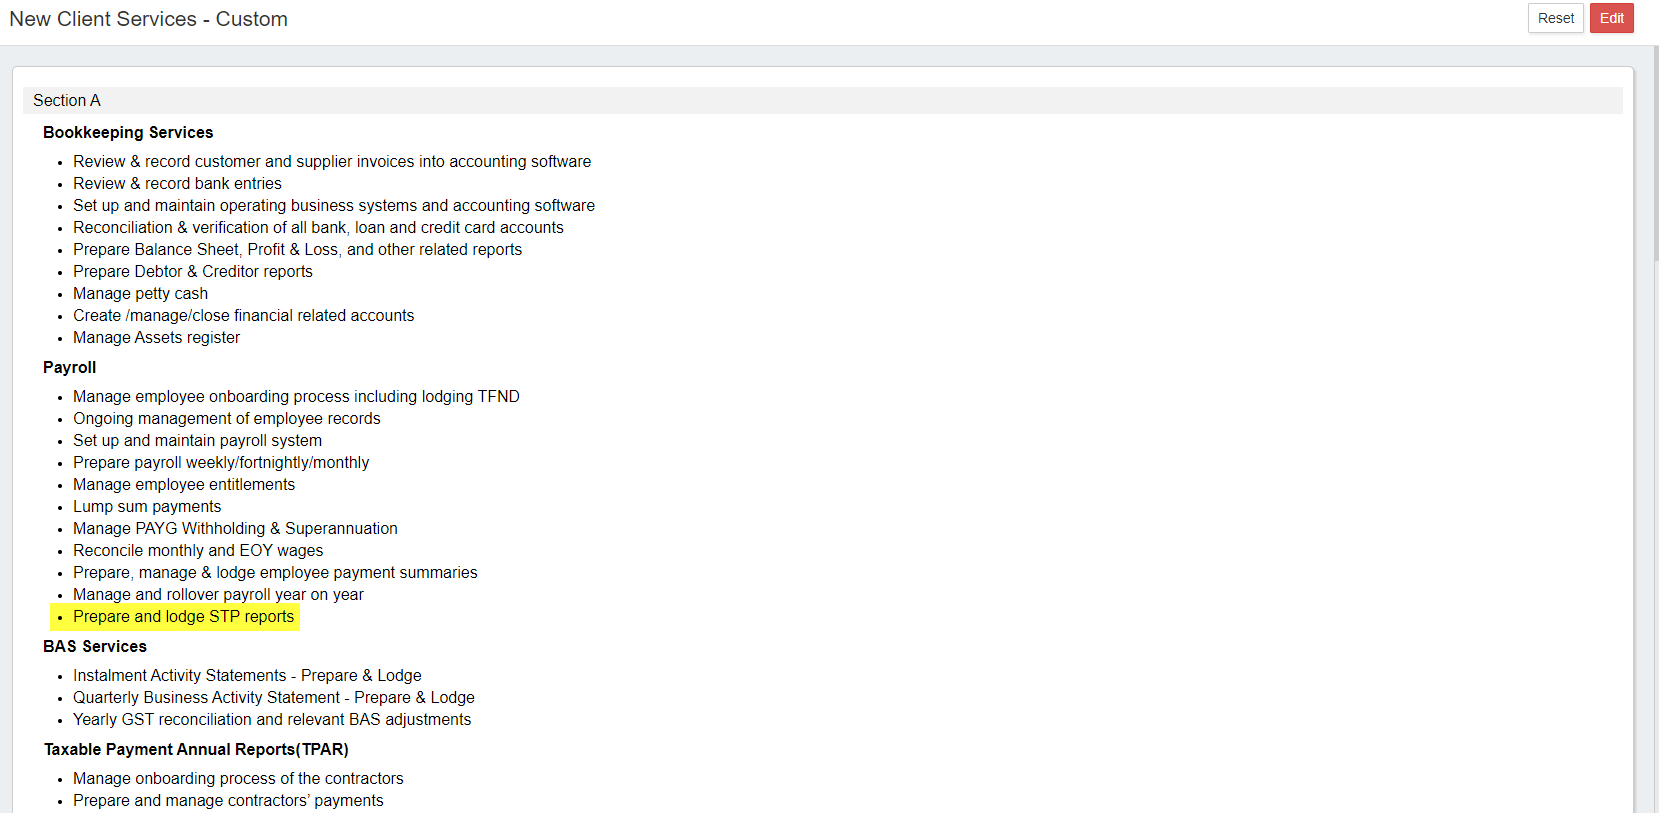
-
Thus, you can customise the default services list.
-
After making the required changes, click on “Save” to save the letter
-
The letter will be created for the selected clients and added to the “Letters” list
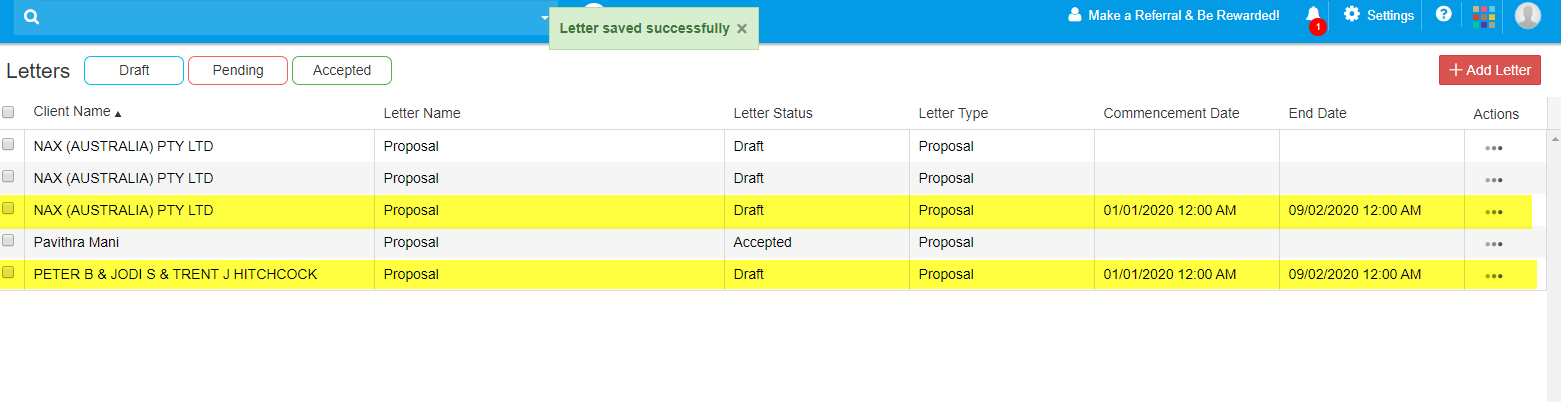
-
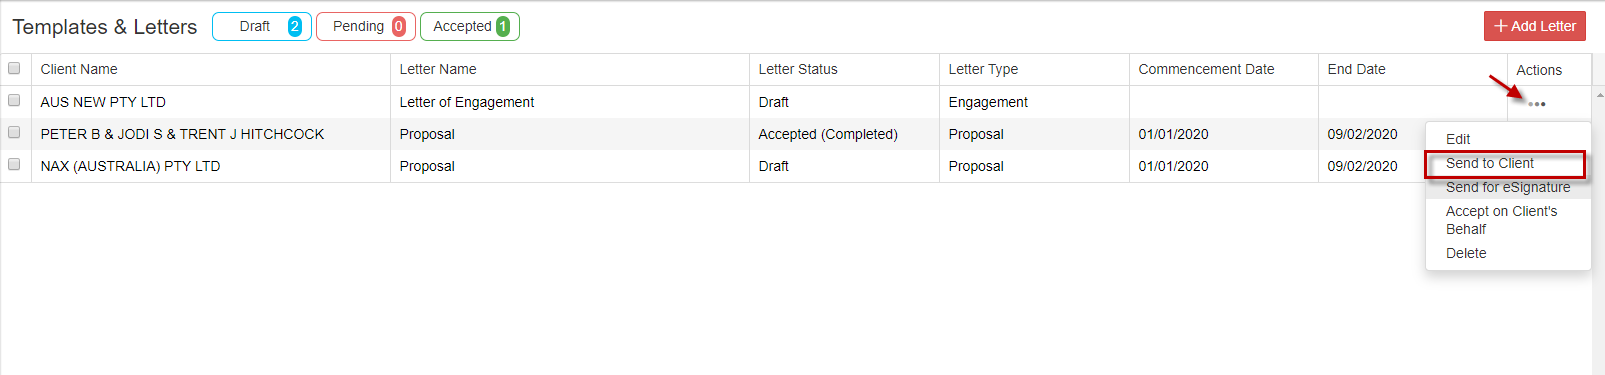
You can choose to send it to your clients, edit, send the letter to client, send for eSignature, accept on client’s behalf or delete under “Actions”
-
If the letter is accepted on behalf of the client, you can enter notes, if you wish and click on “Accept”
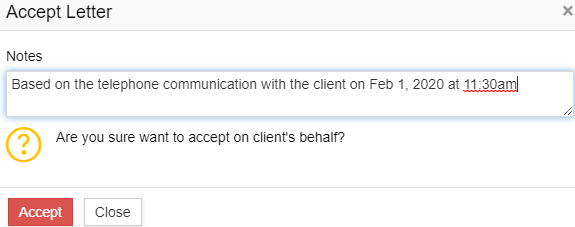
Note:Once the agent accepts on behalf of their client, then the lead client will be changed into active.
-
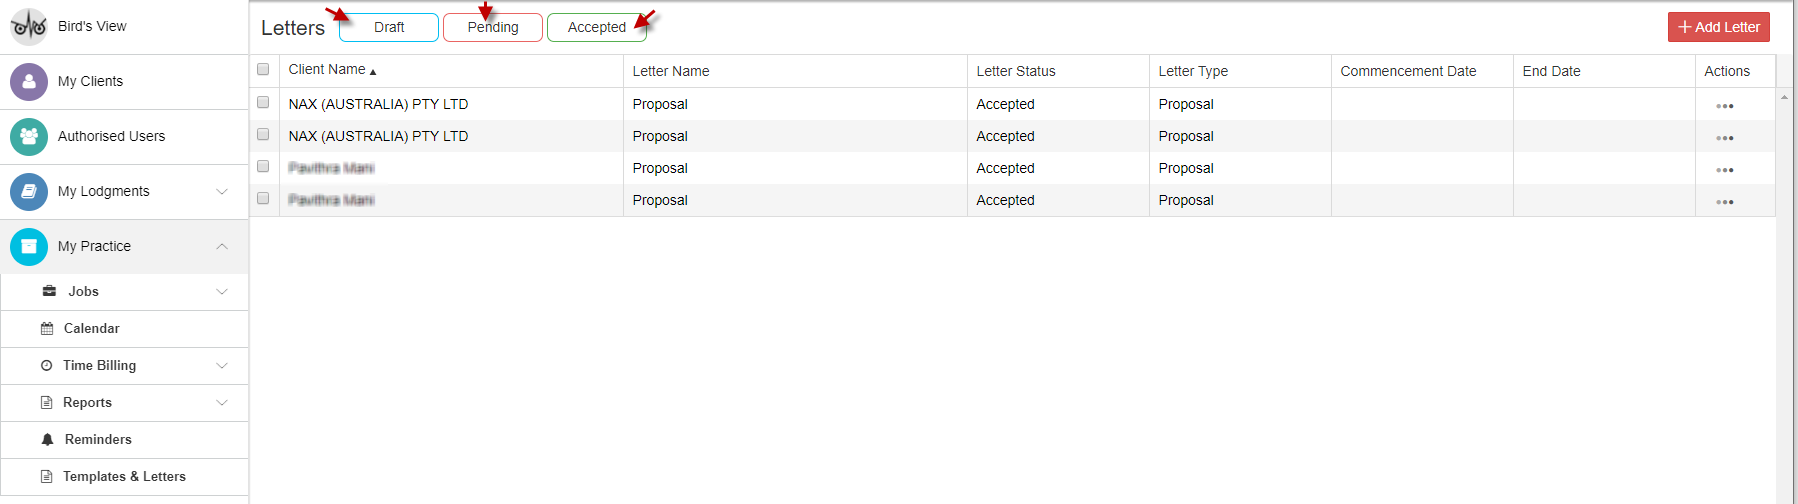
You can just filter the accepted, draft or pending letters by clicking on that particular status on top
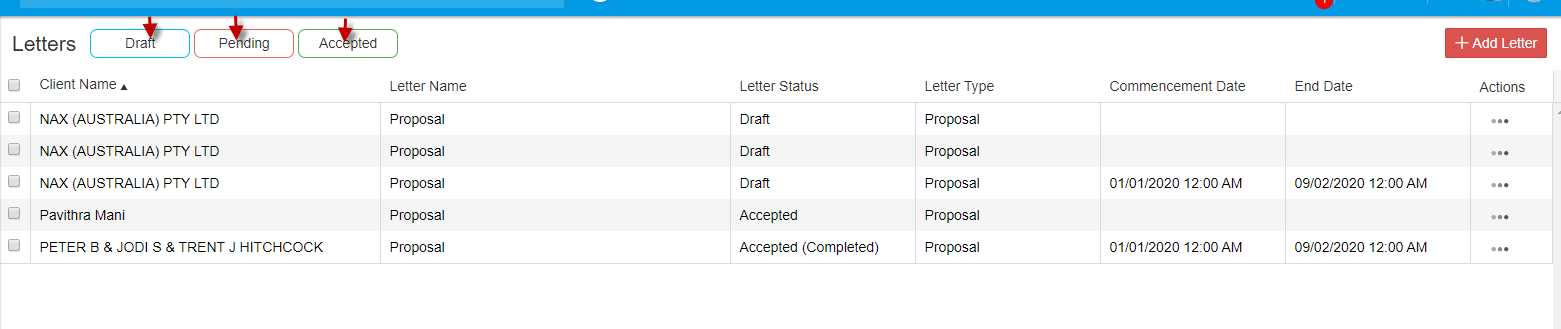
- For example, if you click on “Accepted”, only the letters that have been accepted will appear.

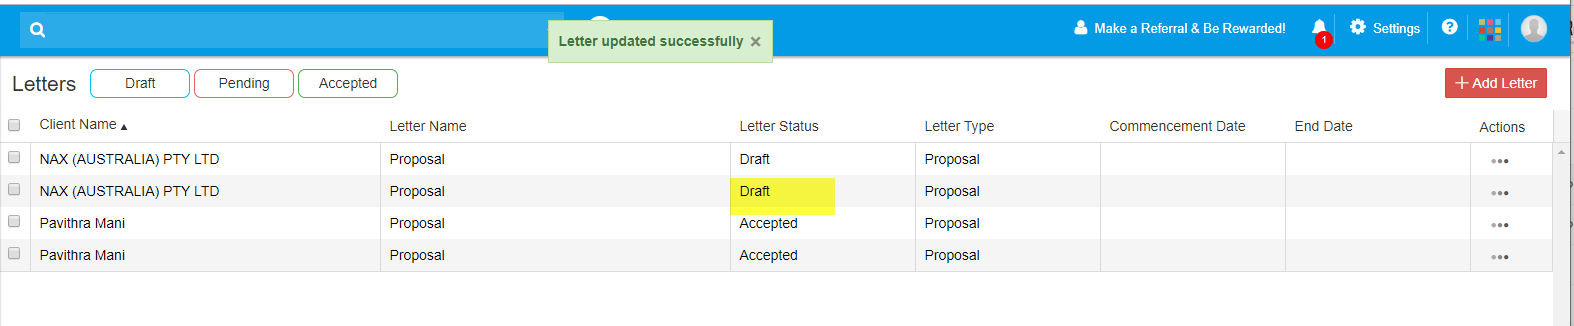
The status of the letter can be Draft, Pending or Accepted
Draft: When the letter has been prepared and was not sent to the client(s)
Pending: When the letter has been prepared, sent to the client and waiting for client’s acceptance
Accepted: When the letter has been accepted by the client
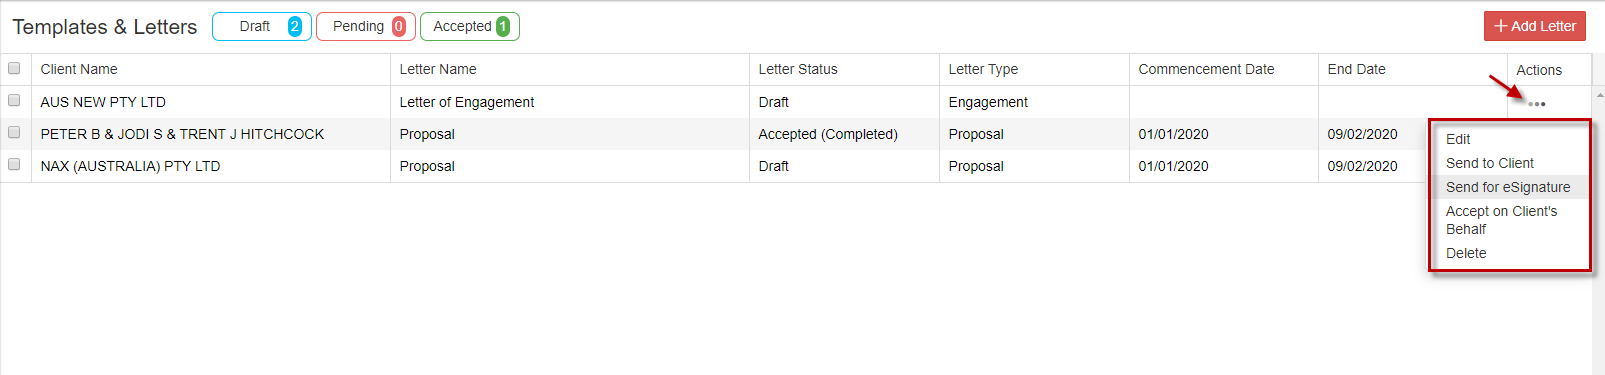
You can see the status of the letter sent to the clients. Click on Actions (3 dots) and you can do the following:
- Edit: To edit the letter.

There are two possible ways, where you can send a letter for authorization to your client.
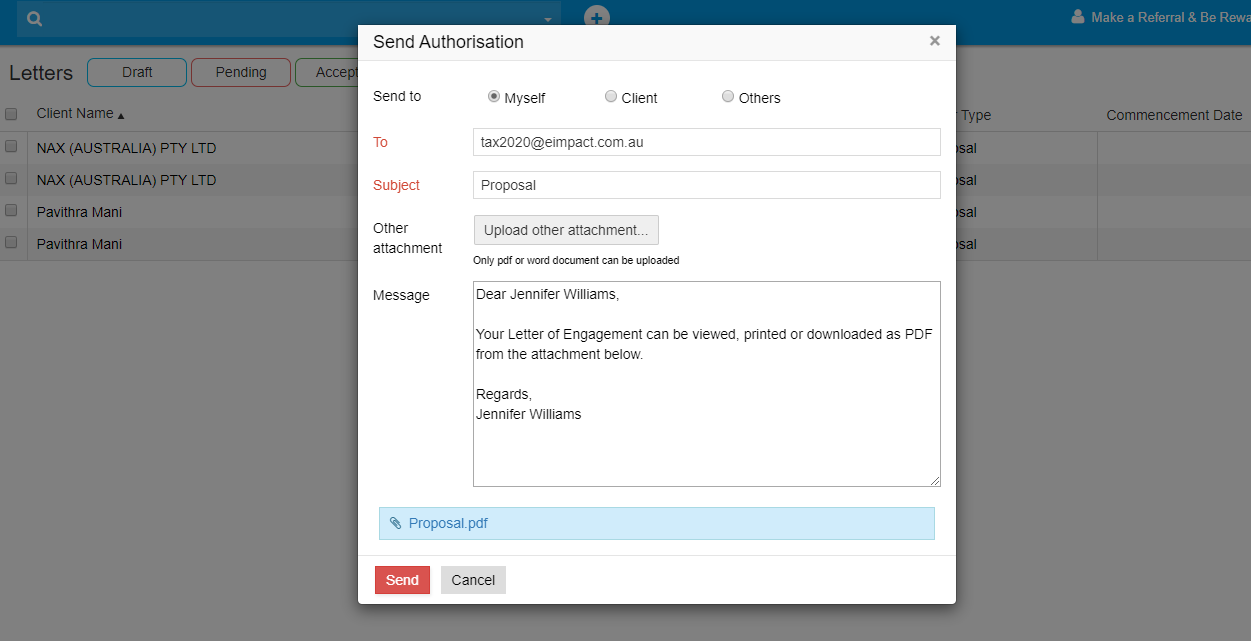
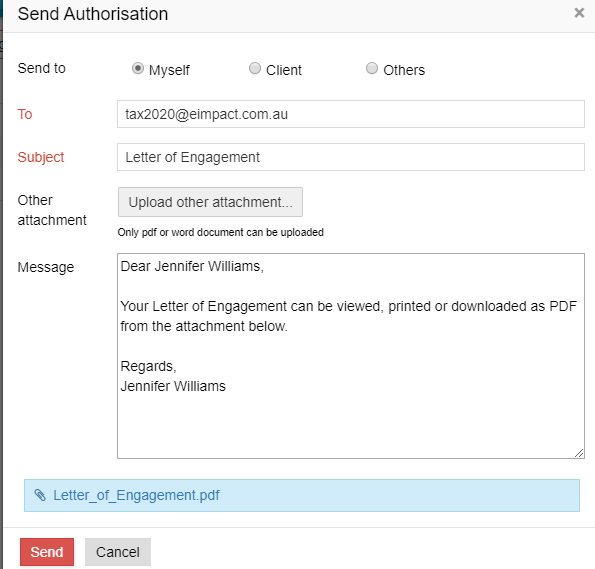
a.Email to Client: To send the letter to the client via Email with the letter in the attachment
The letter will be sent for authorisation to the client after you click on “Send”
 b.Send for e-Signature:
If you click on “Send for e-Signature”, you can send the document to your client via Digital Authentication.
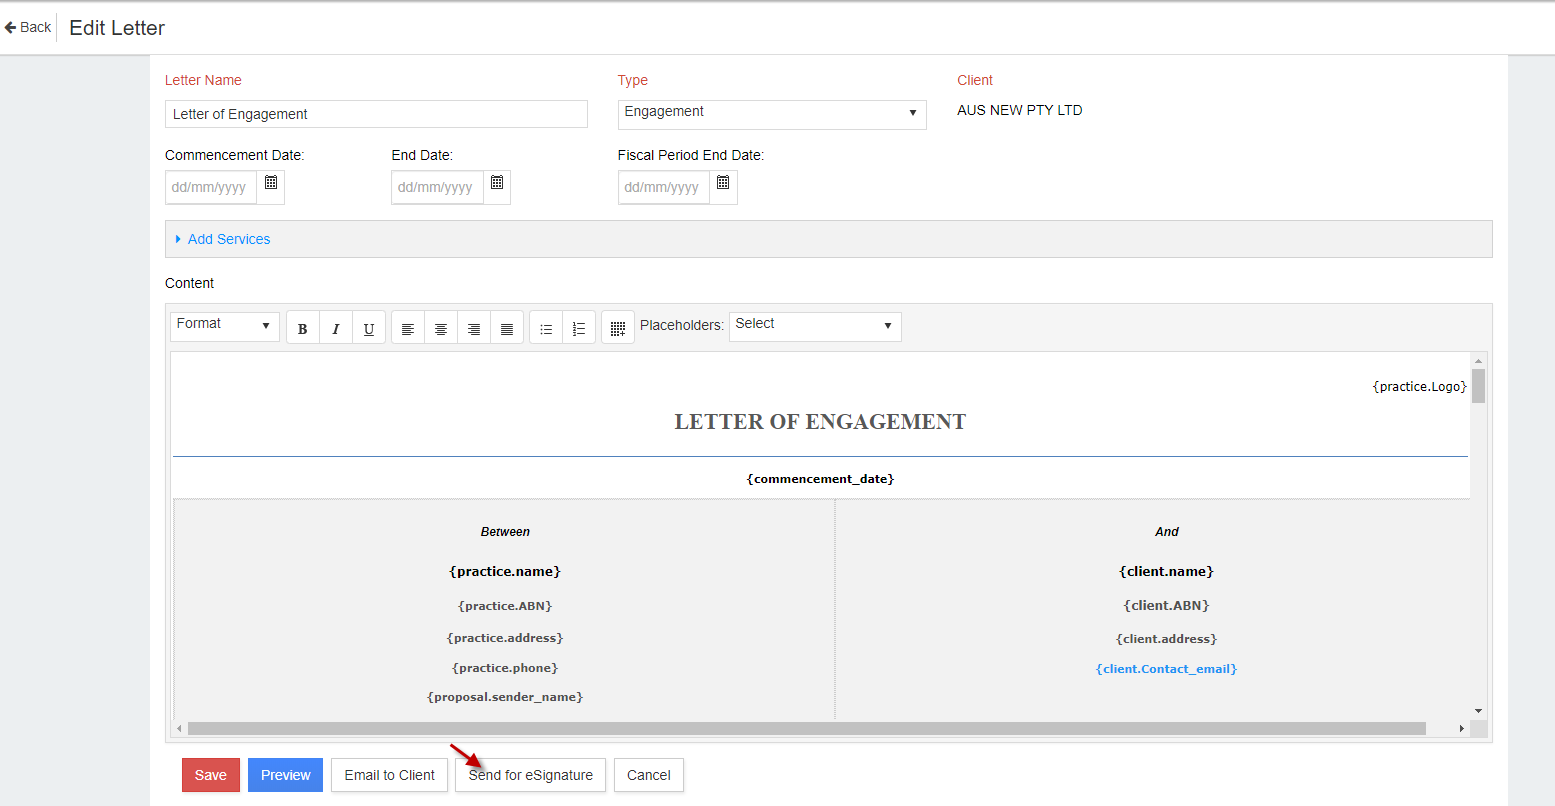
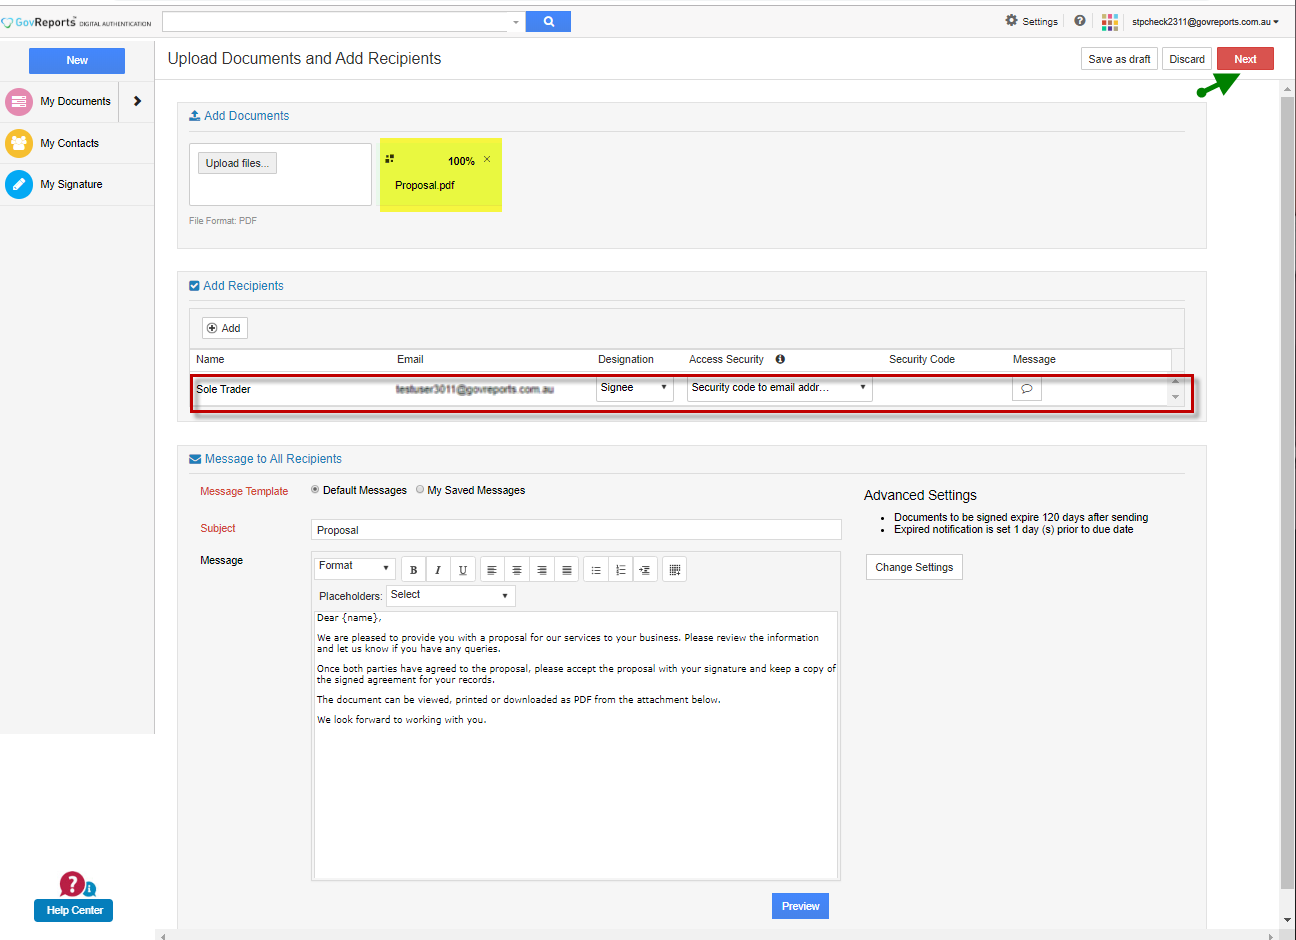
After you click on “Send for e-Signature”, the Digital Authentication screen opens where you can see the letter already attached, your client’s email address already added as recipient’s email address, the letter email contents prefilled. Click on “Next”
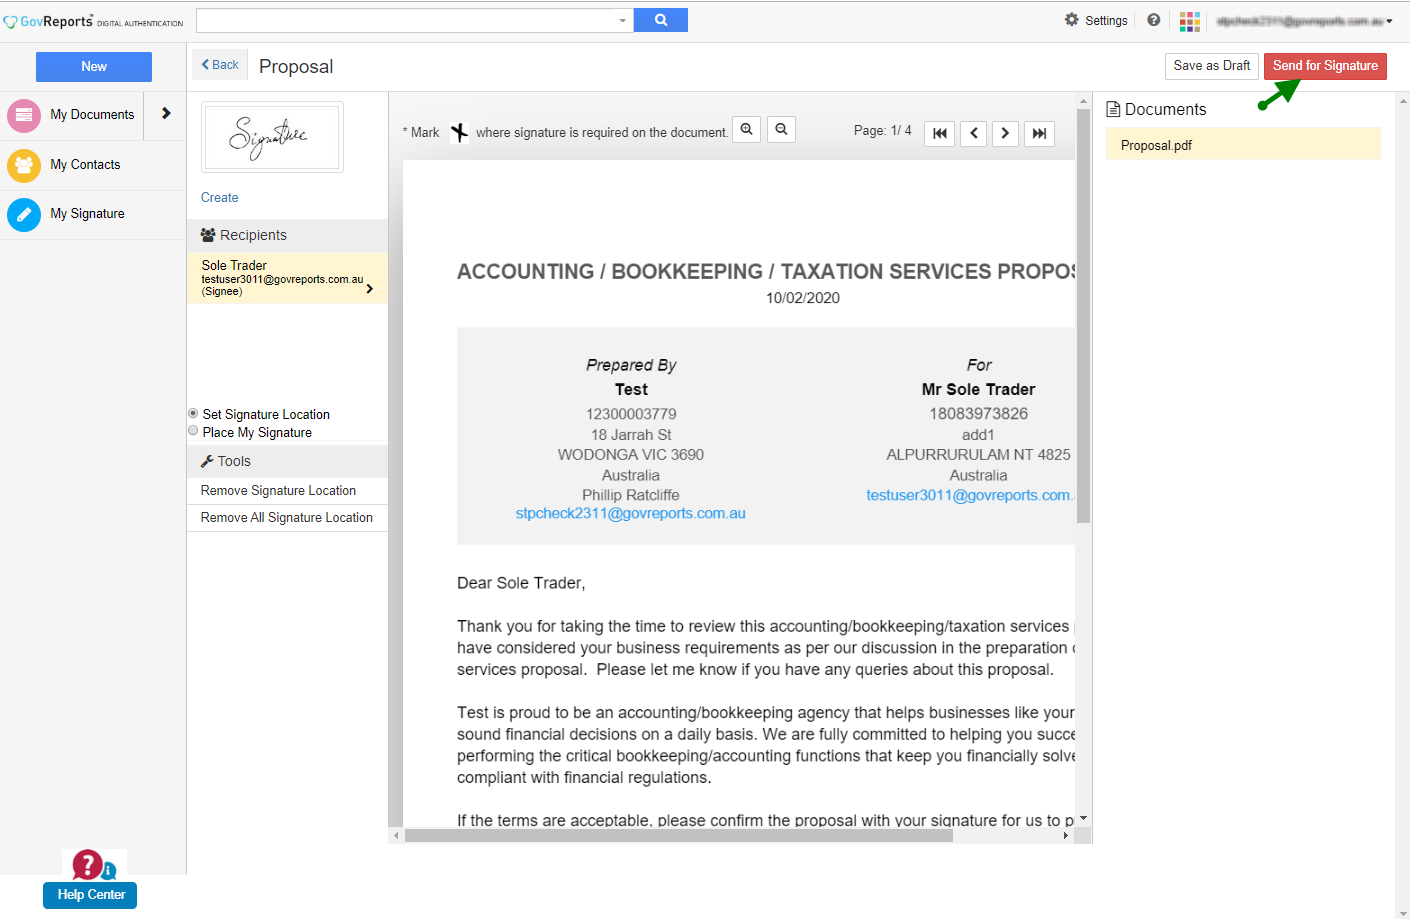
You can set the signature location for the client to sign and place your signature (if required) and click on “Send for signature”
After your client signs it, the status of the letter will automatically change from “Draft” to “Accepted.
Once the document is signed by the client, the status of client will be automatically changed from Lead to Active.
You can also mark the letter as “Accepted on client’s behalf”
-
Move to Draft: To change the status of the letter to Draft.
Irrespective of the status of the letter, the letter changes to “Draft”
-
Send to Client: To send the letter via the client’s email, click on “Send to Client”
Click on “Send”
-
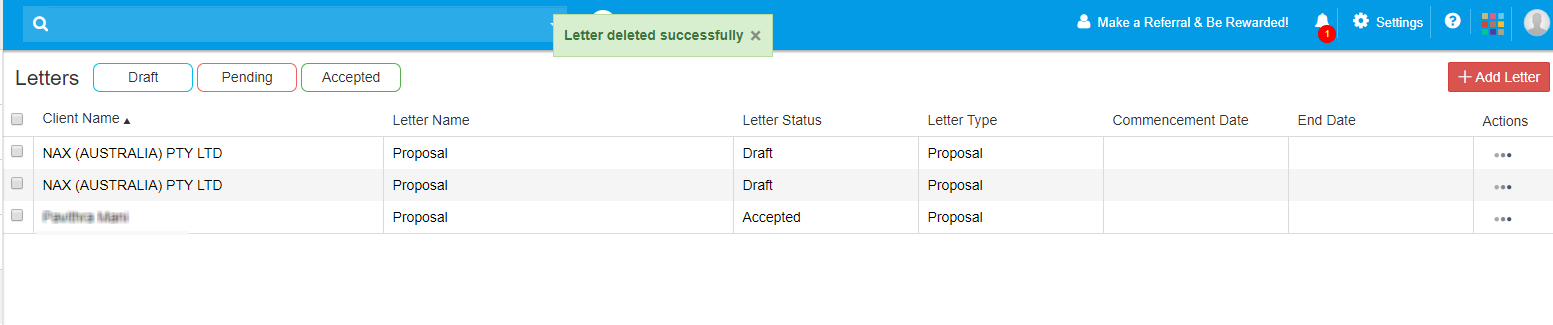
Delete: To delete the letter so that the letter gets deleted from the list irrespective of the status
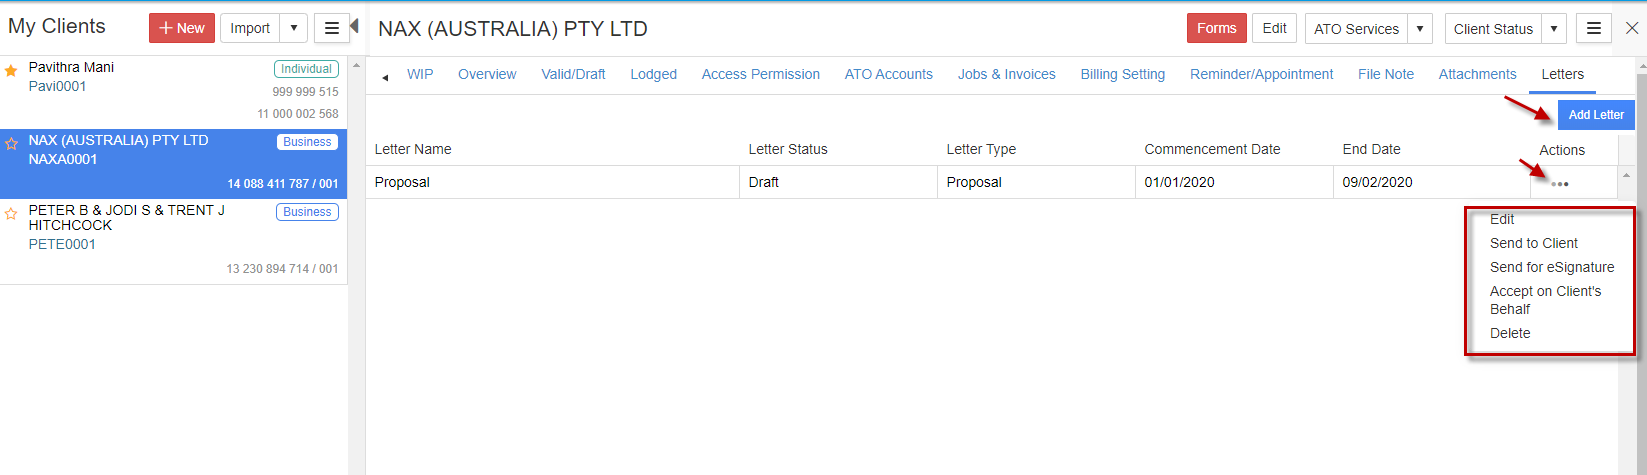
You can also add the letter from your client’s profile. Go to My Clients -> Select a client
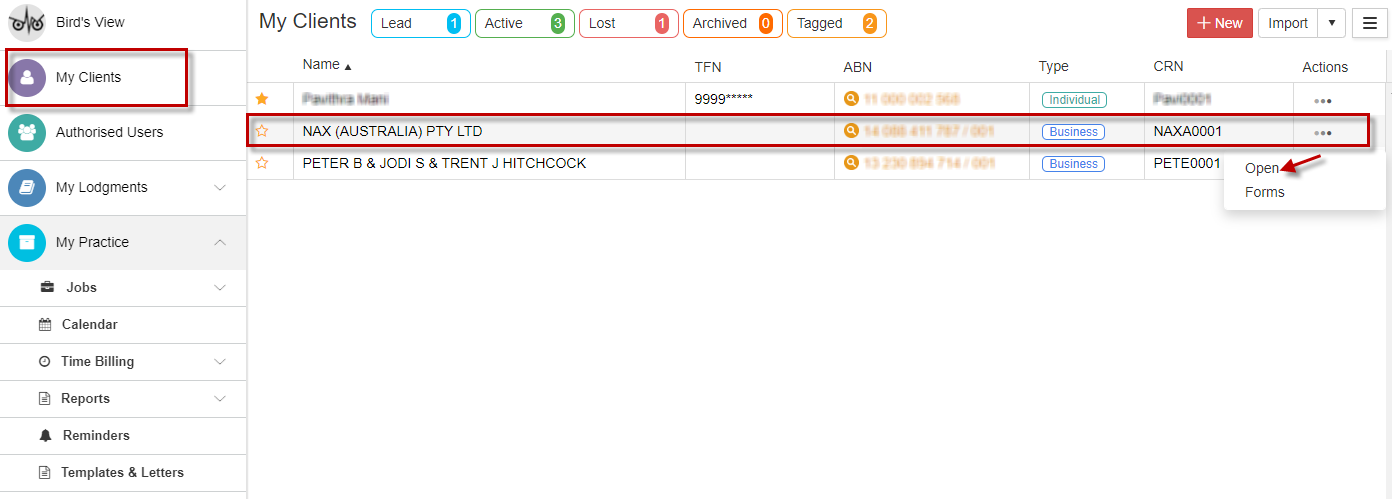
From the client profile, you can select “Letters” option on the right.
You will see the list of letters you have added for this client, if any. You can add a new letter by clicking on “Add Letter”. Under “Actions”, you can edit, send to client, send for eSignature, Accept on Client’s behalf and Delete.
Thus, from the list of templates given, letters can be prepared and sent to the clients or leads.
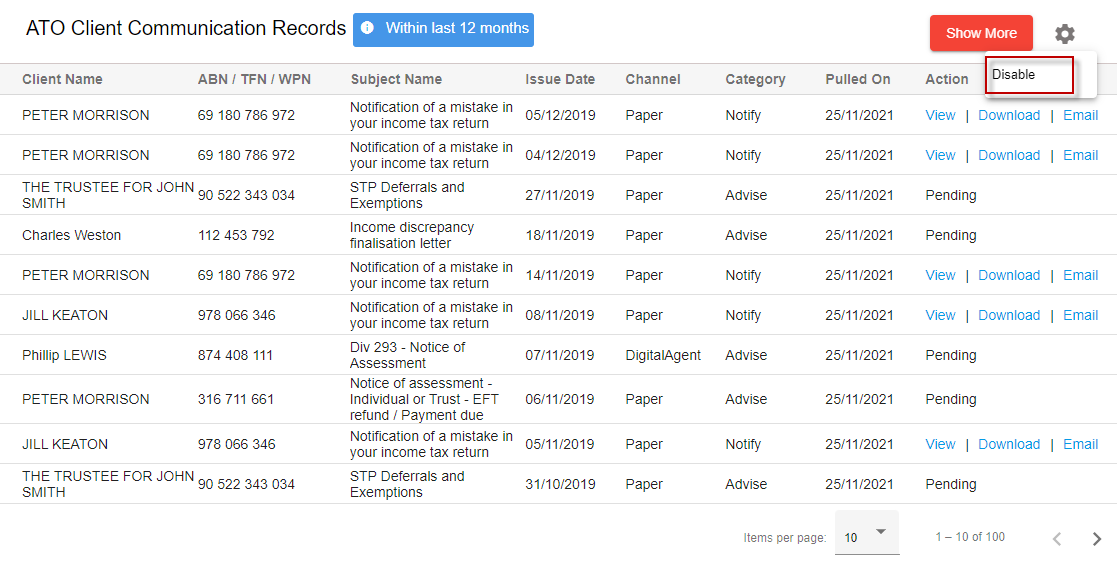
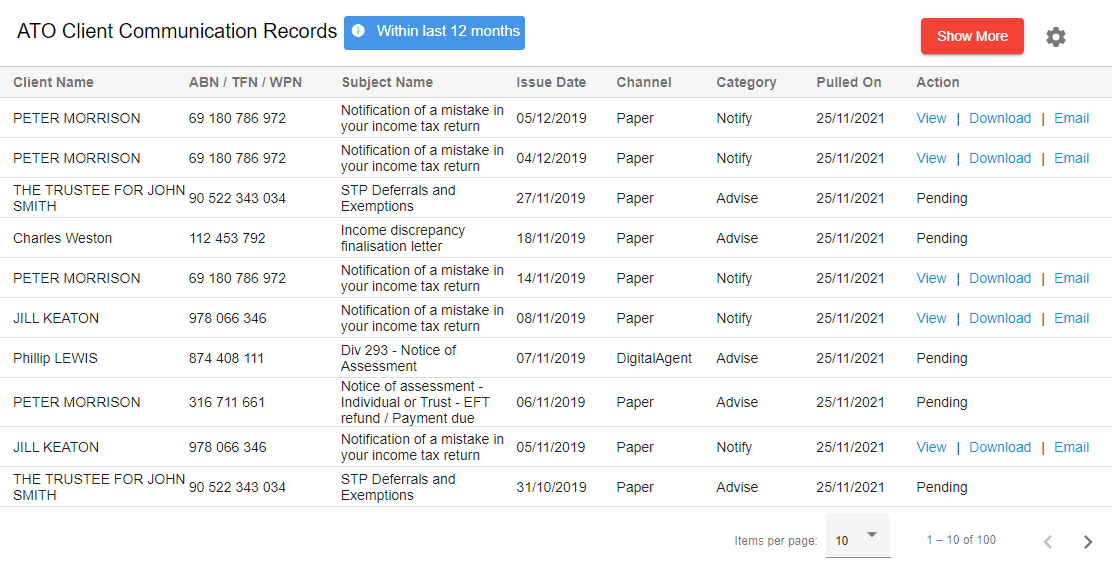
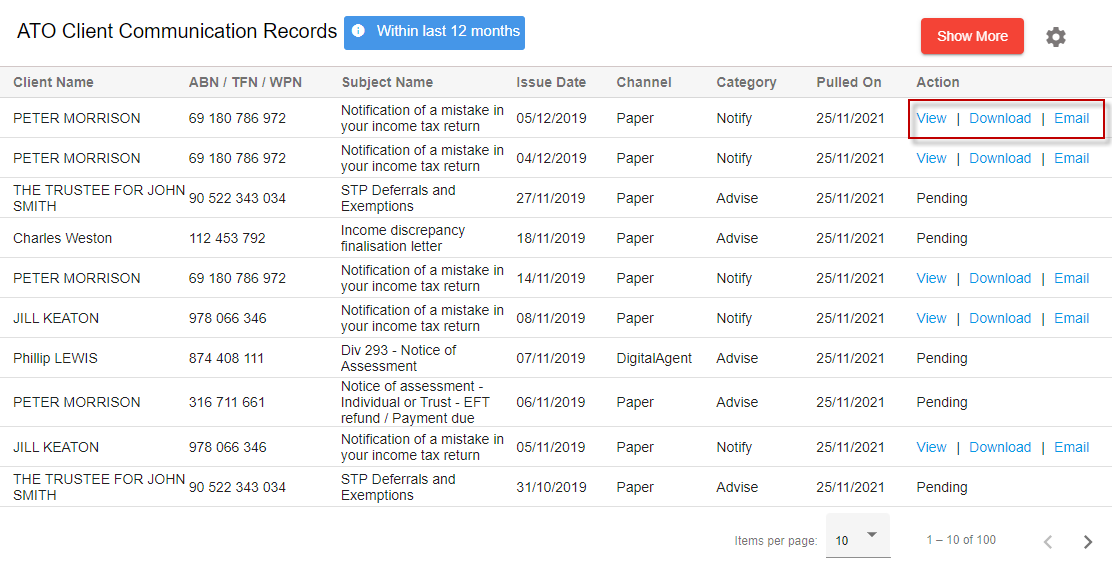
Throughout the year the ATO communicates with your clients via 6 channels – Paper, mygov, SMS, email, ATO Online and Agent Digital.
As you know they may send your client all sorts of communications such as a PAYG Instalment Notice, Notice of Assessment or STP information.
This feature allows you to conveniently request, retrieve, view, download and share ATO Client Communications from within GovReports.
To activate ATO Client Communications
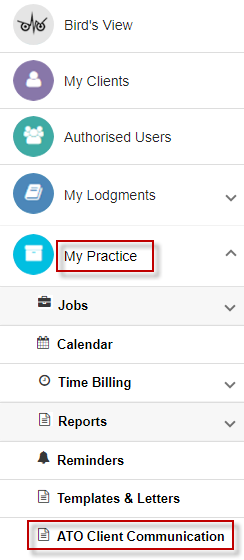
Step 1: Go to
My Practice
Step 2: From the dropdown select
ATO Client Communication
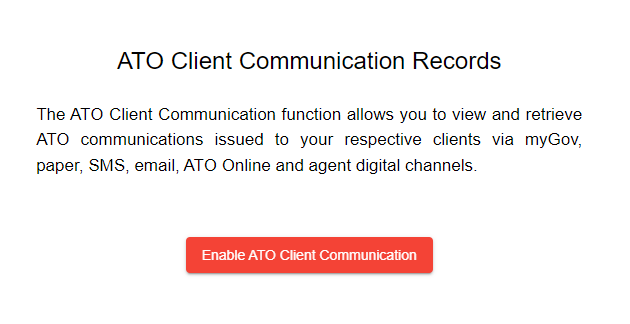 Step 3
: Select Enable
ATO Client Communication to list ATO communication records for respective clients.
Step 4: Select
Submit to enable ATO Client Communication Records

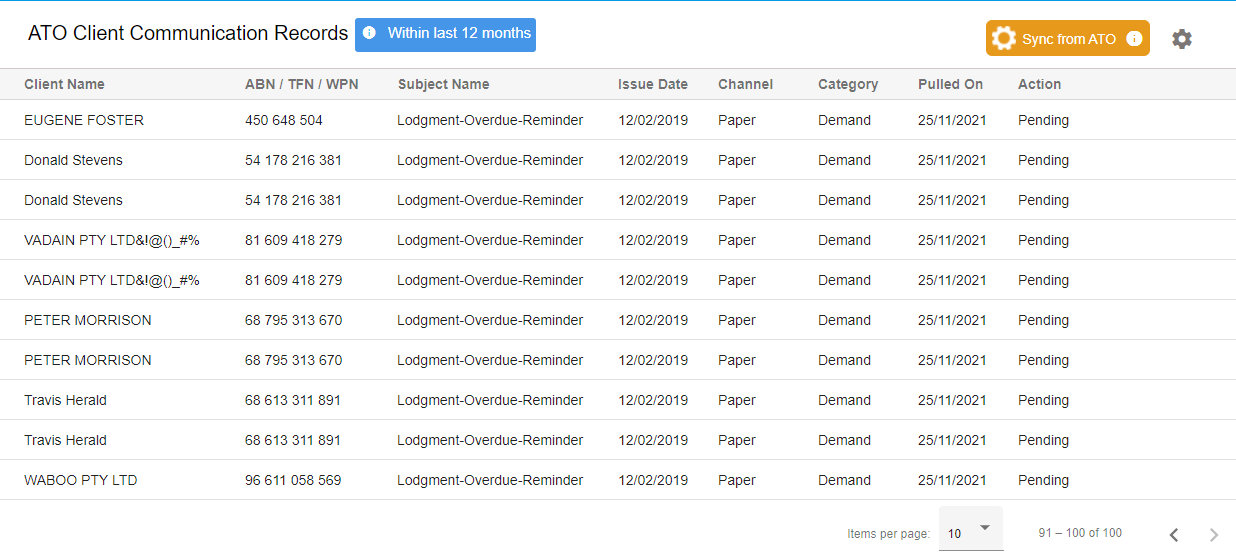
This service is limited to retrieving ATO Client Communication Records for the current financial year. The first 100 records will be retrieved.
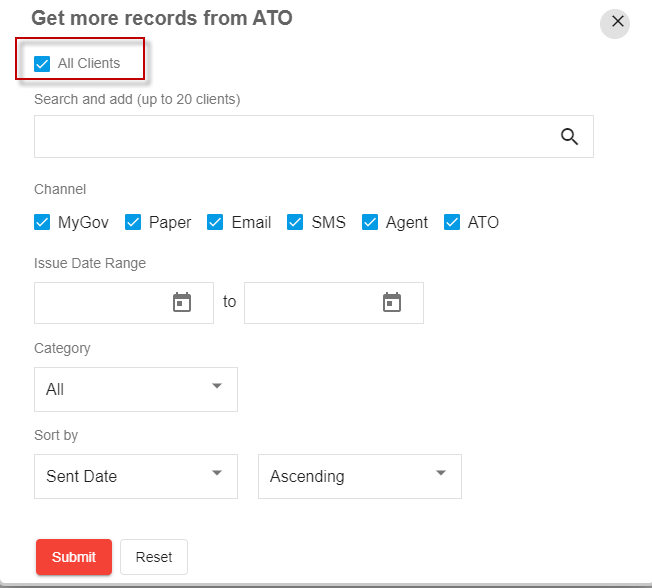
To retrieve older client records from the ATO, select
Show More (Top RHS).
You can search records for either:
- 1. All Clients
- 2. Single or Multiple Clients (Up to 20)
Searching All Clients
-
Selecting All clients will allow you to retrieve records for all clients within your account.
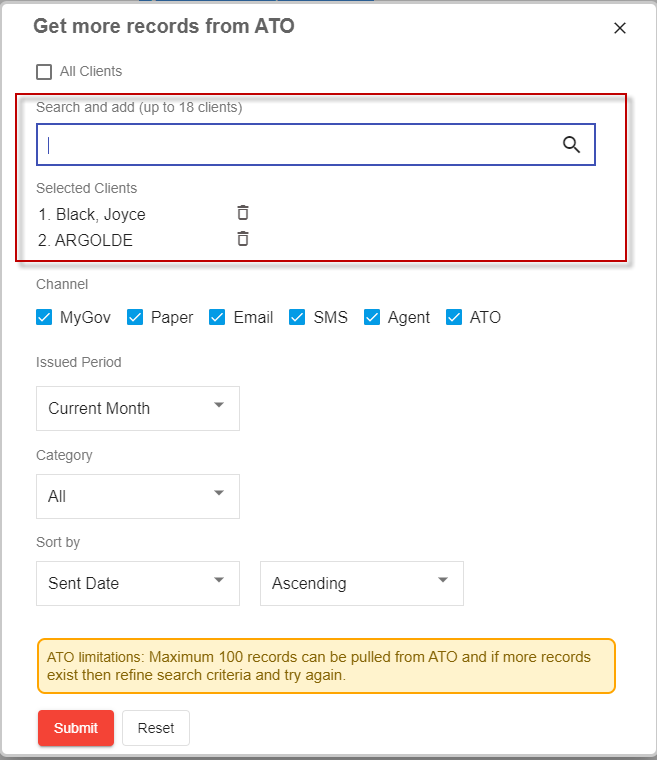
Searching Single or Multiple Clients
You can also search records for
Single or
Multiple clients by
period and/or
category. Based on the search criteria, the ATO retrieves the communications.
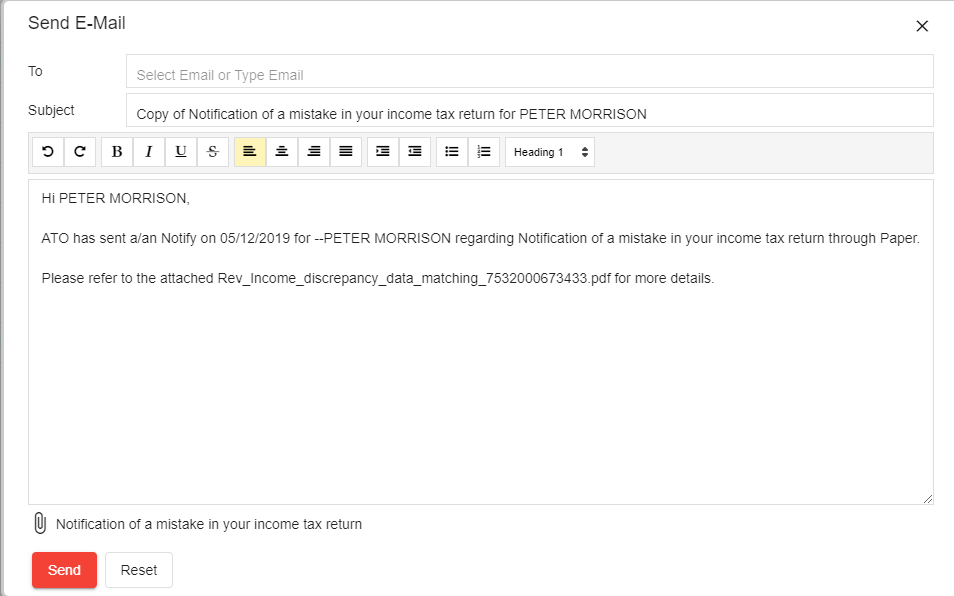
For each client record retrieved you have options to either:
- View
- Download and/or
- Email documents to clients.
 Disabling ATO Client Communications
At any time you can disable this service by selecting
Disable from the
Settings icon.